
When you are looking for an easy, slightly stretchy method to cast on that looks neat and polished, try the cable cast on.

Why Use the Cable Cast On?
This method of casting on is a great one even for a beginner because it creates a sturdy yet elastic edge that has a neat finish. It’s very similar to the knitted cast on, where you are using one strand of yarn to “knit” stitches and slide them onto the left needle. It gives just a bit neater edge but is not any more difficult to master than the knitted cast on.
If you need a truly stretchy edge, such as for socks, this is not the cast on method for your project.
For this method, you do not need waste yarn or a long yarn tail like the long tail cast on.
When Should You Use the Cable Cast On?
This edging is extremely useful for ribbing edges, as it will stretch slightly without stretching out of shape. It does not flare and gives the first row or round good stability.
Use this cast on edge for any area that is ribbed – a bottom-up hat, for example, or the hem and sleeves of a sweater. I usually will not use this cast on for sock knitting, as that requires a bit more stretch than this knitting technique allows. So, even if it may be a ribbed cuff and I’m working cuff-down, I don’t use the cable cast on method for socks – I’ve found that it doesn’t give the stretch required.
Cable Cast On Video Tutorial
Cable Cast On Photo Tutorial and Written Instructions
Step One: Begin with a slip knot on your needle.
Step Two: Work the knitted cast on for one stitch. Insert right hand needle into stitch as if to knit, pull up a loop from the working yarn, loosen it and transfer it to the left hand needle.

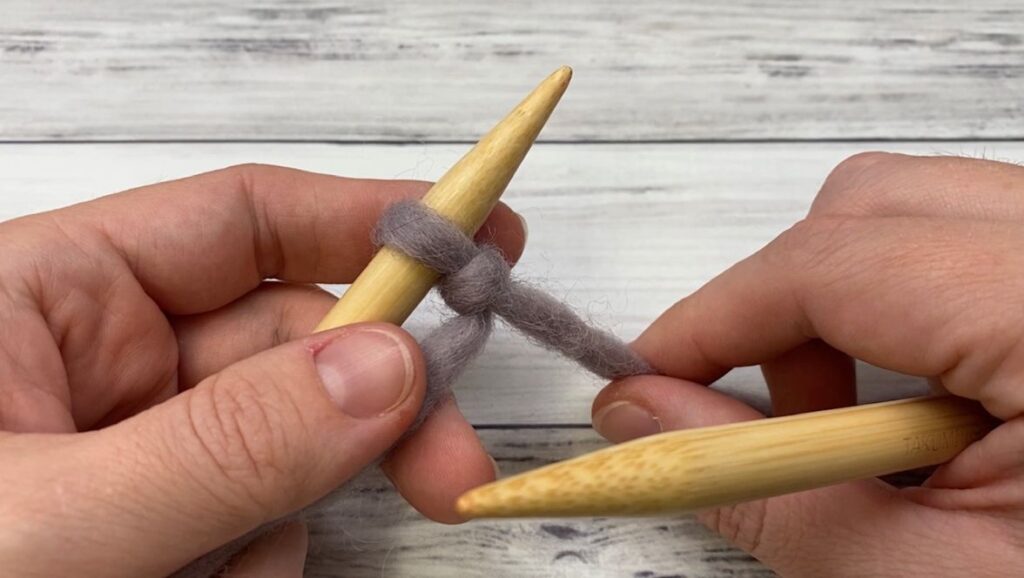
Step Three: Insert the right needle between the two stitches on the left needle.
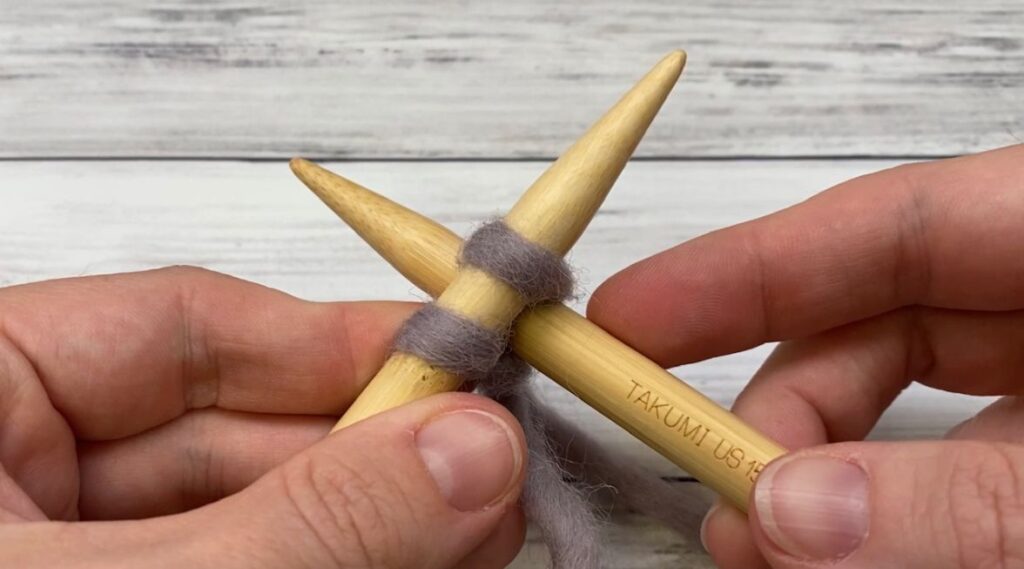
Step Four: Wrap yarn around the right needle as if to knit (either Continental or English) and pull the yarn through to make a new loop.
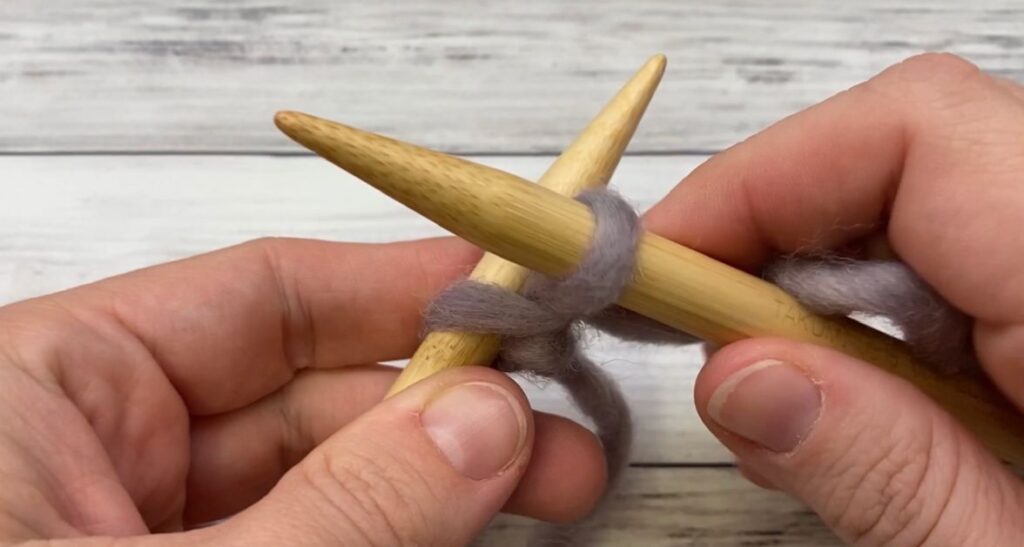
Step Five: Transfer the new stitch onto the left needle.
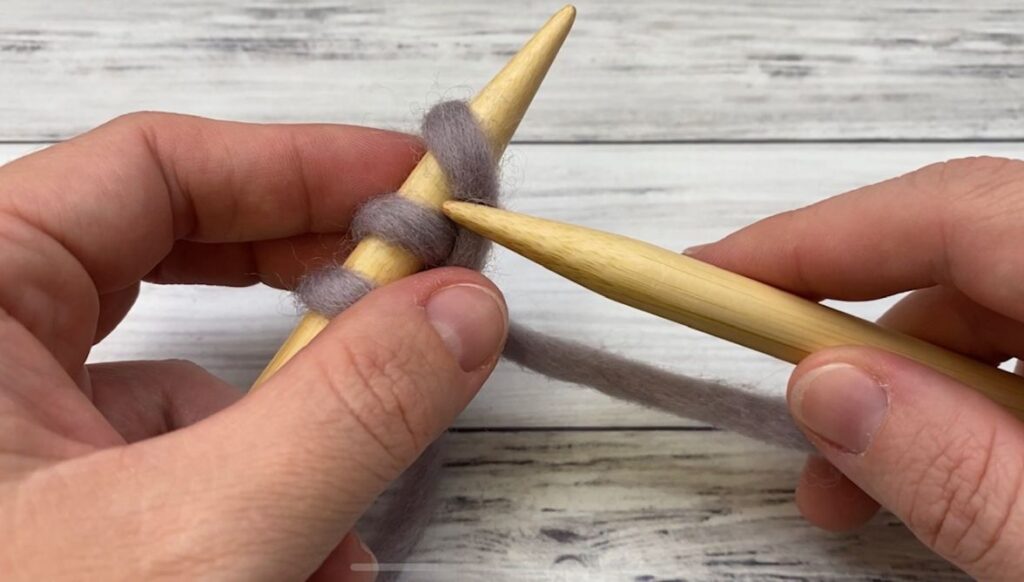
Repeat steps 3-5 for each stitch, always making sure to insert the needle between the previous stitch and the one before it to work this cast on method.
Cable Cast On for Buttonhole (or in Middle of a Row)
This method of casting on is wonderful for buttonholes because it gives a nice clean edge that will not stretch out of shape.
To work the cable cast on for a buttonhole, you would work to the last stitch before the bind off, then work the instructions given above, starting by inserting your needle into the middle of the last two stitches on the left hand needle.
Then, cast on as many stitches as needed and continue working across the live stitches from the previous row or round.
Cable Cast On in the Round
It’s also easy to use this method of casting on when working in the round. There is no different technique for working the cable cast on in the round, just cast on the way you would on straight needles and use a joining method to join your work.
You can use this method with double pointed needles or a circular needle.
Tips for a Perfect Cast On
When working the cable cast on, the first thing I can recommend is not to pull your yarn too tight. If you pull each stitch really tight you won’t be able to get your knitting needle in between the stitches to work the cast on stitch.
Instead, after you transfer the stitch to the left needle, just give it a little tug, just enough to make it the size of a normal stitch (mine get pretty loose when I’m moving them between needles) but not so tight that you’re finding the next stitch difficult.
The only other common problem I’ve seen with this cast on method is splitting the yarn. If you have a yarn that is prone to splitting, be very careful when you insert your needle between two stitches because you might catch some of the existing stitches, and that won’t give a very pretty edge.
Just be careful to go in between the last two newly cast-on stitches. If you’re finding this hard to do, then your work is too tight and you need to loosen up on it. Check out the video tutorial above and pay close attention to my tension.
Final Thoughts on the Cable Cast On
I hope you will try this technique for your next knitting project! It creates a beautiful edge that looks professional when you need a stable edge for neck edges, shawl edges or any place where you don’t need a lot of elasticity.
Happy Knitting!
Amanda