
The crochet slip stitch is an indispensable crochet technique. Learn everything you need to know here.

A slip stitch is an absolute must-know, as you will see this stitch used in almost every crochet pattern in some way or another.
Anatomy of a Slip Stitch
The slip stitch is the shortest basic crochet stitch. This stitch sits right next to the stitch it is made into, with really no height at all.
Crochet Symbol
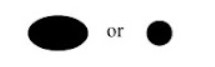
The symbol for a slip stitch in a crochet chart or crochet diagram is a solid circle or oval.
Abbreviation
You will find the abbreviation for slip stitch is usually sl st in most patterns. In UK terms it can be abbreviated ss.
Before we begin… let’s get Social!
I would love for you to come follow me on
Instagram (get sneak peeks of what’s coming up!)
My Facebook Page (come join the fun!)
Follow me on Pinterest (I pin tons of free patterns to my boards!)
Join my Facebook group (lots of awesome crochet talk there)
Also, you can find me on Ravelry or join my subscribers on YouTube.
What is the Slip Stitch Used For?
The slip stitch is a wonderfully versatile stitch to have in your crochet arsenal. It is widely used for joining chains and rounds and it does not count as a stitch when you do so.
It is also a wonderful way to finish the edge of a crochet project. A slip stitch edging gives a project a neat finish.
Slip stitches are also used for areas where you want to decrease several stitches at the beginning of a row. When you slip stitch over those stitches you want to miss, you don’t give them any height so you can easily make a boxy decrease this way. One place I love to use this technique is when you decrease for armholes in a sweater.
Using the crochet slip stitch is one way to seam two crocheted pieces together. You hold the right sides together like if you were sewing a garment, then work the slip stitch through the edges of the two fabrics.
Although not very common, you can make an entire crocheted fabric out of slipped stitches!
All About the Crochet Slip Stitch Video Tutorial
In this step by step tutorial video, we will walk through all of the different ways the slip stitch is used.
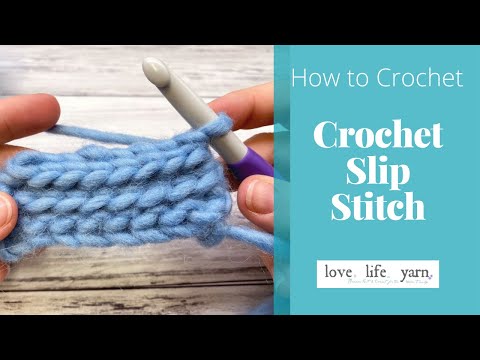
Slip Stitch Tutorial (How to Slip Stitch)
What You’ll Need
Yarn of your choice in any weight (yarn pictured is Tuff Puff from We Crochet and is a #6 super bulky yarn).
Crochet hook in appropriate size to match yarn. I used a 10.00mm Clover Amour hook
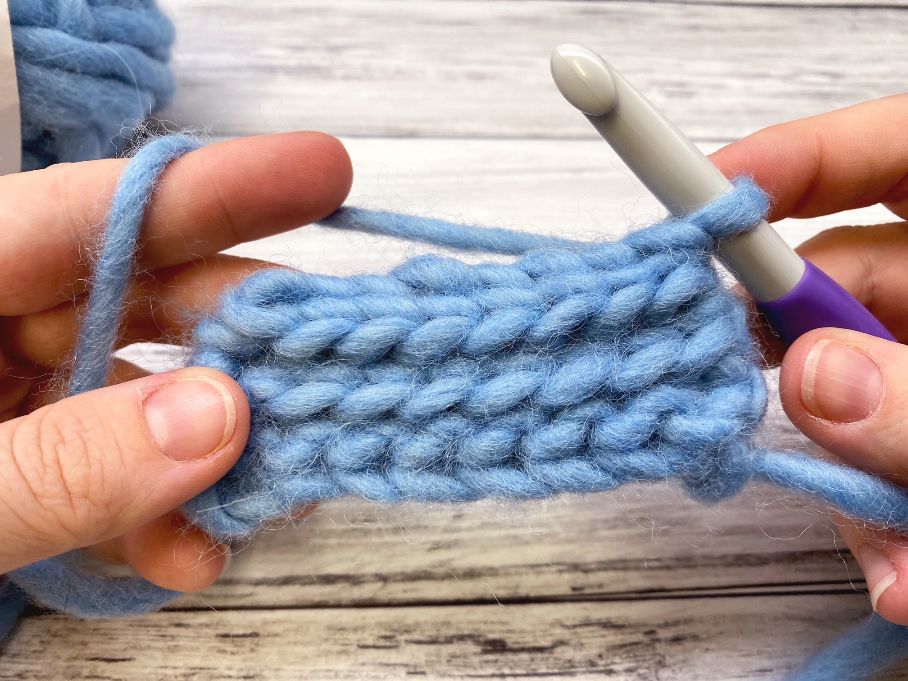
Step One: Insert hook into stitch or space indicated.
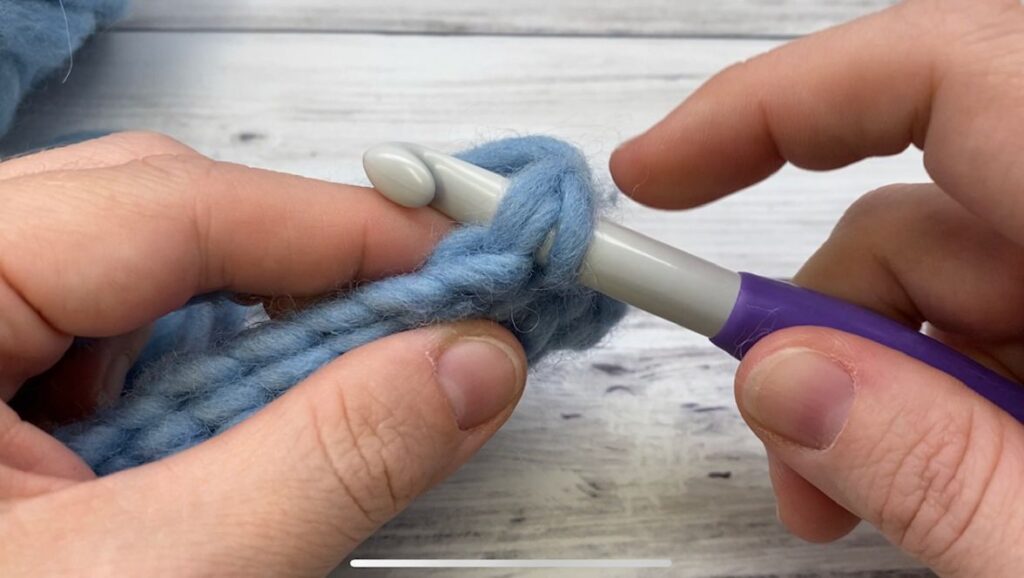
Step Two: Yarn over.

Step Three: Draw up a loop
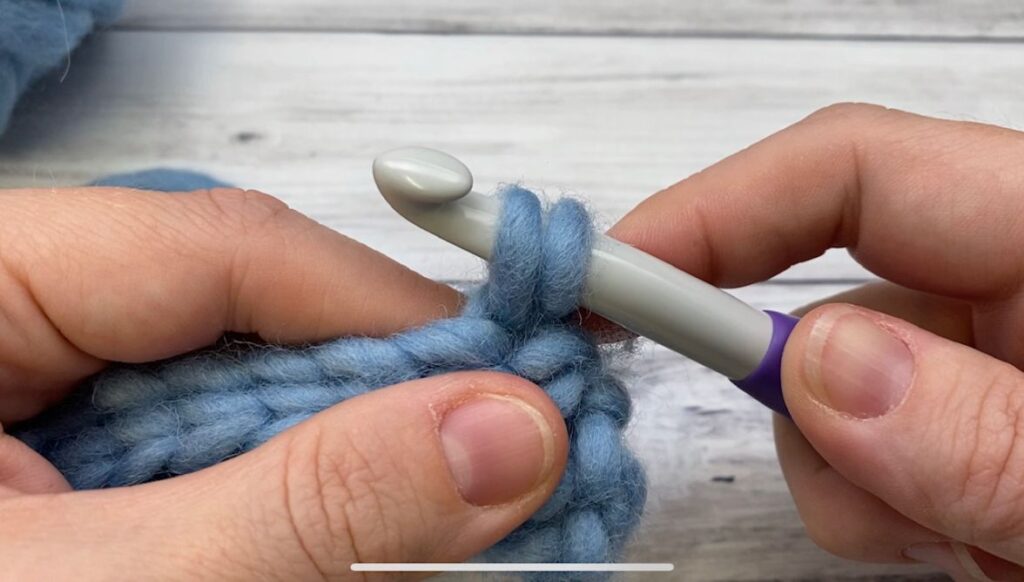
Step Four: Draw loop through loop on hook

Steps three and four are usually done as one motion, so practice pulling up a loop and drawing through the loop on your hook at the same time.
Repeat steps 1-4 as many times as needed. A slip stitch edging makes for a beautiful, simple edging for any project.
Crochet Slip Stitch to Join Round
When working in the round (like a granny square) you will often need to join your current round before moving on to the next. To do this, you will follow the instructions above for a basic slip stitch, but you will complete this stitch in either the turning chain of the beginning of the round or the first stitch of the round.
Then, you are ready to move on to the next round.
Slip Stitch as Decrease
When working something like armhole shaping for sweaters, the slip stitch is an excellent way to decrease multiple stitches at once.
To do this, simply follow the instructions above to slip stitch in the required number of stitches (usually 2-6 for an armhole) and then begin like you were working a regular row with a starting chain.
Slip Stitch Seam
The slip stitch is a wonderful seaming method if you don’t like to sew with a yarn needle.
Step One: Holding fabric with right sides together, insert hook through both layers.
Step Two: Yarn over and pull loop through.
Step Three: Pull new loop through loop on hook.
Repeat steps one through three until you reach the end of your seam.
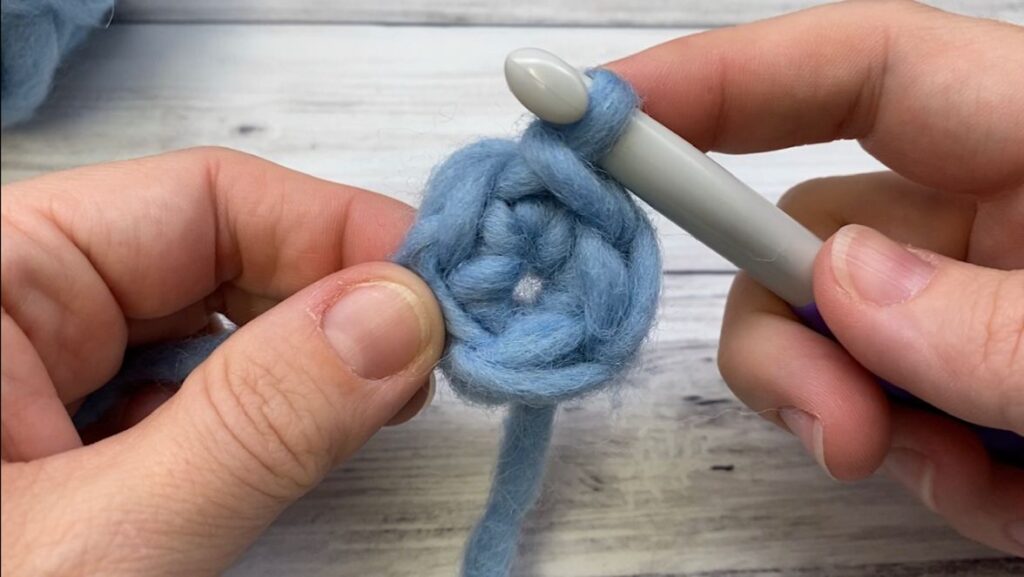
Surface Slip Stitch
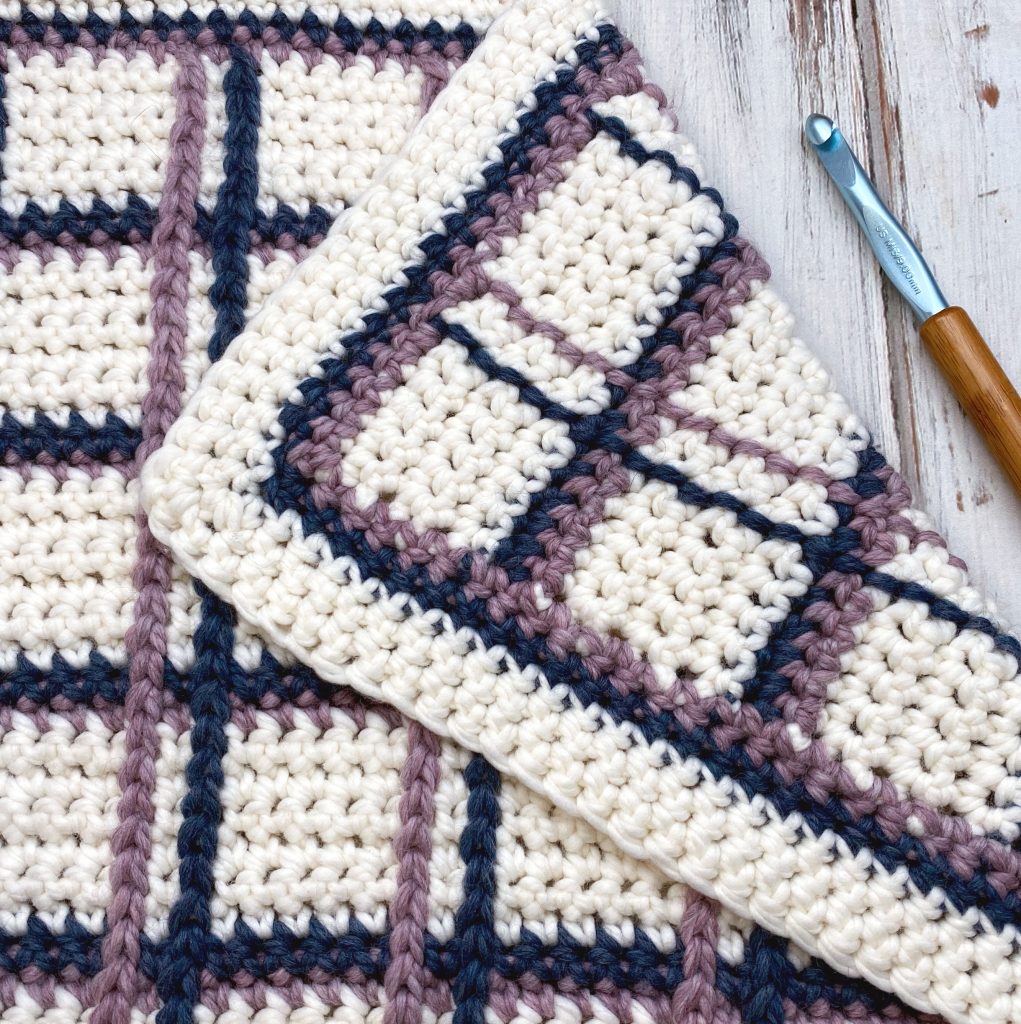
This is one of my favorite slip stitch techniques, and I’ve used it in several projects on the blog, including the use of it for crochet tartan plaid as seen here:
Here’s how to work the surface slip stitch (also called surface crochet or surface stitches):
Step One: Insert hook into fabric from front to back and pull up a loop from the working yarn.
You may choose to make a slip knot in the yarn before you insert your hook and then slip the slip knot onto the hook. I prefer not to have a knot in my fabric and leave a long yarn tail, such as when joining a new color at the beginning of a row.
Step Two: Insert hook into next stitch, space or row you would like, yarn over and pull up a loop.
Repeat step two for as many stitches as needed.
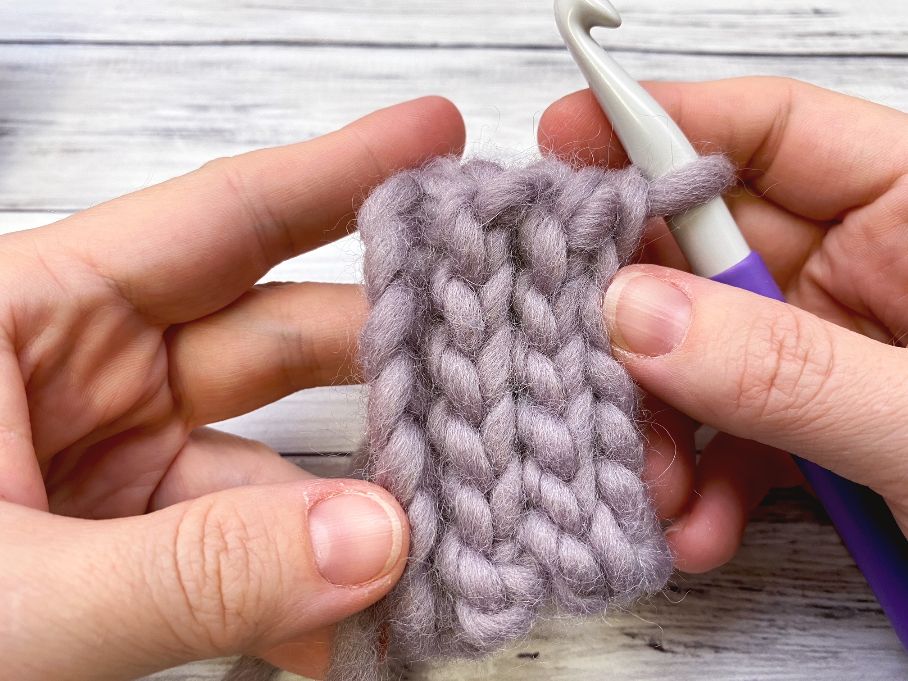
Slip Stitch Crochet Fabric Techniques
There are many different ways to create fabric with just a simple slip stitch. One of these methods is Bosnian Crochet, where you use slip stitching and colorwork to create warm garments.
For each of these methods, you work an entire row of slip stitches – for every row. The entire fabric is made completely with slip stitches.
Fabric made with all slip stitches
This is a dense fabric good for things like kitchen scrubbies.
Slip stitch through the front loop only
Working in just the front loop makes a much thinner fabric. You might see this variation used in hat or beanie patterns.
Slip stitch through the back loop only
This variation on the slip stitch can be used as ribbing as it mimics the look of knit.
Tips and Tricks for Perfect Slip Stitches
Slip stitch crochet is a great way to create a sturdy fabric with minimal effort. It is important to keep your tension loose when slip stitching, as it is a tight stitch.
To ensure that you can easily insert your hook into the stitches, use a bigger hook than what is recommended for your yarn. For example, if you are making a hat or garment, use a hook that is almost double the recommended size for your yarn. This will help keep the stitches loose and prevent the edges from rolling up.
When crocheting homeware pieces that require a more sturdy fabric, choose a hook 1 or 2 sizes larger than what is recommended for the yarn. This will give you tighter stitches and create an even stronger fabric.
Also, be sure to count your stitches regularly so that you don’t miss any and end up with an uneven piece of work. Sometimes it helps to put a stitch marker in the first and last stitch of your rows to ensure you don’t miss them – and you won’t have to count every.single.row. (Because who wants to do that??)
With these tips in mind, you should have no problem achieving success with slip stitch crochet!
Common Questions about the Crochet Slip Stitch
When you work a slip sttich in crochet, you are simply drawing up a loop and pulling that loop through the one on your hook. It does not add height to the project and does not count as a stitch.
Insert your hook into the stitch or space indicated, yarn over and draw up a loop, then draw that loop through the original loop on your hook. With practice, you can draw up a loop and draw it through the loop on you hook in one motion.
No! Single crochet adds height to the project and does more than just draw a loop through an existing loop.
There are two terms that are the same in both US and UK terms, and that is chain stitch and slip stitch, so you would work a slip stitch in UK terms the same as a pattern in US terms.
No, a slip stitch does not count as a stitch in most every situation. Of course, if you are working exclusively in slip stitch for a pattern that would be different.
This is a stitch that is very similar to a regular slip stitch, except that you yarn over before you insert your hook, and then draw the new loop through the two loops on your hook.
In brief, here’s how to do a slip stitch in crochet: Insert the hook into the next stitch, yarn over, and pull through the stitch Yes, that’s all there is to it!
The slip stitch is a basic crochet technique that’s great for beginners to learn. It is one of the six basic crochet stitches.
It is a simple stitch that you’ll use in almost every pattern, from crochet beanies to baby booties.
In crochet charts, you will see the slip stitch represented by a filled dot, or “•”. In some charts it is a filled oval.
Ultimate Guide to the Crochet Slip Stitch

Learn the most basic of crochet stitches - the slip stitch in this quick and easy tutorial.
Materials
- Yarn of your choice
Tools
- Crochet hook appropriate for yarn choice
Instructions
- Insert hook into stitch or space indicated.

- Yarn over.

- Draw up a loop.

- Draw loop through loop on hook.


Final Thoughts on the Crochet Slip Stitch
I hope you’ve enjoyed this easy tutorial for the crochet slip stitch – and that you are as amazed as I am by all the different things it can do!
The slip stitch is really the powerhouse in crochet as it has more jobs than any other stitch.
Happy Crocheting!
Amanda