My oldest son recently asked me to make him a new hat. He is going to be 7 in less than two weeks (I can’t believe it!) and the hat I made for him a few years ago has gotten really tight. I asked him what he wanted it to look like and he was very specific – it was going to be white with a black pom-pom. “Okaaaaay,” I said, “Are you sure you want two different colors?” He was insistent, then he drew me this adorable picture of what he wanted:
He designed his own snowman hat!! It was too cute, so I knew I had to get to work on it as soon as time allowed. I love making hats because there are so many options and they are not a long project. While I do regularly design sweaters, I love quick projects. I used to have trouble finishing my projects and it drove my husband crazy. I’m a very creative person but I have to reign it in because I will get an idea I like better and move on to that, leaving whatever I am working on in whatever state it happens to be in. When Brian and I met, I was a fashion design major in college and my apartment was littered with half-finished projects! He said he was a little worried that I would get tired of him and move on!! Haha, well it’s been over 13 years and we are still in love as ever, so he didn’t have anything to be worried about. When I look back at what I could have accomplished in college if I would have stuck to finishing projects, I kick myself. But oh, well, you do what you can in the now! So now I like to have a small project and a large project going on at all times. Sometimes more than that – but most of them get finished now. 😉
To purchase a large print, ad-free pdf of this pattern click HERE
Christian’s Snowman Hat
What You’ll Need
Yarn: Premier Yarns Deborah Norville Serenity Chunky (acrylic; 3.5oz/100g = 109yd/100m) Pristine, 1 skein (for hat) Raven, 1 skein(for pom-pom)
Needles: 5 size 10.5 double pointed needles
Notions:
Buttons – Three 3/8″ (9mm) black buttons for body and two 1/4″ (7mm) buttons for eyes
Black embroidery floss or sock weight yarn
Pom-pom maker
Gauge: 13 sts and 20 rows = 4″ in St st
Finished Size: Approximately 16″ circumference and 7 1/2″ long
Favorite this pattern or buy the ad-free pdf from Ravelry here
Pattern
Cast on 52 sts. Divide evenly among 4 dpn’s. Join, being careful not to twist.
Round 1: *K1, p1; repeat to end.
Round 2: *P1, k1; repeat to end.
Rounds 3-6: Repeat rounds 1-2.
Rounds 7-20: Knit.
At this point, the hat should be 5″ from beginning.
Shape Crown
Round 1: *K11, k2tog; repeat to end – 48 sts.
Round 2: Knit.
Round 3: *K4, k2tog; repeat to end – 40 sts.
Round 4: Knit.
Round 5: *K3, k2tog; repeat to end – 32 sts.
Round 6: Knit.
Round 7: *K2, k2tog; repeat to end – 24 sts.
Round 8: Knit.
Round 9: *K1, k2tog; repeat to end – 16 sts.
Round 10: Knit.
Round 11: *K2tog; repeat to end – 8 sts.
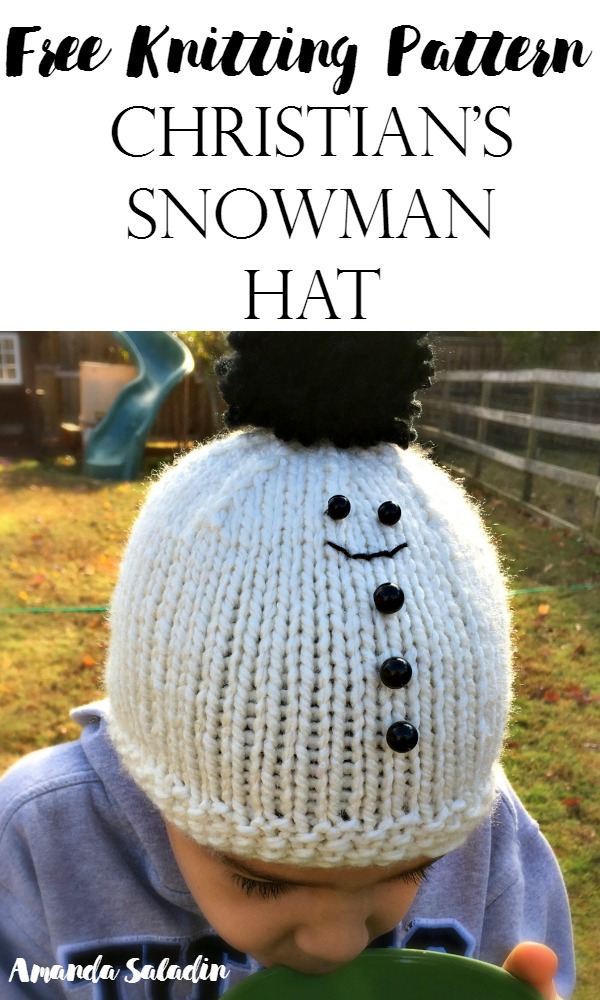
Cut yarn, leaving a long tail. Draw yarn through remaining 8 sts and pull tight to close. Using a pom-pom maker, create a large pom-pom. Attach to top. Sew on buttons as shown in picture. Embroider a simple smile. Weave in ends.
You’re done! I hope you enjoy this pattern as much as Christian and I enjoyed creating it! Leave a comment below. 🙂


My guess is to just leave a long enough tail to sew the back.
Can this be adjusted for a big kid/adult?
This is so cute!
Thanks.
Hi Gladys! If you use double pointed needles there will be no seam to sew. That’s what I did with this hat, but I didn’t know how to use them when I first started knitting. I used to knit a hat flat and leave a long tail to sew up the back just like you mentioned. Either way is okay! It can be adjusted for a larger size, you just need to cast on the required number of stitches (typically an adult hat is about 21″ circumference) and when I make an adult size I don’t start decreasing until the hat is around 5-6″ long (I’m aiming for a total of 8″ long).
Glad you like it! I’m so proud of my son for drawing up his design. 🙂