
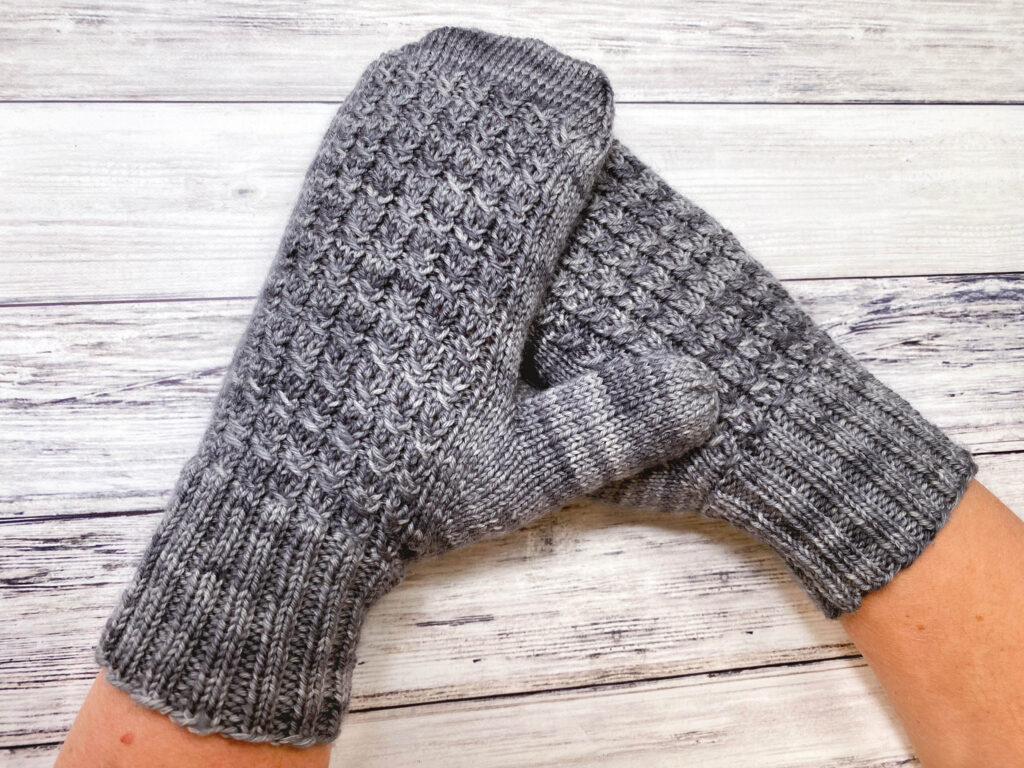
Want a fun knit that looks like cables without the cable needle? Try these Mock Cable Mittens!
Buy the ad-free PDF and knit on the go!
Design Story and Inspiration for These Knit Mittens
I designed these mittens for the Holiday Maker’s Challenge – a fun, free event that happens every year. During the challenge, I give away 8 free downloadable PDF patterns that must meet the following:
- Quick to knit
- Great for gifting
- Uses stash yarn
These were perfect! I used up some fingering weight yarn I had purchased with enough left over for a kid’s version (which will be released at a later date). I love the way they turned out with the mock cables (I also used mock cables for these ankle socks and this hat).
Yarn Options for Our Easy Knit Mittens
I chose to use fingering weight yarn (category #1) for this pattern, as I have been designing socks quite a bit lately and picked up several skeins for socks. Then I decided I’d like to try something else with fingering weight yarn and these easy mittens were born!
You can feel free to substitute any fingering weight yarn that gets gauge.

Purchase the ad-free PDF of this pattern in my shop here!
Easy Knit Mittens
What You’ll Need
Yarn: Yarn Bee Authentic Hand Dyed Tonal in Iron Soot (1 skein) (3.5oz, 400yds, 100% super wash merino wool) (Fingering weight #1)
Needles: US Size 2 (2.75mm) dpn’s or circular
Notions: Stitch Markers, Tapestry Needle, Waste yarn or holder, Scissors
Style: Right and Left Mittens
Gauge: 30 stitches and 32 rows = 4 inches (10cm) in mock cable pattern
Size: Woman Medium (Approximate 7” hand circumference)
Estimated Yardage: 234 yards
Stitch Abbreviations and Techniques
Knit (k)
Purl (p)
M1R (make one increase which slants to the right) – Insert left needle point, from back to front, under the horizontal bar joining the last stitch on the right needle to the first stitch on the left needle. Knit through the front loop.
M1L (make one increase which slants to the left) – Insert left needle point, from front to back, under the horizontal bar joining the last stitch on the right needle to the first stitch on the left needle. Knit though the back loop.
Mock Cable (MC) – Sl 1, k2, pass sl st over k2.
Mock Cable Pattern Stitch
Preparation row: K1, *p1, k3; rep from * to last st; k1.
Rnd 1: K1, *p1, MC; rep from * to last st, k1.
Rnd 2: K1, *p1, k1, yo, k1; rep from * to last st, k1.
Rnds 3-4: K1, *p1, k3; rep from * to last st, k1.
Rnd 5: Rep rnd 1.
Rnd 6: Rep rnd 2.
Repeat rnds 1-6 for pattern st.
Mock Cable Mitten Pattern
Right Mitten
Cast on 60 sts.
If using dpn’s, divide sts on 4 dpns as follows:
Needle 1: 15 sts
Needle 2: 15 sts
Needle 3: 15 sts
Needle 4: 15 sts
Mark as beginning of round, join.
Cuff
Round 1: *K2, p2. Repeat from * to end of the round.
Repeat Round 1 until piece measures 2.5 inches or desired length from the cast-on edge.
On the next round you will begin working in stockinette stitch and mock cable stitch pattern.
Thumb Gusset
Round 1: K2, place gusset marker, k2, place gusset marker. Work to the end of Needle 2 (30 sts from beg), place side marker, work in mock cable pattern stitch to complete round.
Round 2: K2, slip marker, M1R, work to second gusset marker, M1L, slip marker. The base of the gusset is formed. Complete round in established pattern of St st and mock cable pattern stitch.
Round 3: Work even as established in St st and mock cable pattern stitch.
Repeat Rounds 2 & 3 until there are 22 sts between gusset markers.
Work even until piece measures 2.50 inches from the top of the cuff.
Body
On the next round, knit to first gusset marker, remove marker. M1R. Slip the next 22 sts (gusset sts) to waste yarn or holder, cast on 2 sts. Remove second gusset marker. M1L, complete round as established in St st and mock cable pattern stitch. [62 sts]
Work even as established until piece measures 5.75 inches from the top of the cuff.
Mitten Top Shaping
Change to all St st for top shaping.
Shape top of mitten over the next 14 rounds as follows:
Round 1 (Decrease Round): SSK, k27, k2tog, ssk, k27, k2tog. [58 sts]
Round 2: Work even.
Continue in this manner, having two stitches less between decreases each decrease round, until there are 34 sts remaining.
Cut yarn, leaving 8-inch tail.
Thread tapestry needle with tail and graft the mitten top using Kitchener Stitch.
Thumb
Worked in St st.
Slip the 22 sts on hold to a needle. Knit.
Pick up 3 sts from the base of the thumb hole on the hand. Mark as the beginning of the round. Join and distribute evenly on needles. [25 total sts]
Work in rounds until thumb measures 2.50 inches from the base.
Work 6 sts, k2tog, complete round. [24 sts]
Knit 1 round even
*Knit 1, k2tog. Repeat from * around. 16 sts remain.
Cut yarn, leaving a tail. Weave tail through remaining stitches.
Left Mitten
Follow directions for the Right Mitten to the Thumb Gusset.
Thumb Gusset
Round 1: K26, place gusset marker, k2 sts, place gusset marker, k2, place side stitch marker complete round in mock cable pattern stitch.
Round 2: Knit to first gusset marker, slip marker, M1R, knit to the second gusset marker, M1L, slip marker, k2, complete round in mock cable pattern stitch.
Round 3: Work even as established in St st and mock cable pattern stitch.
Repeat Rounds 2 & 3 until there are 22 sts between gusset markers.
Work even until piece measures 2.50 inches from the top of the cuff.
Body
On the next round, knit to first gusset marker, M1R, remove gusset marker. Slip the next 22 sts (gusset sts) to waste yarn or holder. Cast on 2 sts. Remove second gusset marker. M1L, k2, work mock cable pattern stitch to end of round. [62 sts]
Work even as established until mitten body measures 5.75 inches above the cuff.
Continue with Mitten Top Shaping and Thumb directions as for Right Mitten.
Finish
Weave in ends.
Block lightly if desired.
Final Thoughts on Our Mock Cable Mittens
Whew! I know this pattern isn’t quite as easy as some of the others on the blog, like the Easy Knit Mittens, but the look of these mock cables is SO worth it!
So, if you have some fingering weight yarn lying around and want to make something different with it, be sure to give this pattern a try!
Happy Knitting!
Amanda
Beautiful! I just don’t like working in fingering weight yarn, takes too long for me to complete. Maybe if I work them two at a time. I look forward to the challenge.
Hi i am trying to print the mock cable mittens knitting pattern but can’t seem to print it can you help?
If you are part of the Holiday Maker’s Challenge you can download the printable version for free, but only until Christmas!