The thickest, warmest crochet aviator hat for your little one is here! This hat is created using two layers: a wool outer layer and a faux fur lining that’s extra soft.
Want to test a child or adult version of this hat??? Apply here!
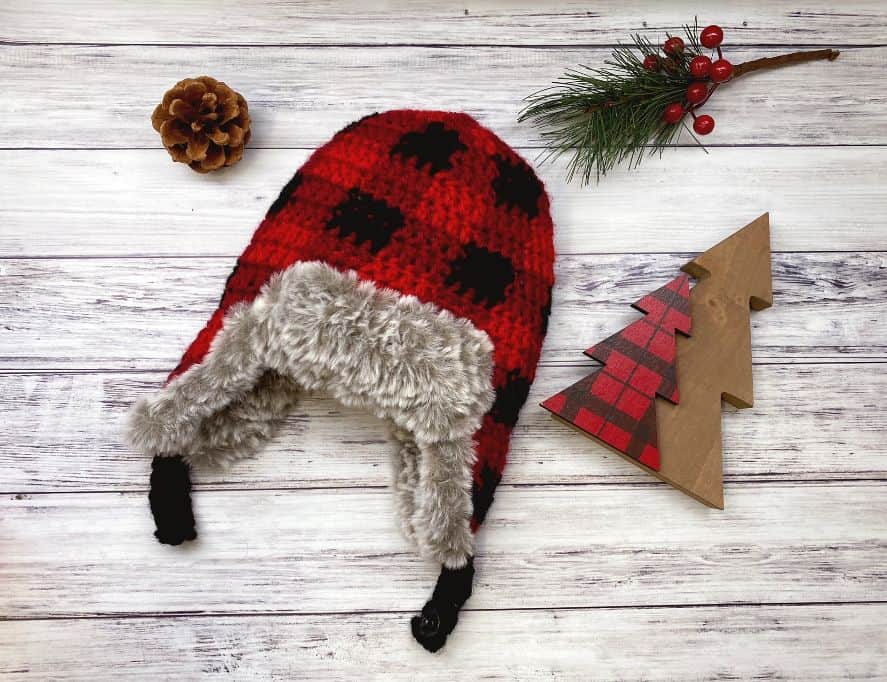
Design Story and Inspiration for the Plaid Crochet Aviator Hat
I love seeing all the fur-lined aviator hats out there, but I really wanted to crochet one. I mean, I’m all about DIY and just buying one to give as a gift wasn’t what I had in mind.
So I decided to design one. It would need two separate layers… one nice and furry and warm next to sensitive skin and one made of wool that would keep in that warmth.
So the Plaid Aviator Hat was born. Right now it’s only in one size, but if there is enough interest
About the Yarn
I wanted to use Lion Brand Go for Faux for the fur part of this pattern as it is exceptionally thick and soft and I knew it would work out perfectly. It works up so super fast!!
I like to stick with the same yarn brand when working a project, so I was on the lookout for a great Lion Brand yarn that would work with the fur.
I’ve used Wool-Ease on many projects before and wouldn’t normally use it for a baby, since wool can irritate sensitive skin, but in this case the yarn only touches under the chin.
If you don’t like the idea of using wool, Lion Brand Basic Stitch would be a good alternative, and it comes in a wide variety of colors to suit your style.
Before we begin… let’s get Social!
I would love for you to come follow me on
Instagram (get sneak peeks of what’s coming up!)
My Facebook Page (come join the fun!)
Follow me on Pinterest (I pin tons of free patterns to my boards!)
Join my Facebook group (lots of awesome crochet talk there)
Also, you can find me on Ravelry or join more than 14K subscribers on YouTube.
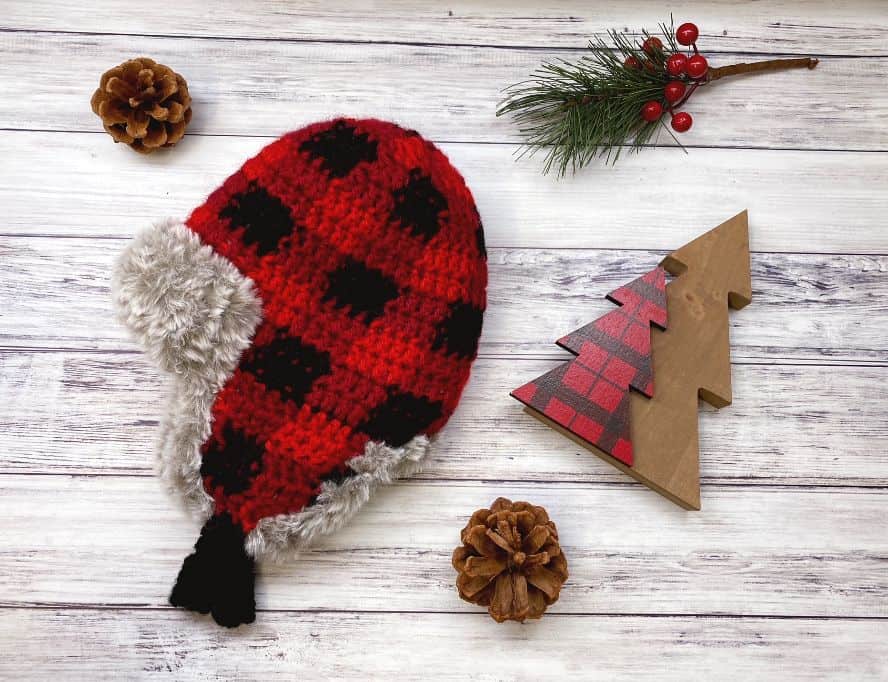
Pattern Details
This pattern is made in two parts and then sewn together, so that you can completely line the inside with faux fur.
Be sure to check gauge on both so you can ensure the two pieces will fit together.
To check gauge on the fur yarn, create a gauge swatch 7 sts wide and 8 rows tall and measure. It should be 4″ square if it matches the gauge listed.
Plaid Aviator Crochet Hat Pattern
What You’ll Need
Yarn: Lion Brand Wool-Ease: #138 Cranberry (MC, 1 skein), #153 Black (CC1, 1 skein), #102 Ranch Red (CC2, 1 skein) (Worsted Weight #4)
Lion Brand Go For Faux: #201 Grey Wolf (CC3, 1 skein) (Super Bulky Weight #6)
Hook: US size K/10.5 (6.50 mm), US size M/N (9.0 mm)
Notions: Tapestry needle, stitch markers, ½” snap, sewing needle, matching thread
Skill Level: Intermediate
Size: 16” circumference (Fits 6-12 months)
Gauge: 12 sts and 8 rows = 4” [10 cm] in dc with smaller hook and worsted weight yarn
7 sts and 8 rows = 4” [10 cm] in sc with larger hook and fur yarn
Crochet Aviator Hat Pattern Notes
Rounds are not joined unless noted.
Place stitch marker in first st of each round to keep track.
When working the plaid, the unused color is carried along the line of crochet stitches and crocheted over in the tapestry crochet technique. To keep the look uniform, on the last st of that color, draw the contrasting color through the last 2 loops.
When working a dc2tog over two different colors, use the same color as the previous st to start the first dc, then draw the contrasting color through the last 2 loops of that st and finish the dc2tog with the next color.

Plaid Crochet Aviator Hat Pattern
Plaid Shell
Left Earflap
With smaller hook and CC2, ch 10.
Row 1: Dc in 4th ch from hook and next 2 ch, dc 4 in MC, turn. (8 sts)
Row 2 (Inc): Ch 3 with MC, dc CC1 in first 4 sts, dc MC in next 4 sts, dc CC1 in last st, turn. (10 sts)
Row 3 (Inc): Ch 3 with CC1, dc CC1 in first st, dc MC in next 4 sts, dc CC1 in next 4 sts, 2 dc in MC in last st, turn. (12 sts)
Row 4: Ch 3 with CC2, sk first dc, dc CC2 in next st, dc MC in next 4 sts, dc CC2 in next 4 sts, dc MC in next 2 sts, turn.
Row 5: Ch 3 with MC, sk first dc, dc MC in next st, dc CC2 in next 4 sts, dc MC in next 4 sts, dc CC2 in next 2 sts.
Fasten off.
Right Earflap
With smaller kook and CC2, ch 10.
Row 1: Dc in 4th ch from hook with CC2, dc MC in next 4 ch, dc CC2 in last 2 ch, turn. (8 sts)
Row 2 (Inc): Ch 3 with MC, dc MC in first 3 sts, dc CC1 in next 4 sts, dc MC in next st, 2 dc MC in last st, turn. (10 sts)
Row 3 (Inc): Ch 3 with MC, dc MC in first 3 sts, dc CC1 in next 4 sts, dc MC in next 2 sts, 2 dc MC in last st, turn. (12 sts)
Row 4: Ch 3 with CC2, sk first dc, dc CC2 in next 3 sts, dc MC in next 4 sts, dc CC2 in next 4 sts, turn.
Row 5: Rep Row 4.
Do not fasten off. Cont to Joining Rnd.
Joining Rnd
Change to CC1
Rnd 1: Ch 10 (for Back), sc across first Earflap, ch 14 (for Front), sc across 2nd Earflap. (48 sts)
Rnds 2-7: Working in Plaid Pattern, ch 3, work even in dc. Join with sl st to first st.
Shape Crown
Cont working in Plaid Pattern.
See notes about dec over 2 color sections.
Rnd 1: *Sc 4, sc2tog; rep from * around. (40 sts)
Rnd 2: *Sc 3, sc2tog; rep from * around. (32 sts)
Rnd 3: *Sc 2, sc2tog; rep from * around. (24 sts)
Rnd 4: *Sc, sc2tog; rep from * around. (16 sts)
Rnd 5: *Sc2tog; rep from * around. (8 sts)
Rnd 6: *Sc2tog; rep from * around. (4 sts)
Cut yarn, leaving a long tail. Draw tail through last 4 sts and pull tight to close.

Fur Lining
Earflap (make 2)
With CC3 and larger hook, ch 5.
Row 1: Sc in 2nd ch from hook and each ch across, turn. (4 sts)
Row 2: Ch 1, 2 sc in first st, sc to last st, 2 sc in last st, turn. (6 sts)
Row 3: Ch 1, sc in each st across, turn.
Row 4: Rep Row 2. (8 sts)
Row 5: Rep Row 3.
Fasten off first Earflap.
Do not fasten off 2nd Earflap.
Joining Rnd
Rnd 1: Ch 4 (for Back), sc across first Earflap, ch 8 (for Front), sc across 2nd Earflap. (28 sts)
Rnds 2-7: Sc in continuous rnds.
Shape Crown
Rnd 1: *Sc 5, sc2tog; rep from * around. (24 sts)
Rnd 2: *Sc 4, sc2tog; rep from * around. (20 sts)
Rnd 3: *Sc 3, sc2tog; rep from * around. (16 sts)
Rnd 4: *Sc 2, sc2tog; rep from * around. (12 sts)
Rnd 5: *Sc, sc2tog; rep from * around. (8 sts)
Rnd 6: *Sc2tog; rep from * around. (4 sts)
Cut yarn, leaving a long tail. Draw tail through last 4 sts and pull tight to close.
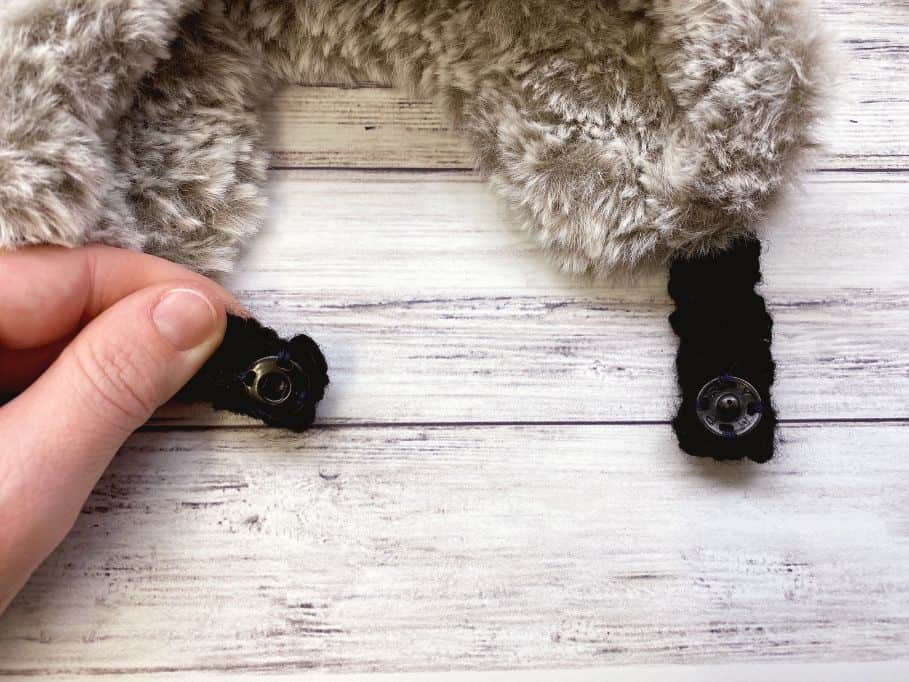
Chin Straps
With smaller hook, CC1 and RS facing, join yarn in 4th dc of bottom of Earflap, ch 1.
Row 1: Sc in same st as join and next st, turn.
Rows 2-20: Ch 1, sc 2, turn.
Fasten off. Fold in half and stitch with yarn tail.
Rep for 2nd Earflap.
Joining the layers
Place the Fur Lining inside the Plaid Shell. With RS facing and larger hook, join CC3 at bottom of one Earflap. Sc evenly around, catching both layers of fabric and working 2 sc in corners, sc only in the Fur Lining behind the Chin Straps, join to first sc with sl st.
Fasten off.
Front Flap
With larger hook and CC3, ch 11.
Row 1: Sc in 2nd ch from hook and each ch across. (10 sts)
Rows 2-3: Work even in sc.
Fasten off.
Sew to front of hat as seen in photos, being sure to go through both layers of hat.
Finishing
Sew snaps on chin straps.
Weave in ends.
You Might Also Like…
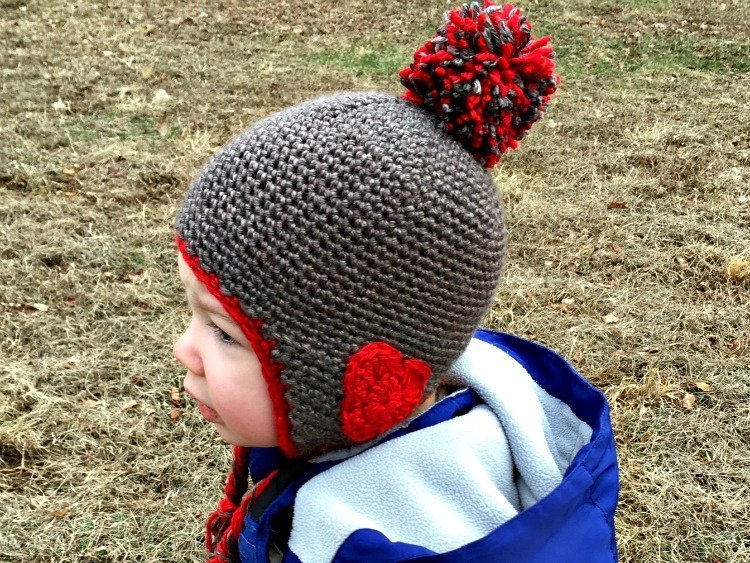

That’s it! Today we’ve learned how to work the Plaid Crochet Aviator Hat and I hope you love it as much as I do!
Happy Crocheting!
Amanda
Love this, especially that it is 2 layers. I can see making the inner layer from velvet yarn instead of fake fur, or even just another solid color yarn.
I would also like this pattern in a size for adults. I’d like one of these and I know several friends and family members who would also like these
I love this Aviator hat although it may be too small for my little nephew. I would love to see the pattern in more sizes. Thank you Amanda!
Hi – by any chance do you have this pattern in adult sizes? I love it and would love to make for a whole family. But I am not talented to increase the size on my own. Love your patterns, have made a few.
Hi! I have worked on and off for a while on an adult version but haven’t released it yet. Keep an eye out – I am working on it 😀