
Morgan was originally created as a free CAL but is now has all the crochet doll instructions in one easy post!
Design Story and Inspiration for Our Crochet Doll Pattern
I love this style of crochet doll and I really wanted to design my own. It took quite a few tries to get the body the way I wanted, but I am SO happy with how she turned out, and she has been made many times since the original CAL, and I love every one!
Materials Needed
1 skein tan or skin colored yarn (I used Lion Brand Coboo which is a size 3 yarn)
Size D (3.25mm) crochet hook
Safety eyes (or you can embroider the eyes easily)
Polyester fiberfill
Yarn for the dress and boots (I used Lion Brand Wool-Ease DK Cake and I like the way it subtly changed colors on the dress then matched perfectly for the boots. This yarn has been discontinued, but Lion Brand Mandala works just as well.)
Worsted weight yarn for hair (I used Lion Brand Fisherman’s Wool)
Yarn needle
Stitch Marker (store bought or homemade!)
You can choose any yarn you like, of course. I love the size she is using DK yarn (category #3) and a small hook.

Find this jacket and shoes for Morgan here!
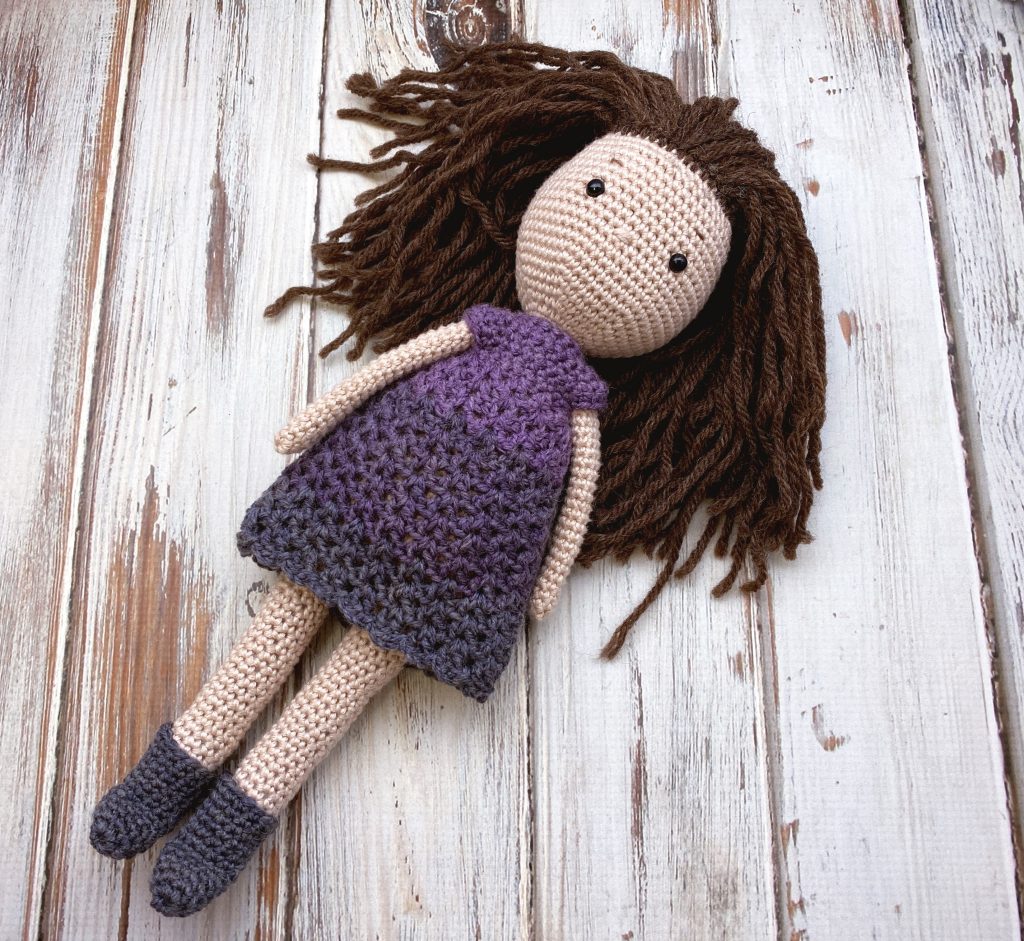
Morgan Crochet Doll
What You’ll Need
Yarn: Lion Brand Coboo or other similar tan or skin color DK yarn, 1 skein for doll
Lion Brand Wool-Ease DK Cake or other DK yarn, 1 skein for dress and boots
Lion Brand Fisherman’s Wool or other worsted weight yarn, 1 skein for hair
Hook: US Size D (3.25mm) – The video shows a 3.00mm. I didn’t realize a size D hook would be a different mm and used a different one for the video. To make Morgan as shown use 3.25mm.
Notions: Safety eyes (embroider eyes for a small child), small amount of polyester fiberfill, yarn needle, stitch marker, scissors
Finished Size: Approximately 13″ tall
Gauge: 24 sts and 24 rows = 4″ in sc

Crochet Morgan Doll Pattern
Notes
Doll is worked in continuous rounds without joining. Use a stitch marker to mark first st of each round.
Stuff legs, body and head as you go. I found that when I waited to stuff at the end of a section it was lumpy. About every inch or so I will stop to stuff.
Ch 4 at the beginning of a row counts as dc, ch 1.
Abbreviations:
Increase (Inc): 2 sc in next st
Invisible Decrease (Dec): insert hook in front loop only of next 2 sts, yarn over, draw up a loop, yarn over, draw through two loops
V-stitch (V-st): dc, ch 1, dc in same st
In the video, you can see that the body of my doll is turning out smaller and I show a 3.0mm hook. I made the legs with the same hook as the first doll, which was a 3.25mm!! Please use a 3.25mm hook. Both of mine showed size D. At least I know my tension isn’t off now. Haha!

Leg (Make 2)
With MC, make magic ring.
Round 1: 6 sc in magic ring (6 sts).
Round 2: 2 sc in each st (12 sts).
Rounds 3-32: Work even in sc.
Fasten off first leg. Do not fasten off second leg. Continue to body.
Buy the ad-free PDF of Morgan and her doll here!
Body
Round 1: Ch 3, sc around 12 sts of first leg, sc flo in ch-3, sc 12 sts of second leg, sc flo in ch-3 (30 sts).
Round 2: (Sc 4, 2 sc in next st) 6 times (36 sts).
Round 3: (Sc 5, 2 sc in next st) 6 times (42 sts).
Rounds 4-11: Work even in sc.
Round 12: Sc 10, sc2tog, sc 19, sc2tog, sc 9 (40 sts).
Round 13: Work even in sc.
Round 14: Sc 10, sc2tog, sc 18, sc2tog, sc 8 (38 sts).
Round 15: Work even in sc.
Round 16: Sc 10, sc2tog, sc 17, sc2tog, sc7 (36 sts).
Round 17: Work even in sc.
Round 18: (Sc 4, sc2tog) 6 times (30 sts).
Round 19: Work even in sc.
Round 20: Sc 8, sc2tog, sc 13, sc2tog, sc 5 (28 sts).
Round 21: Sc 8, sc2tog, sc 12, sc2tog, sc 4 (26 sts).
Round 22: Work even in sc.
Round 23: Sc 8, sc2tog, sc 11, sc2tog, sc 3 (24 sts).
Round 24: Sc 8, sc2tog, sc 10, sc2tog, sc 2 (22 sts).
Round 25: Sc 8, sc2tog, sc 8, sc2tog, sc 2 (20 sts).
Round 26: Sc 7, sc2tog, sc 7, sc2tog, sc 2 (18 sts).
Round 27: (Sc, sc2tog) 6 times (12 sts).
Rounds 28-29: Work even in sc.

If you want the mini doll pattern, pick up the PDF of Morgan and her doll in my shop! Please tag me on Instagram if you make a Morgan – I’d love to see it!

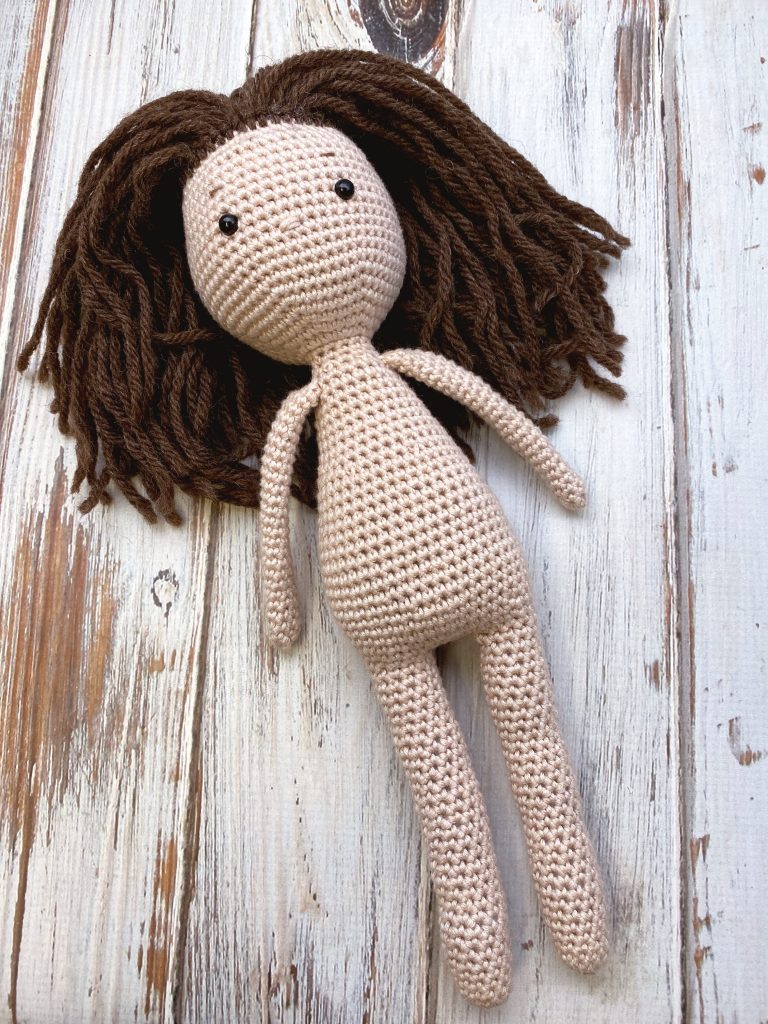
Head
Round 1: 2 sc in each st (24 sts).
Round 2: (Sc 3, inc) 6 times (30 sts).
Round 3: (Sc 4, inc) 6 times (36 sts).
Round 4: (Sc 5, inc) 6 times (42 sts).
Round 5: (Sc 6, inc) 6 times (48 sts).
Round 6: (Sc 7, inc) 6 times (54 sts).
Rounds 7-18: Work even in sc.
Place safety eyes between rows 12-13, 9 sts apart.
Embroider nose 2 rows lower with MC as shown in photos.
Be sure to stuff neck firmly at this point.
Round 19: (Sc 7, dec) 6 times (48 sts).
Round 20: (Sc 6, dec) 6 times (42 sts).
Round 21: (Sc 5, dec) 6 times (36 sts).
Round 22: (Sc 4, dec) 6 times (30 sts).
Round 23: (Sc 3, dec) 6 times (24 sts).
Round 24: (Sc 2, dec) 6 times (18 sts).
Round 25: (Sc, dec) 6 times (12 sts).
Round 26: (Dec) 6 times (5 sts).
Cut yarn, leaving a long tail. Finish stuffing head.
Weave yarn tail through remaining 6 sts and pull tightly to close.

Arm (Make 2)
With MC, make magic ring.
Round 1: 4 sc in magic ring (4 sts). Pull tightly to close.
Round 2: 2 sc in each st (8 sts).
Rounds 3-25: Work even in sc.
Fold in half and work 4 sc across, closing tube.
Do NOT stuff arms.
Attach arms as shown in photo.
Hair
Cut yarn strands twice as long as desired hair length.
The easiest way to do a lot of these is to wrap the yarn around something. I used the shorter side of a DVD case. Then, cut across one side of the wrapped yarn.
Hair is attached in the latch hook style. Insert hook from front to back where you would like strands. Fold strand in half, catch in hook and pull through about 1/2″. Yarn over with both strands and pull through loop. (Same as if you were attaching fringe to a project). Repeat for everywhere you want hair. (See video for help!)
For eyebrows, I took apart the plies on the yarn I used for the hair and used a single ply to embroider eyebrows to ensure it matched the hair perfectly. I embroidered her eyebrows 3 rows above the row with the safety eyes.
Dress
With CC2, ch 19.
Row 1: Sc in 2nd ch from hook and each ch across; turn (18 sts).
Row 2: Ch 1, sc 3, inc, sc, inc, sc 6, inc, sc 1, 2 sc in next st, sc 3; turn (22 sts).
Row 3: Ch 1, sc 3, inc, sc 3, inc, sc 6, inc, sc 3, inc, sc 3; turn (26 sts).
Row 4: Ch 1, sc 3, inc, sc 5, inc, sc 6, inc, sc 5, 2 sc in next st, sc 3; turn (30 sts).
Row 5: Ch 1, sc 3, inc, sc 7, inc, sc 6, inc, sc 7, 2 sc in next st, sc 3; turn (34 sts).
Row 6: Ch 1, sc 3, inc, sc 9, inc, sc 6, inc, sc 9, inc, sc 3; turn (38 sts).
Row 7: Ch 1, sc 5, ch 1, skip next 9 sts, sc 10, ch 1, skip next 9 sts, sc 5; turn (22 sts).
Row 8: Ch 4, dc in first st, *skip next st, V-st in next st, repeat to last st, V-st in last st; turn.
Rows 9-12: Ch 4, dc in first dc, V-st in each ch-1 space across, V-st in last dc; turn.
Join with slip st to third ch of turning ch.
Dress is now worked in rounds.
Rounds 13-19: Slip st into ch-1 space, ch 4, dc in same ch-1 space, V-st in each V-st to end, join with slip st to 3rd chain of starting chain.
Round 20: Ch 1, sc in same space, ch 3, *sc in between V-sts, ch 3; repeat from * to end, slip st in first sc.
Fasten off.
Join yarn at top and ch 20. Fasten off and weave in ends. Repeat for second side.
Weave in all ends.
Boots
With CC1, make magic ring.
Round 1: 6 sts in magic ring (6 sts). Pull tightly to close.
Round 2: 2 sts in each st (12 sts).
Rounds 3-5: Work even in sc, turn at end of round 5.
Heel Flap:
Row 6: Ch 1, sc 6; turn (6 sts).
Row 7: Repeat row 6.
Row 8: Ch 1, sc2tog, sc 2, sc2tog; turn (4 sts).
Row 9: Ch 1, (sc2tog) twice; turn (2 sts).
Row 10: Ch 1, sc2tog (1 st).
Place marker in st.
Boot Shaft
Round 11: Sc 4 sts down side of heel flap, sc 6 sts from front, sc 4 sts up other side of heel flap, sc in marked st (15 sts.)
Rounds 12-16: Sc evenly on 15 sts. Can make the boots as short or tall as you wish by adjusting this number.
Final Thoughts on Our Morgan Crochet Doll
Wow! I hope you love Morgan as much as I do! I really love seeing all the different versions of Morgan out there and it makes me so happy that this pattern has brought such joy to others.
Don’t forget to grab her free coat and shoes, too!
Happy Crocheting!
Amanda