
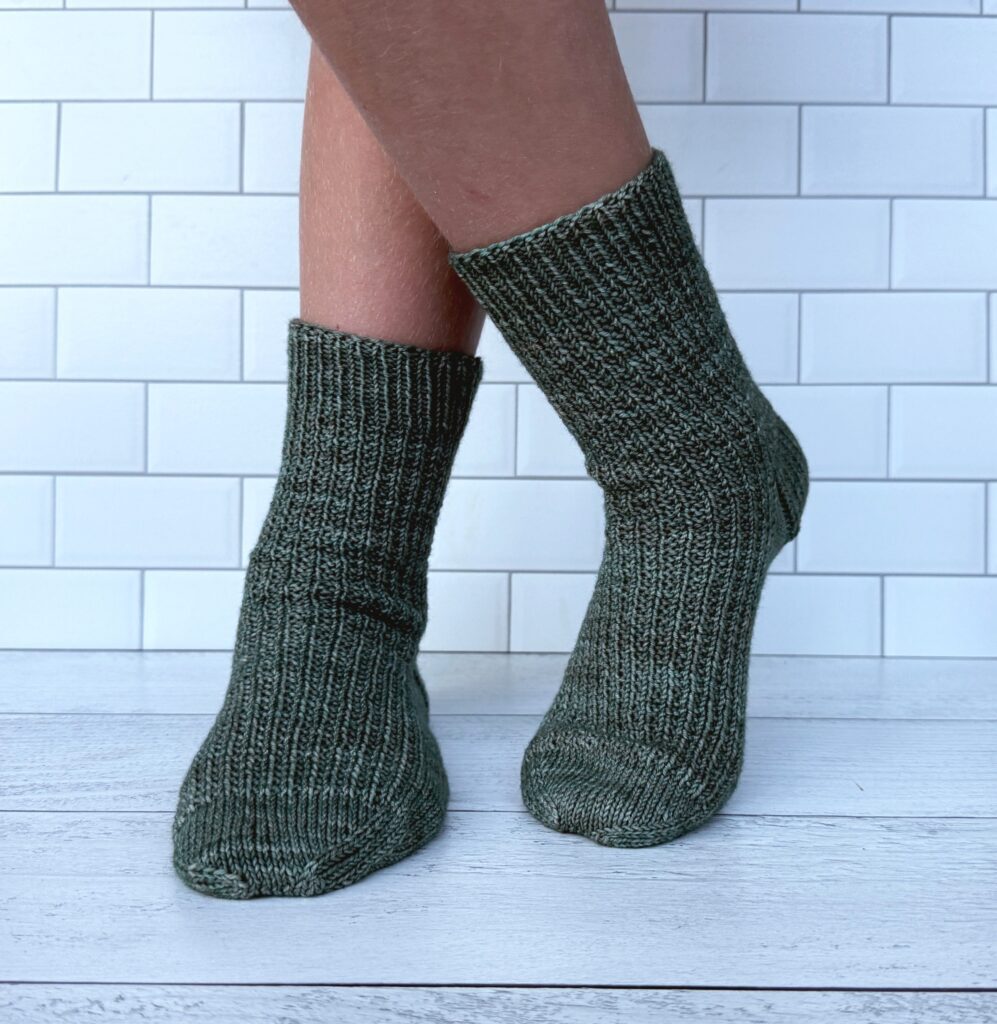
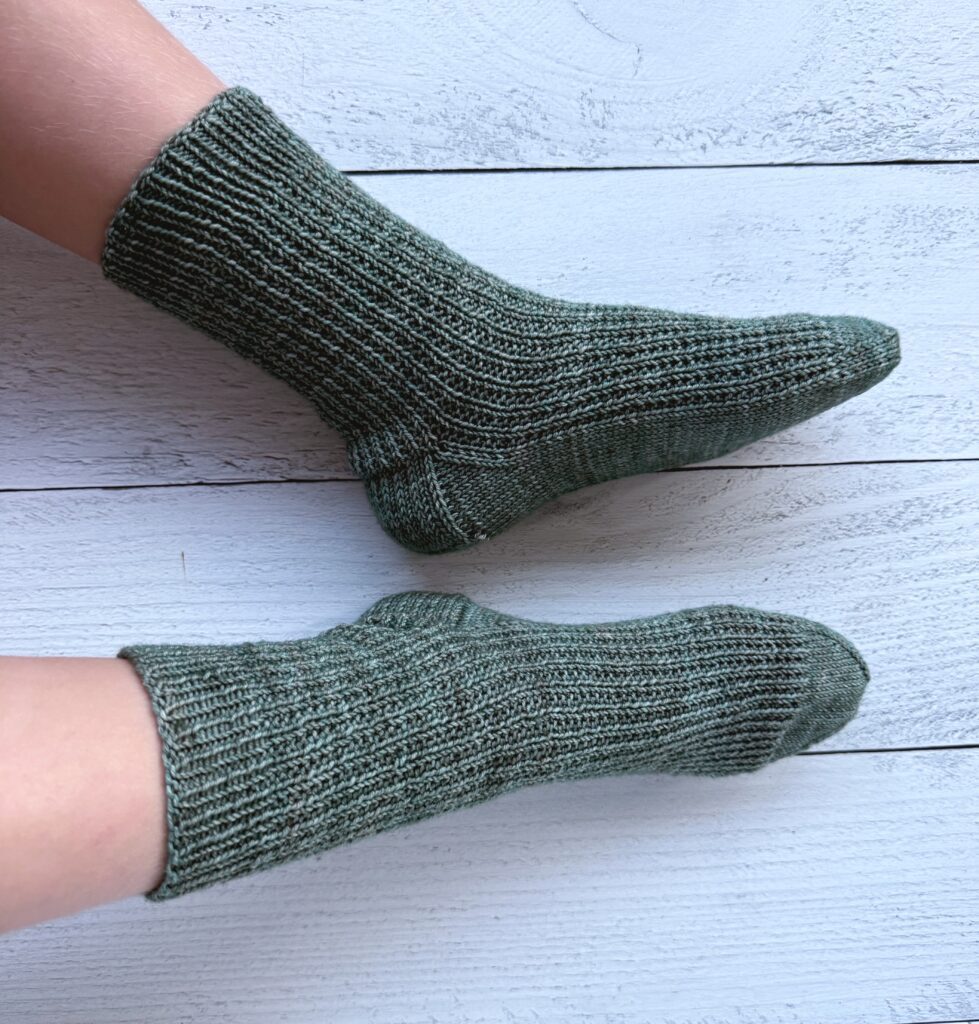
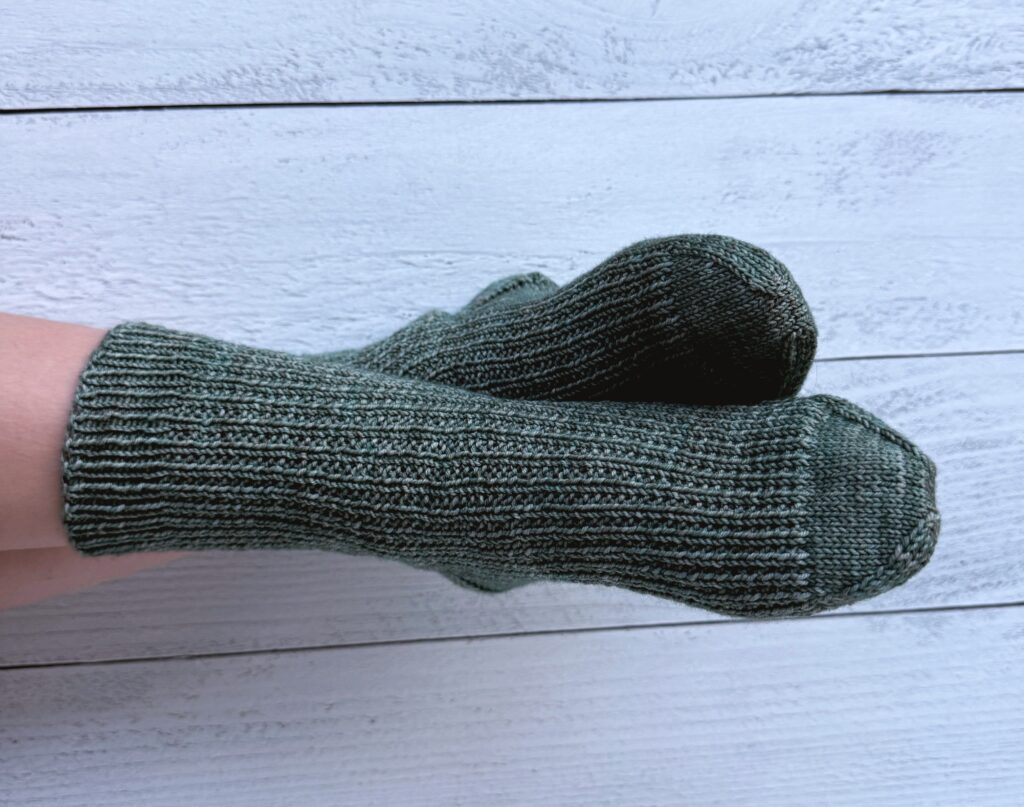
This kids sock knitting pattern works up in three sizes and features a simple two-row textured stitch that makes knitting a whole pair actually fun.
Design Story and Inspiration for These Fun Kids Knitted Socks
If you’ve been hanging around Love.Life.Yarn for a while, you know I have no shortage of sock patterns. Women’s socks, baby socks, you name it. But kids socks? That was a gap I honestly couldn’t ignore anymore, especially since I still have boys at home who wear kid sizes and go through socks like nobody’s business.
So I finally did something about it!
I wanted this pattern to feel approachable without being boring. A plain stockinette sock is fine, but a little texture goes a long way and makes the finished pair look so much more intentional. The two-row stitch pattern alternates a knit/purl row with a plain knit row, which gives you that subtle ribbed look on the leg without being complicated to execute. If you’ve already tackled a basic sock, you can absolutely handle this one.
It comes in three sizes to cover everything from little kid shoe size 10 all the way up to big kid size 6, so you can knock out a pair for pretty much any kid in your life. And with only one skein of Malabrigo Sock needed, it’s a great stash-busting project too!
Yarn Options for Kid Sock Knitting Patterns
For this pattern I used Malabrigo Sock, and honestly it’s hard to argue with that choice. It’s a gorgeous 100% superwash merino that knits up beautifully, comes in the most stunning colorways, and the superwash treatment means you can actually toss it in the wash without a meltdown. Because, let’s be real, nobody is hand washing their kids’ socks.
The most important thing when choosing a sock yarn for kids is to look for a superwash wool or a wool/nylon blend so you get durability AND easy care. Kids are hard on socks, and you want the yarn working for you, not against you.
What if you don’t want to use wool?
No worries! For the best non-wool sock yarn, look for blends of cotton/nylon or bamboo/cotton/nylon.
HiKoo CoBaSi is a popular wool-free choice made from cotton, bamboo, and silk with elastic nylon, and it’s machine washable, which is a must for kids’ items.
Universal Yarn Bamboo Pop Sock is another great option that is 100% wool-free, self-patterning, and comes in really fun, vibrant colorways that kids will love picking out.
Whatever you decide, make sure the yarn you choose gets gauge and get knitting!
Tips for Knitting Kid’s Socks
How to Measure a Kid’s Foot
Measuring a kid’s foot sounds simple until you actually try to do it! The easiest method is to have them stand on a piece of paper and trace around their foot, then measure the length from heel to the tip of the longest toe and the circumference around the widest part of the foot. Standing is key here because the foot spreads slightly under body weight, and you want your finished sock to actually fit comfortably. If you are knitting for a wiggly toddler, distraction is your best tool. Snacks work great.
What to Do if They’re Between Sizes
If the foot measurement lands right between two sizes, go with the larger size for length and the smaller size for circumference. Kids’ feet grow fast, and a little extra length gives you some wiggle room. For circumference though, socks need that snug fit to actually stay up and feel comfortable, so err on the smaller side there.
Understanding Negative Ease
You might notice that the finished sock circumferences in this pattern are smaller than an actual foot measurement, and that is completely intentional! Socks are knit with negative ease, meaning the finished fabric is designed to stretch over the foot. That stretch is what keeps the sock snug and in place. A good rule of thumb is that your finished sock circumference should be about 10% smaller than the actual foot measurement. So if you measure 6.5″ around the foot, a finished sock circumference of around 5.5″ to 6″ is right where you want to be.
Knit Both Socks at Once
Second sock syndrome is real, and it is especially real with kids’ socks because they are small and fast to knit, which somehow makes it even harder to motivate yourself to cast on that second one. The solution is to just knit both at the same time! You can use two sets of dpns and work each sock separately but side by side, finishing each section before moving to the next. It adds a little setup time but you end up with a finished pair instead of one lonely sock living in your project bag for six months.
Reinforce the Heel and Toe
Kids are genuinely hard on socks. If you want your handknit pair to actually survive the school year, consider reinforcing the heel and toe as you knit. You can hold a strand of reinforcing thread alongside your working yarn in those sections, or simply use a yarn that already has a nylon component built in. The heel flap stitch used in this pattern already adds some durability, but a little extra reinforcement goes a long way when little feet are involved.
Gift Knitting Tips
Knitting socks as a gift is so thoughtful, but sizing can be tricky when you can’t just ask! The easiest way to get a sneaky measurement is to grab one of their existing shoes and check the size, then cross reference with the size chart in this pattern. Kids’ shoe sizes translate pretty directly to the finished sizes here. If you are knitting for a baby or very young child, size up. Feet grow so fast at that age that by the time you finish knitting, they will probably already need the next size anyway!
Kid’s Textured Socks
Purchase the ad-free PDF of this pattern in my shop here!
What You’ll Need
Yarn: Malabrigo Sock, 1 skein (440yds/100g)
Needles: 5 dpn, US size 2 (2.75mm)
Notions: Yarn needle, scissors, stitch marker
Style: Cuff to Toe
Gauge: 32 sts and 40 rows = 4” (10cm) in St st
Finished Sizes:
| Size | Finished Foot Circumference | Finished Foot Length | Approximate US Shoe Size |
| Small | 5.5″ (14 cm) | 6.5″ (16.5 cm) | Little Kid 10–12 |
| Medium | 6.5″ (16.5 cm) | 7.5″ (19 cm) | Big Kid 1–3 |
| Large | 7.5″ (19 cm) | 8.5″ (21.5 cm) | Big Kid 4–6 |
Stitch Guide
Knit (k)
Purl (p)
Beginning of Round (BOR)
Stitch Pattern
Row 1: *K1, p1; repeat from * to end.
Row 2: Knit.
Buy the ad-free PDF and knit on the go!
Kid’s Textured Socks Knitting Pattern
Sock Start:
Cast on 44 (52, 60) sts loosely.
Divide sts on 4 dpns as follows:
N1: 11 (13, 15) heel sts
N2: 11 (13, 15) instep sts
N3: 11 (13, 15) instep sts
N4: 11 (13, 15) heel sts
Join. BOR
Cuff:
Work cuff in k1p1 until 1.50″ (4 cm) from cast on edge. End at BOR.
Leg:
Work in stitch pattern until sock measures 4 (4.5, 5.5)”/10 (11.5, 14) cm from cast on edge. Complete sts on N3. Stop.
Heel Flap with Heel Stitch:
Slip N4 sts onto N1. 22 (26, 30) sts
With RS facing, work back and forth as follows:
Row 1: *Sl 1 purlwise, k1. Repeat from * to end.
Row 2: Sl 1 purlwise, p to end.
Repeat these 2 rows until 20 (24, 24) rows are complete.
Turn Heel:
Note: Sl 1 = slip 1 purlwise
Row 1: (RS) K 12 (14, 16), ssk, k1. Turn.
Row 2: (WS) Sl 1, p 3, p2tog, p1. Turn.
Row 3: (RS) Sl 1, k 4, ssk, k1. Turn.
Row 4: (WS) Sl 1, p 5, p2tog, p1. Turn.
Row 5: (RS) Sl 1, k 6, ssk, k1. Turn.
Row 6: (WS) Sl 1, p 7, p2tog, p1. Turn.
Row 7: (RS) Sl 1, k 8, ssk, k1. Turn.
Row 8: (WS) Sl 1, p 9, p2tog, p1. Turn.
Size Small Only
Row 9: (RS) Sl 1, k 10, ssk. Turn.
Row 10: (WS) Sl 1, p 10, p2tog. Turn.
Size Medium Only
Row 9: (RS) Sl 1, k 10, ssk, k1. Turn.
Row 10: (WS) Sl 1, p 11, p2tog, p1. Turn.
Row 11: (RS) Sl 1, k 12, ssk. Turn.
Row 12: (WS) Sl 1, p 12, p2tog. Turn.
Size Large Only
Row 9: (RS) Sl 1, k 10, ssk, k1. Turn.
Row 10: (WS) Sl 1, p 11, p2tog, p1. Turn.
Row 11: (RS) Sl 1, k 12, ssk, k1. Turn.
Row 12: (WS) Sl 1, p 13, p2tog, p1. Turn.
Row 13: (RS) Sl 1, k 14, ssk. Turn.
Row 14: (WS) Sl 1, p 14, p2tog. Turn.
All Sizes
12 (14, 16) sts remain. Knit 6 (7, 8) sts. BOR
Purchase the ad-free PDF of this pattern in my shop here!
Heel Gusset:
With a free needle, knit remaining 6 (7, 8) heel sts. [N1]
Continuing with the same needle, pick up 10 (12, 12) sts along the side of the heel.
Pick up and knit a st from row below the first instep st to prevent a hole. [N1: 17 (20, 21) sts total]
With a free needle, work across 11 (13, 15) instep sts. [N2]
With a free needle, work across 11 (13, 15) instep sts. [N3]
With free needle, pick up and knit from row below the first heel st to prevent a hole.
With same needle, pick up 10 (12, 12) sts along side of the heel and knit remaining heel sts. [N4: 17 (20, 21) sts total] BOR
Shape Gusset:
Rnd 1: (Dec Rnd)
N1: Knit to 3 sts from end. K2tog, k1.
N2: (Instep) Work even.
N3: (Instep) Work even.
N4: K1, ssk, knit to end.
Rnd 2: Work even.
Repeat Rnds 1 and 2 until there are 44 (52, 60) sts remaining.
Foot:
Continue working in rnds working top of foot in pattern stitch and sole (heel sts from beg of pattern) in Stockinette st until foot measures 5.5 (6.25, 7)”/14 (16, 18) cm from base of heel.
Complete sts on N4. BOR
Shape Toe
Rnd 1:
N1: (Sole) Knit to last 3 sts, k2tog, k1.
N2: (Instep) K1, ssk, knit to end.
N3: (Instep) Knit to last 3 sts, k2tog, k1.
N4: (Sole) K1, ssk, complete round.
Rnd 2: Work even.
Repeat Rnds 1 and 2 until 32 (36, 40) total sts remain.
Work decrease rnd only until 16 sts remain. [8 instep sts, 8 sole sts]
Finishing
Work sts on N1. Slip sts from N4 to opposite end of N1.
Slip sts from N3 onto N2.
Holding two needles together, graft sts using Kitchener Stitch.
Weave in ends.
Work second sock.
Final Thoughts on Our Kids Sock Knitting Pattern
If you have been wanting to knit socks for the kids in your life but weren’t sure where to start, this is your pattern. It’s straightforward enough for an advanced beginner to tackle with confidence, but the textured stitch gives it enough personality that it doesn’t feel like a plain practice sock either. That’s a win in my book.
With three sizes covering little kids all the way up to bigger kids, you can get a lot of mileage out of this one pattern. Grab a fun colorway, cast on, and knock out a pair for every kid on your list. Seriously, one skein is all you need!
And if this is your first time knitting socks, don’t let the heel intimidate you. The heel flap and gusset construction used in this pattern is actually very beginner friendly once you get going, and I walk you through every step. You’ve totally got this.
Happy knitting!
Amanda