
Buy the ad-free PDF of this pattern in my shop here!
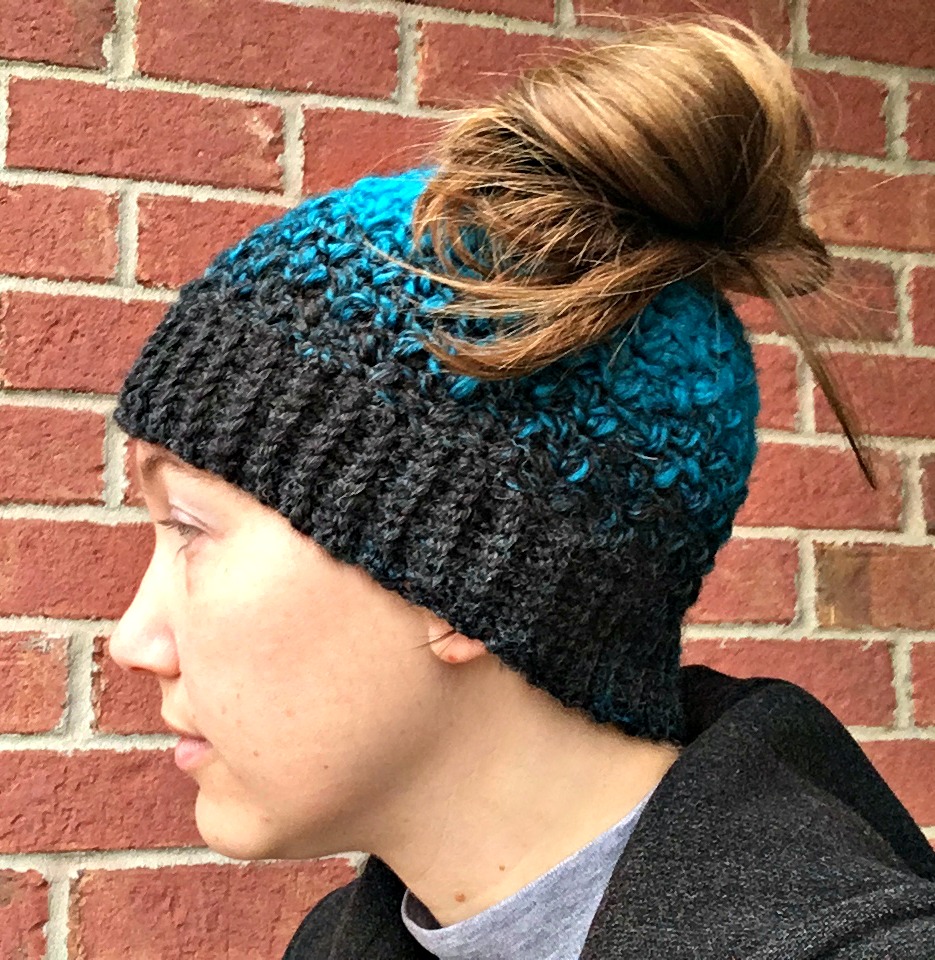
I’m sure you have seen these hats everywhere – they are really taking over! The first time I saw a picture of one I thought “who would want their hair hanging out of their hat like that?!”
But then friends started asking me to make them one. I started seeing patterns for them creep up everywhere. I don’t usually follow trends but a friend begged me to make her a messy bun hat and so this pattern was born. I’ve also seen them called ponytail hats and of course you could wear this with either a ponytail or bun.
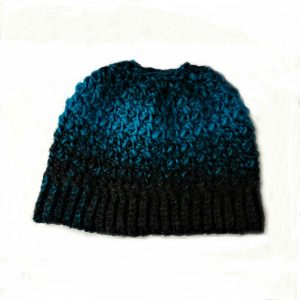
I’ve been designing a series of hats using this Lion Brand Scarfie yarn. I’ve made three hats from this skein alone! I love the color changes and the feel of this yarn.
It’s also really easy to work with and you can use a large hook to create a quick project. I’ll be releasing the rest of the hat patterns I’m working on in the coming weeks – I’m getting them ready for Christmas gifts.
Who doesn’t need a warm hat this time of year? Especially when it’s made from such a wonderful yarn!
Like messy bun hats? Be sure to check out the Ripple Lace Messy Bun Hat and the Simple Textured Messy Bun Hat.
Hope you enjoy!
Buy the ad-free pdf or favorite on Ravelry here
Quick and Easy Messy Bun Hat
What You’ll Need
Yarn: Lion Brand Scarfie (Acrylic/Wool, each 5.3oz/150g and 312 yds/285 meters): 1 ball #209 Charcoal/Aqua
Hooks: K (6.5mm) and L (8.0mm)
Notions: yarn needle
Gauge: 11 sts and 12 rows = 4″ in mbs with larger hook
Finished Size: Approximately 20″ circumference and 7 1/2″ long
Special Stitches:
Modified Bean Stitch (mbs): insert hook into st and pull up a loop, yo, insert hook into same st and pull up a loop (4 loops on hook), yo, pull through all loops on hook.
Modified Bean Stitch 2 Together (mbs2tog): insert hook into first mbs, pull up loop, yo, insert hook into next mbs, pull up loop (4 loops on hook), yo, draw through all loops on hook.
PATTERN
Ribbing:
With smaller hook, ch 9.
Row 1: Sc in 2nd ch from hook and each ch; turn – 8 sts.
Row 2: Ch 1, sc back loop only in each st; turn.
Repeat row 2 until piece measures 20″ from beginning. Join with slip st to first row, making a circle. Be careful not to twist ribbing.
Change to larger hook. Ch 1, sc 54 sts evenly around edge of ribbing.
Round 1: Ch 2, mbs in first st, *ch 1, sk next sc, mbs in next sc; repeat from * to last st, ch 1, skip last sc, join to first mbs with slip st; turn – 27 mbs.
Round 2: Ch 2, mbs in first mbs, *ch 1, mbs in next mbs; repeat from * to end, ch 1; join to first mbs with slip st; turn.
Rounds 3-12: Repeat round 2.
Round 13: Ch 2, mbs in first mbs, (ch 1, mbs in next mbs) 6 times, *ch 1, mbs2tog, (ch 1, mbs in next mbs) 7 times, repeat from * two times, mbs2tog, ch 1, join to first mbs with slip st; turn – 24 mbs.
Round 14: Ch 2, mbs in first mbs, ch 1, mbs in next mbs, *ch 1, mbs2tog, (ch 1, mbs in next mbs) 2 times; repeat from * four times, ch1, mbs2tog, ch 1, join to first mbs with slip st; turn – 18 mbs.
Round 15: Ch 2, mbs in first mbs, ch 1, mbs2tog, *ch 1, mbs in next mbs, ch 1, mbs2tog; repeat from * to end, ch 1, join to first mbs with slip st; turn – 12 mbs.
Round 16: Ch 2, *mbs2tog, ch 1; repeat from *, join to first mbs with slip st – 6 sts. Fasten off.
Use beginning tail to sew up seam in ribbing. Weave in ends.
Purchase a large print, ad-free printable pdf of this pattern on Etsy
That’s it! Just leaving that opening at the top makes room for a ponytail or bun. I hope you’ve enjoyed this free pattern for the Quick and Easy Messy Bun Hat. Happy crocheting!
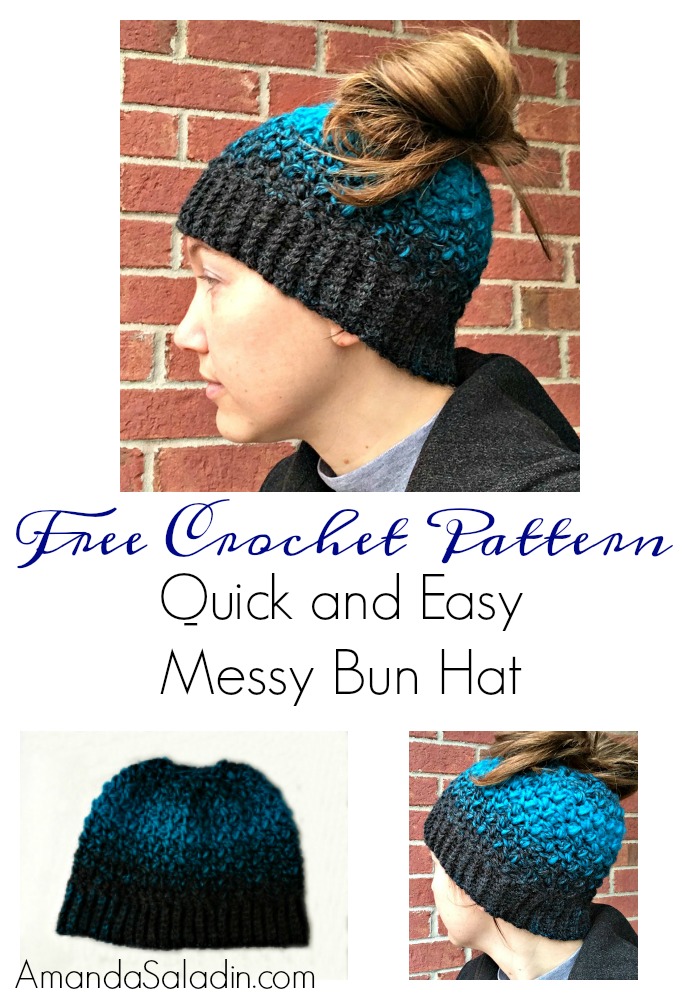
What color/brand was used on the green and white hat that is pictured above?
Hi Ann,
That is also Lion Brand Scarfie yarn, just in a different color way. ?
Thanks! Do you happen to remember the color? The closest at the store I could find was cream/teal.
Just looked at my skein and it is the cream/teal. It’s a really dark teal so it shows up as a green online. It works out really nice!
I like this hat so much better than the patterns for little girls that I’m finding. Do you have instructions for sizing this for an 8 year old with a small head?
I have not sized it for any other size but give me some time to do the math and you could test it out for me. I have a seven year old with a smaller head so I will use him as my guide for how big around it needs to be and I will email you. ?
do you have the size for a 10 year old?
So far this pattern is only adult sized but you could try making it with a smaller hook in about a 16-18″ diameter for a child.
I thought this was a Free pattern. I’m not finding a Download button.
It is a free pattern but there is not a download option. The pattern is listed above.
been looking everywhere for this.
Glad you found it. 🙂
i have just now run across the messy bun hat or ponytail hat. they are really cool and different . i enjoy knifty knitter loom knitting. i would to have a free pattern of some of the hats on this site. you do a wonderful job in your work. thanks for sharing with us.
I love loom knitting! I teach my high school fashion classes how to loom knit and even just taught my oldest son (he’s 7). I love how easy and relaxing it is – and much easier to teach to a group than regular knitting or crochet! I’m not sure how many patterns are out there for loom knitting because I’ve only ever done the basics. I hope you find a great loom knit messy bun hat pattern 🙂
Where can you buy Scarfie yarn in the Dedham, Ma area………ACMOORE doesn’t have uit
Hi Edbna, I got mine from a local Joann. Do you have a Joann, Hobby Lobby, or Michael’s? If not you may have to order it online. I’m not familiar with Dedham, Ma but we did live outside of Springfield, Ma for a while.
I just so happen to have some Scarfie Yarn and want to use it. So happy to come across a messy bun hat pattern that calls for it. My only question is does this pattern cover the ears ?
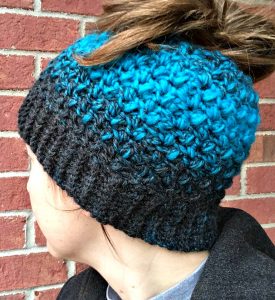
Hi Martha, it did cover my ears when I wore it for these pictures. You can see from the photos that it covers almost all the ear and if you want it a little longer you can add a couple of chains to the ribbing to make it longer or a couple of rounds where you work even.
Hi Amanda,
This is a great looking pattern, but I need it larger for both my head and for my son who has a lot of hair 🙂 are you able to help out with the modifications on the above pattern to accommodate that please?
Thanks heaps.
Sure! Give me some time to work the math on that and I will get back to you. I have had requests for 23″ circumference so I will work out the numbers for that size.
oh this is a good question!, i was just going to ask about modifications. a brim that is 60 st around fits me, and was wondering if i would make a difference if i made it that way.
The only difference with 60 sts around would be the decreases. As long as you can shape the crown it works. 🙂
Hi Debbie – check out the response I just wrote to Kerry for working the 60 sts. 🙂
Hi Kerry – I looked at the math for this pattern and after working the ribbing to 23″ you would sc 60 sts around (the math was actually 62 but that made for a more difficult decrease pattern.) That gives you 30 mbs. Work to round 12 on 30 mbs, then change round 13 to this:
Round 13: Ch 2, mbs in first mbs, ch 1, mbs in next 2 mbs, *ch 1, mbs2tog, (ch 1, mbs in next mbs) 3 times; repeat from * four times, ch1, mbs2tog, ch 1, join to first mbs with slip st; turn – 24 mbs.
Then you can work the rest of the decreases just like the smaller size and it should turn out fine! If you want it a little longer (mine came to the bottom of the ears) just keep working even until you are ready to work round 13.
Let me know how it turns out! 🙂
Hello Amanda, I just love this pattern thank you so much!!!! I have all ready made many of them, but I would like to make one for my granddaughter and wanted to know if you had a pattern for a child size? Again thank you for the awesome pattern 🙂
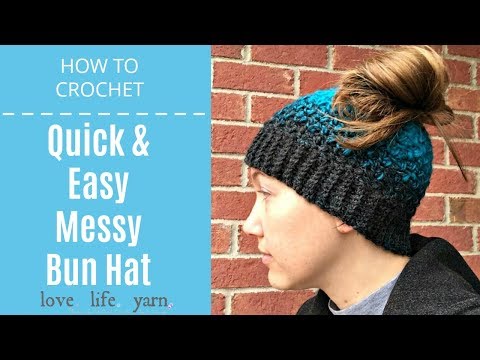
Hi Tammy! So glad you like the pattern. I just made a third one for the video tutorial and I still love this yarn and stitch pattern together. I might have to make something else with the combination. I don’t have a pattern for a child size but others have had success using a smaller hook and making the ribbing 18″ long to fit a smaller head. Try using 1-2 sizes smaller hook after the ribbing. Hope this helps! 🙂
thank you so much for doing a pattern AND a video!! i have the hardest time reading patterns, but once i get the hang of it all i need is a pattern to remind me, but I’ve never had both video and pattern before…SO much easier!!
You are so welcome! I am working on adding videos to all the patterns on this site but it is definitely a work in progress. 🙂
that would be awesome! btw, cracked up when you had to change locations…as a mom of two little boys, i can completely relate!!!
Yes! It is so hard to make any videos at home with my little guys! We are about to have our fourth boy so it is crazy around here. Our oldest is almost 8.
I purchased the downloaded pattern for this and a baby blanket and my credit card was charged, but there is no download in my email.
Hi Mary,
If you purchased on Etsy there should be a link to download them there. Click on your profile and check out purchases. Thanks! 🙂
Thank you so much for the lovely pattern.
I do have a question about the yarn. It is listed as bulky, but having used it on another hat, if
it is a bulky, it is a very thin bulky. Did you find the same or is it just me.
Hi Nancy,
I do agree with you. This is a thinner bulky yarn than others I have used.
Ok I’m working this pattern rt now and I’m on row and it shows that when your done with this it would be 18 mbs but when I do by it I’m only coming up with 17. Is there something I’m doing wrong?
Hi Kathleen,
Have you checked out the video tutorial for this pattern? It might help out 🙂
Why is the ch 2 at the beginning of a row necessary?
Hi Rebecca,
I found that I needed a ch 2 at the beginning of a round to get the right height for the mbs. I haven’t tried just working it in rounds – if you try that and like it, please let me know! 🙂
Thank you Dear. I made it as you instructed and it’s so pretty. Took me about an hour and a half. I appreciate your prompt response.
Yay!! So glad to hear it turned out well 🙂
i made this for a friend and it was cute – how do I convert this to a full hat (no hole) my hair isn’t as long and I love this pattern
Hi Jen! I’ve already done this for you! Check out The Beth Hat (made for a friend named Beth!) – it’s the same hat that is just closed at the top. 🙂
Thank you so much! That hat is amazing 🙂