
Crochet a super functional and fun wristlet keychain – perfect for keeping those keys handy! By adjusting the length, you can also make a super functional lanyard.

Design Story and Inspiration for This Crochet Wristlet
Occasionally when I am in a craft store I like to check the jewelry section for anything that would inspire me. Sometimes it’s been a bracelet craft, other times beads, but usually I find something that sparks an idea.
This time, it was a package of swivel clasps. Immediately I thought of a lanyard or keychain and picked up a package of four. I knew the thermal stitch was a great thick stitch that didn’t stretch out (I use it for bag handles all the time) and I decided to create a super easy project that is as functional as it is fun!

Yarn Options for Our Crochet Keychain
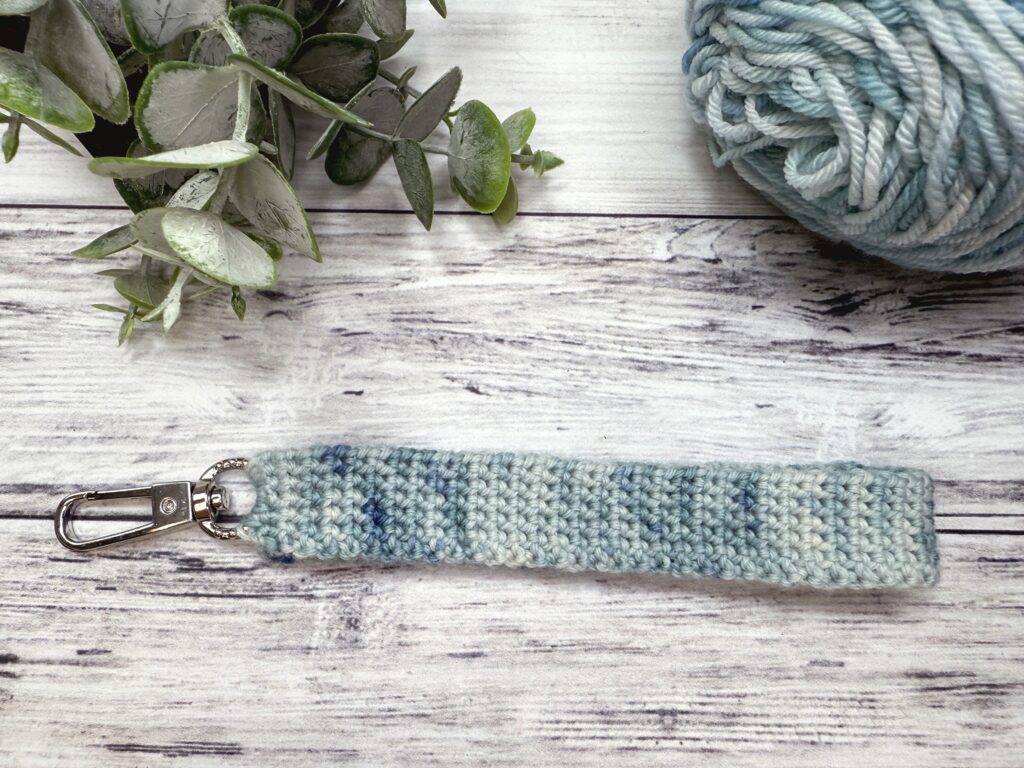
I had some extra fingering weight yarn in my stash that I just knew would be perfect for this project. The subtle color changes in this hand dyed yarn were exactly what I was looking for and I love the way this turned out!
Feel free to use any fingering through worsted weight yarn that you like. Just adjust the stitch count to be as wide as you would like it (I’d suggest 4 sts for DK or worsted and check your yarn label for hook size suggestions).
I would not recommend using bulky or super bulky yarn for this project as I feel they would be too chunky, but feel free to experiment if you like.
So, this is a great stash busting project – find some yarn in that stash and get going! 😀
Buy the ad-free PDF of this pattern and crochet on the go!
Crochet Wristlet Keychain
What You’ll Need
Yarn: Fingering weight yarn, 1 skein (or see yarn suggestions above for help using different weights)
Crochet Hook: US Size F (3.75mm) or hook size suggested on yarn label if using different weight yarn
Notions: Swivel clasp, yarn needle, scissors
Gauge: Not crucial for this project
Finished Size: Approx. 7″ long (including clasp) after both ends attached to swivel clasp
Stitch Abbreviations
Chain (ch)
Single Crochet (sc)
Video Tutorial for the Easy Crochet Wristlet

Purchase the ad-free PDF of this pattern in my shop here!
Crochet Wristlet Keychain Pattern
To work first round, you will start with a slip knot on your hook and work around the ring of the swivel clasp by placing your hook inside the ring. Please see video tutorial if you need help.
Row 1: Working around the ring of the swivel clasp, sc 6; turn.
Row 2: Ch 1, sc back loop only of each st; turn.
Row 3: Ch 1, *insert hook into back loop only of first st and into missed front loop two rows below, work a regular sc into these loops; repeat from * for each st; turn.
Repeat row 3 until piece is desired length. I did 11.5″ but you can make it any length you want – even turn it into a crochet lanyard by working until it is 33-34″ or longer. You can easily check length by folding in half.
Final Row: Ch 1, *insert hook into first st and into missed front loop two rows below, work a regular sc into these loops, repeat from * for each st; turn.
I would recommend blocking before finishing. I pinned my wristlet onto a blocking board, sprayed it with water and let it dry. It was curling a bit before blocking, and none at all after. Then, move on to the finishing.
Finishing
Fold wristlet in half, bringing the last row to the ring of the swivel clasp. Pull yarn through last stitch and use a yarn needle to sew last row to swivel clasp. Please see video tutorial if you need help.
Weave in ends.
Final Thoughts on This Easy Crochet Lanyard or Wristlet
I’m super excited to use this on my keys and planning on making more – and even a lanyard or two! I love the way the thermal stitch worked for this project and hope you enjoy it as much as I do!
Happy Crocheting,
Amanda