
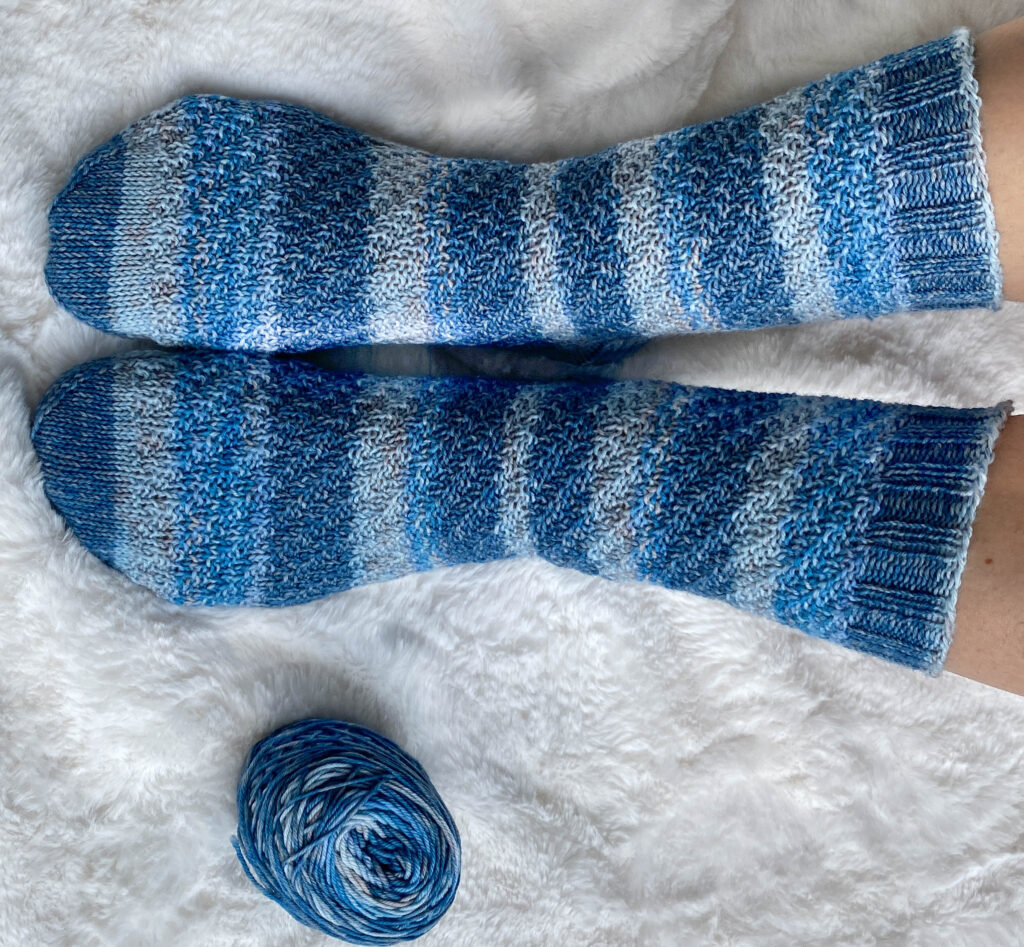
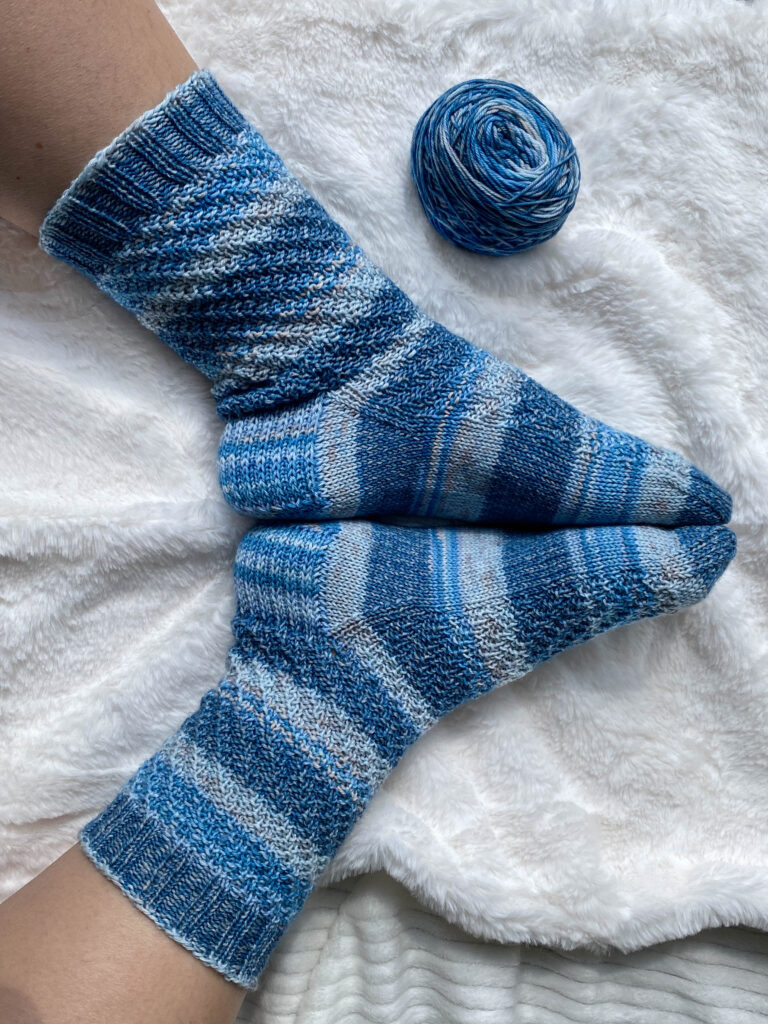
Looking for a fun and easy knitted sock pattern? Check out our Static Socks!
Purchase the ad-free PDF of this pattern here in my shop!
There’s a special joy that comes from knitting a pair of socks. Whether you’re an experienced knitter or you are a first-time sock knitter, the process of turning a beautiful skein of yarn into a pair of comfy socks is magical.
But if you’ve ever felt intimidated by knitting socks, you’re not alone. Many believe that knitted socks are only for the most experienced knitters, however, with the right guidance, tools and and a touch of patience, anyone can knit a beautiful pair that fits like a dream.
In this guide, we’ll walk you through an easy sock pattern, designed to fit snugly from the cuff right down to the toe. Whether it’s your first pair of socks or your fiftieth, this simple pattern is perfect for you to dive into the world of sock knitting and it will help you create something that is both beautiful and functional.
Why Knit Socks?
The world of knitting is huge and there are so many options out there for the perfect project. So why choose socks? Here are some of my favorite reasons:
- Hand-knitted socks are unique. Unlike the socks you can buy at the store, hand-knitted socks are crafted with care, love and a personal touch. Each pair tells a story, reflecting the maker’s style, yarn choice, and even mood during the knitting process.
- The coziness factor. There is nothing quite like slipping your feet into a pair of cozy socks, especially when they are hand-knitted. The warmth, comfort and customized fit of handmade socks can’t be matched by store bought, especially during the chilly months.
- They are a great outlet for creativity. Knitting socks allows for endless creativity. From choosing your favorite colors (or the wearer’s favorite colors) to experimenting with intricate patterns, socks are a wonderful way to express individuality. Whether you are crafting fun socks with playful designs or elegant ones with a lace pattern or a simple cable motif, the possibilities are endless.
- They are economic and sustainable. Wondering what to do with that single skein left over from a project? Socks are the answer! They don’t require much yarn so they are perfect for using up leftover skeins. Plus, hand-knitted socks are a sustainable choice, reducing the need for mass production.
- The joy of gifting. Hand-knitted socks make wonderful gifts. Whether it’s for a birthday, Christmas, or just because, gifting a pair of handmade socks is a gesture that speaks volumes about the thought and effort put into it.
Materials and Tools: Everything You Need for Your Knitted Socks
To make sure your sock knitting journey is as smooth as possible, it’s important that you gather all the materials you need before you begin. Here’s a detailed list of what you’ll need to craft our perfect pair:
Yarn:
- Type: Knit Picks Static
- Quantity: 1 skein (equivalent to 437 yards or 100 grams). Note: The specific colorway used in this pattern has been discontinued, but feel free to choose a color that resonates with your style. You can also substitute any fingering weight (category #1) yarn that gets the same gauge. See our guide to the best yarns for socks here!
Needles:
- Type: Double-pointed needles (dpn), but these have also been made on circular needles using the magic loop method
- Size: US size 2 (2.75mm).
Notions:
- Yarn Needle: Essential for weaving in ends and ensuring a neat finish.
- Scissors: A sharp pair for cutting the yarn cleanly.
- Stitch Marker: This will help you mark the beginning of each round, ensuring consistency and accuracy in your pattern.
Style:
- This pattern follows a “Cuff to Toe” style, which means we’ll start knitting from the cuff and work our way down to the toe. This traditional method is favored by many for its straightforward approach and the ability to try on the sock as you knit.
Before diving into the pattern, take a moment to familiarize yourself with these materials and tools. Having everything at hand will make the knitting process seamless and enjoyable.
Understanding the Basics
Before diving into the knitting process, it’s essential to grasp the foundational elements of our sock pattern. This understanding ensures that you’re well-prepared and can navigate the pattern with confidence.
- Style of the Sock Pattern – Cuff to Toe: This pattern follows the traditional “Cuff to Toe” style. It means we begin our knitting journey at the cuff (the part that sits just above the ankle) and work our way down to the toe. This method is favored by many knitters, especially those at a beginner to intermediate skill level, due to its straightforward approach. Additionally, it allows you to try on the sock as you progress, ensuring a perfect fit.
- Finished Size and Fit: The pattern is designed to cater to a range of foot sizes. The finished sizes are:
- Small (7-inch foot circumference) to fit shoe size 4-6
- Medium (7.75-inch foot circumference) to fit shoe size 7-9
- Large (8.5-inch foot circumference) to fit shoe size 10-12By providing multiple sizes, the pattern ensures that you can craft a sock that snugly fits the intended foot, be it yours or a loved one’s.
- Gauge Matters: The gauge refers to the number of stitches and rows in a specified measurement, ensuring that the sock fits as intended. For this pattern, the gauge is 30 stitches and 38 rows equaling 4 inches (or 10 cm) in stockinette stitch. It’s crucial to check your gauge before starting the project. If your gauge doesn’t match, you might need to adjust your needle size or tension to achieve the desired result.
- Skill Level and Complexity: While the allure of hand-knitted socks might seem daunting to some, this basic sock pattern is designed to be accessible. Whether you’re a beginner looking to challenge yourself or an intermediate knitter seeking a reliable pattern, this guide caters to various skill levels. The key is to understand each step, take your time, and enjoy the process.
Understanding these basics sets the foundation for a successful knitting experience. With the right knowledge, patience, and passion, you’ll be well on your way to crafting a beautiful pair of socks that not only look great but also fit perfectly.
Purchase the ad-free PDF of this pattern in my shop here!
Static Socks (Easy Knitted Socks)
What You’ll Need
Yarn: Knit Picks Static, 1 skein (437yds/100g), fingering-weight yarn. (This particular colorway has been discontinued.
Needles: 5 dpn, US size 2 (2.75mm)
Notions: Yarn needle, scissors, stitch marker
Style: Cuff to Toe
Finished Size: Small (Medium, Large), 7 (7.75, 8.5) inch circumference to fit shoe size 4-6 (7-9, 10-12)
Gauge: 30 sts and 38 rows = 4” (10cm) in St st
Stitch Guide
Knit (k)
Purl (p)
PATTERN STITCH
Rnds 1-2: *K2, p2; rep to end.
Rnds 3-4: *P1, k2, p1; rep to end.
Rnds 5-6: *P2, k2; rep to end.
Rnds 7-8: *K1, p2, k1; rep to end.
Repeat rnds 1-8 for pattern st.
Purchase the ad-free PDF of this pattern in my shop here!
Easy Knitted Sock Pattern for the Static Socks
Sock Start:
Cast on 52 (60, 64) sts loosely.
Divide sts on 4 dpn’s as follows:
N1: 13 (15, 16) heel sts
N2: 13 (15, 16) instep sts
N3: 13 (15, 16) instep sts
N4: 13 (15, 16) heel sts.
Join and mark beginning of round (BOR).
Cuff:
Work cuff in k2p2 rib for 14 rnds. [1.5” from cast on edge] End at BOR.
Work in pattern for 52 (62, 62) rnds, completing sts on N3. Stop. [7 (8, 8)” total from the cast on edge.]
Heel Flap with Heel Stitch:
Slip N4 sts onto N1. 26 (30, 32) sts.
With RS facing, work back and forth as follows:
Rw 1: *Sl 1 purlwise, k1. Repeat from * to end.
Rw 2: Sl 1 purlwise, p to end.
Repeat these 2 rows until 24 (30, 30) rows are complete. Heel flap measures 1.9 (2.3, 2.3)”.
Turn Heel:
Note: Sl 1 = slip 1 purlwise
Rw 1 (RS): K14 (16, 18) ssk, k1. Turn.
Rw 2: Sl1, p3 (3, 5), p2tog, p1. Turn.
Rw 3: Sl1, k4 (4, 6), ssk, k1. Turn.
Rw 4: Sl1, p5 (5, 7), p2tog, p1. Turn.
Rw 5: Sl1, k6 (6, 8), ssk, k1. Turn.
Rw 6: Sl1, p7 (7, 9), p2tog, p1. Turn.
Rw 7: Sl1, k8 (8, 10), ssk, k1. Turn.
Rw 8: Sl1, p9 (9, 11), p2tog, p1. Turn.
Rw 9: Sl1, k10 (10, 12), ssk, k1. Turn.
Rw 10: Sl1, p11 (11, 13), p2tog, p1. Turn.
Rw 11: Sl1, k12 (12, 14), ssk, k1. Turn.
Rw 12: Sl1, p12 (13, 15), p2tog, p1. Turn.
Size 7-9 (10-12) ONLY
Rw 13: (RS) Sl1, k14 (16), ssk. Turn.
Rw 14: (WS) Sl1, p14 (16), p2tog. Turn.
ALL SIZES
14 (16, 18) sts remain.
Work 7 (8, 9) sts. BOR
Heel Gusset:
Note: to remain in pattern across the top of the sock due to no longer working the pattern from the beginning of round, you will need to skip two rows of the pattern sequence, this should align your pattern and keep the established pattern working across the top of the sock. The top of the foot (instep stitches) will be worked in the stitch pattern, while the bottom of the foot (heel stitches) will be worked in St st from here on.
With a free needle, knit remaining 7 (8, 9) heel sts. [N1]
Continuing with the same needle, pick up 12 (15, 15) sts along the side of the heel.
Pick up and knit a st from row below the first instep st to prevent a hole. [N1: 20 (24, 25) sts total]
With a free needle, work across 13 (15, 16) instep sts in pattern as established. [N2]
With a free needle, work across 13 (15, 16) instep sts in pattern as established. [N3]
With free needle, pick up and knit from row below the first heel st to prevent a hole.
With same needle, pick up 12 (15, 15) sts along side of the heel and work across remaining heel sts. [N4: 20 (24, 25) sts total] BOR
Shape Gusset:
Rnd 1: (Dec Rnd)
N1: Work to 3 sts from end. K2tog, k1.
N2: (Instep) Work even in pattern.
N3: (Instep) Work even in pattern.
N4: K1, ssk, work to end.
Rnd 2: Work even (pattern for N2 and N3, St st for N1 and N4).
Repeat Rnds 1 and 2 until there are 52 (60, 64) sts remaining (13 (15, 16) per needle).
Foot:
Continue working in rnds in established pattern (pattern sts for instep, St st for heel sts) until foot measures 7.5 (8.25, 8.75)” from base of heel.
Complete sts on N4. BOR
Shape Toe
Change to all k sts.
Rnd 1:
N1: (Sole) Work to last 3 sts, k2tog, k1.
N2: (Instep) K1, ssk, work to end.
N3: (Instep) Work to last 3 sts, k2tog, k1.
N4: (Sole) K1, ssk, complete round.
Rnd 2: Work even.
Repeat Rnds 1 and 2 until 36 (40, 40) total sts remain. 8 (10, 12) rnds
Work decrease rnd only until 16 sts remain. [8 instep sts, 8 sole sts]
Finishing
Work sts on N1. Slip sts from N4 to opposite end of N1.
Slip sts from N3 onto N2.
Holding two needles together, graft sts using Kitchener Stitch.
Weave in ends.
Block lightly if desired.
Work second sock.
You’ll Also Love These Other Free Sock Patterns
Mock cable socks (Great for the warmer months with its ankle length)

Super bulky socks (Great pattern for a beginner sock knitter. Works up quickly in super bulky yarn)
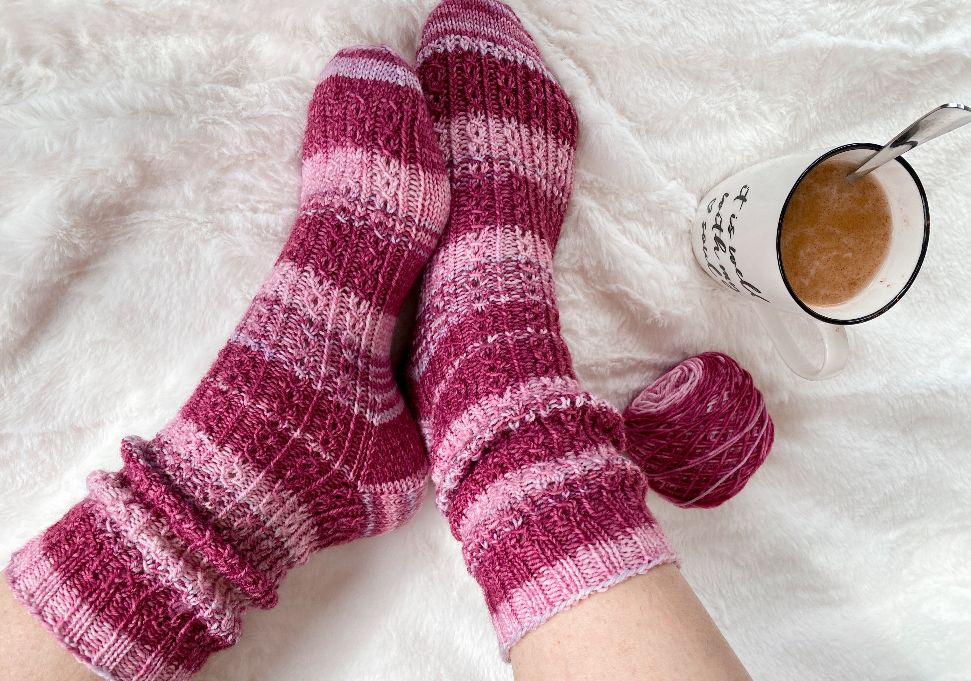
Eyelet rib socks (These easy socks feature a fun eyelet pattern)
Tips and Tricks for Knit Sock Patterns
Knitting socks can be a rewarding experience, but like all crafts, it comes with its own set of challenges. To help you navigate the most common sock knitting mistakes, here are some helpful hints and tutorial videos to go along with our detailed instructions for our sock pattern crafted with self-striping yarn.
1. How to maintain a consistent stitch count. One of the most common challenges in sock knitting is keeping a consistent stitch count. It’s easy to accidentally increase or decrease stitches, especially when working on intricate patterns. To avoid this:
- Always double-check your stitch count at the end of each round.
- Use stitch markers to segment your work, making it easier to count and track stitches. (This can be helpful in our pattern after you turn the heel. This way you mark the stitches worked in St st apart from the stitch pattern.)
- If you find you’ve messed up, it’s better to address it immediately rather than pushing forward. This ensures the overall pattern and fit remain consistent. Don’t worry, we’ve all done it!
2. Don’t skip blocking. Once you’ve finished knitting, blocking is the next crucial step. This process involves wetting the socks and then shaping them to dry, ensuring they achieve the desired size and shape. Blocking can:
- Enhance the overall appearance of your socks, making stitch patterns more defined.
- Ensure a better fit, especially if the socks are intended as a gift.
- Reduce any unevenness or curling in the fabric.
3. Helpful video tutorials. While written patterns are comprehensive, sometimes a visual guide can make challenging parts easier to understand. We’ve curated a list of video tutorials that can help you understand the techniques used in our pattern. These tutorials provide step-by-step guidance on the more intricate aspects of the pattern.
How to cast on for cuff down socks
How to work kitchener stitch
4. Engage with the Community: If you ever feel stuck or need inspiration, the knitting community on social media is a treasure trove of knowledge and encouragement. Join knitting groups, participate in discussions, and share your progress. You’ll find a wealth of helpful hints, support, and maybe even make some new friends along the way!
Final Thoughts on Our Easy Knitted Sock Pattern
Even though this free knitting pattern looks a little challenging, it’s actually a simple knit using only knit stitches and purl stitches to create a pair of gorgeous socks. I hope you will venture into the world of sock knitting – there are so many different designs!
Now is the perfect time to knit a nice pair of socks using our new pattern, a basic pattern or even a more complex pattern.
I hope you enjoy this free knitting pattern!
Happy knitting!
Amanda