
The knit stitch is the most basic stitch in knitting. As we move from knit to crochet, you will learn how to work the knit stitch.
Instructions for working this stitch with two needles are below.

After learning to cast on, the next skill you will need on your way from crochet to knit is the knit stitch.
If you are a crocheter learning to knit, you can practice this stitch with a crochet hook first to get used to the motion of it. I have included a tutorial for both crocheters and someone learning to knit with two needles that hasn’t crocheted before. Just skip to the section that applies to you.
Anatomy of the Knit Stitch
A stitch is really a loop of yarn drawn through another loop. When I was first trying to learn to knit I didn’t understand this, but once I realized that was what I was supposed to do, it just clicked.
The right side of a knit stitch makes the “V” shape that we are familiar with from store-bought sweaters. The wrong side of a knit stitch has a bump, or ridge.
Knit Stitch Tutorial for Crocheters

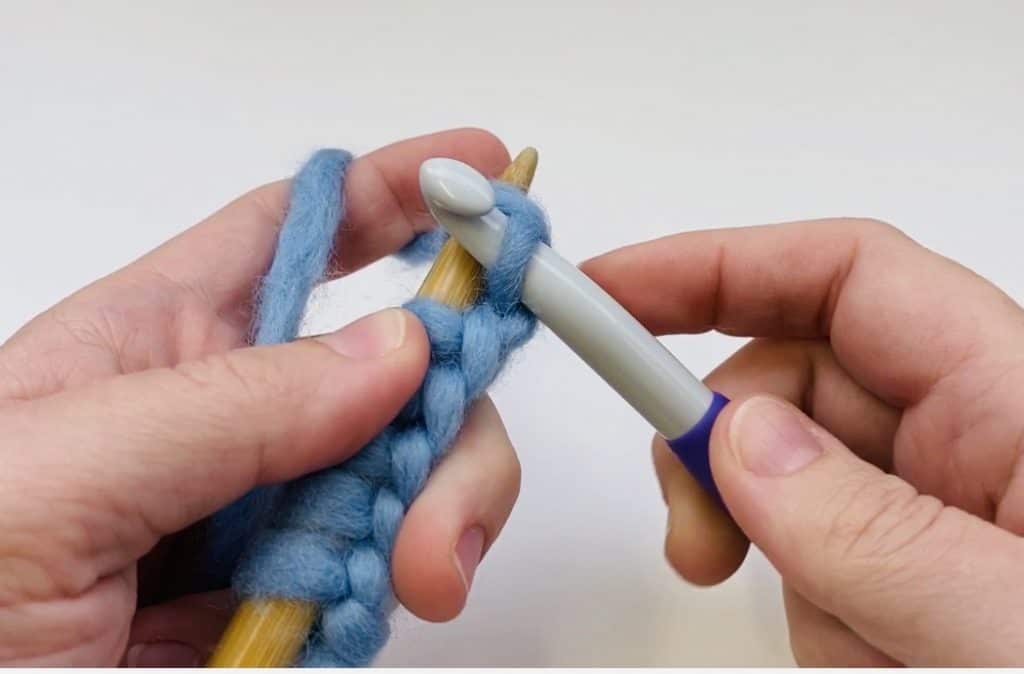
Step One: Insert hook into stitch, working behind the needle. It makes an “X” shape.

Step Two: Wrap the yarn around the hook from left to right (if you are right handed). This is the opposite motion of a yarn over and is called a yarn under.
Step Three: Pull the loop through.

Step Four: Push the first loop in the needle (the one you worked into) off the end of the needle.
You’ve made your first stitch! If you’re having trouble, check out the video tutorial below.
Knit Stitch Continental
The method we are using to transition from crochet to knitting actually has a formal name – Continental.
I was taught the English, or Throw, method when I learned to knit. When I transitioned to crochet it felt more natural to hold the yarn in my left hand, so eventually I retaught myself to knit with the continental method.
This method is perfect for crocheters because you hold the yarn exactly the same as you do in crochet. The biggest hurdle is remembering to yarn under instead of yarn over!
Continental Knit Stitch Tutorial
Maybe you’ve found this page and you are not a crocheter. Never fear! This is how you work the knit stitch with two needles.
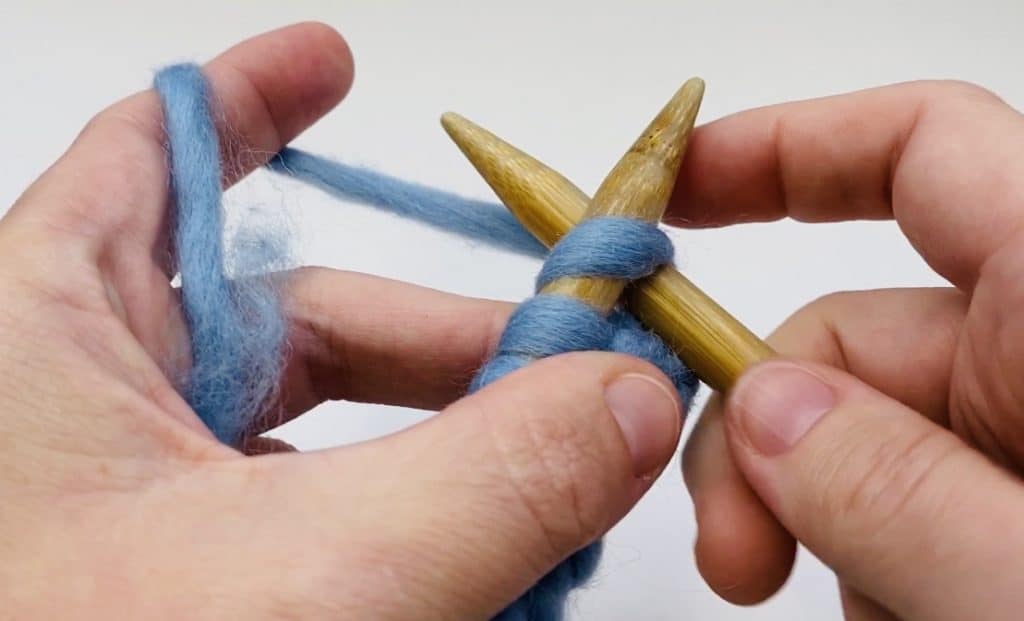
Step One: Insert right needle into stitch behind left needle. This makes an “X” shape.
Step Two: Wrap yarn around needle from left to right.

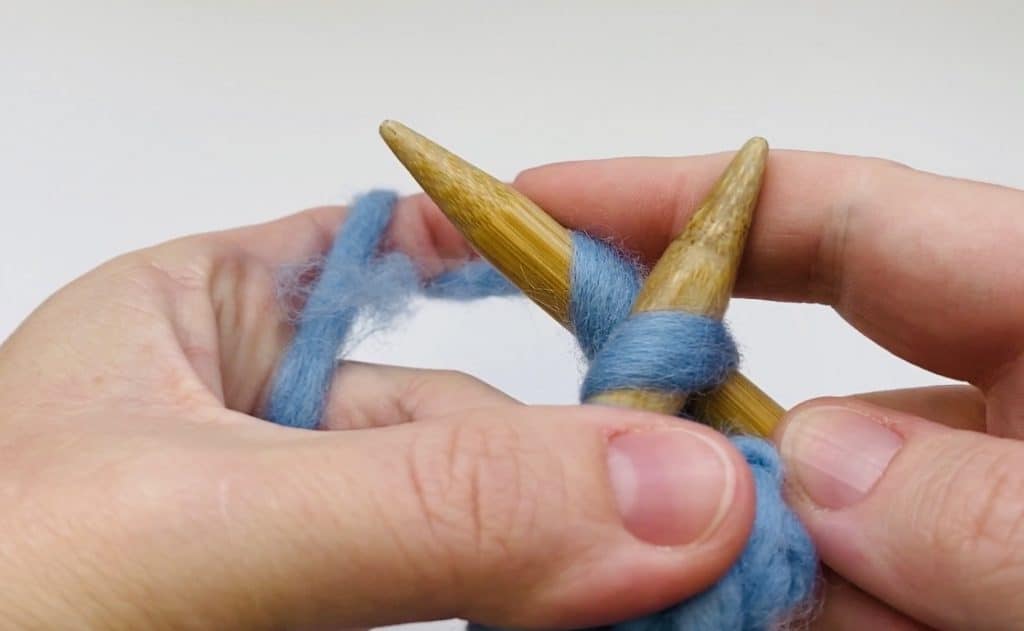
Step Three: Pull loop through, using tip of needle to help draw it through the loop on the left needle.

Step Four: Push the stitch off the left needle (the one you worked into).
You’ve made your first stitch! If you aren’t sure or are stuck, be sure to view the video tutorial.
Tutorial Video
Common Problems
- You’re stitches are getting too tight. Most of the time when this happens, you are making your stitches at the tapered part of the needle. Make sure to work on the shaft of the needle to keep your stitches the right size. You also could be holding your yarn too tightly. The yarn should feel comfortable in your hand and not be wound too tightly.
- Your knitting gets wider at the edges. Most of the time this is because new knitters work into the first stitch twice. The first stitch is usually looser and it’s easy to work into both “legs” of the stitch. Make sure you only work into the first stitch once.
- You turn to start a new row, but the yarn is attached to the second stitch instead of the first. This usually means you didn’t make a stitch in the last stitch of the previous row. Slide the loose stitch back to the other needle and knit into it.
- Your knitting has a hole in it. This is usually caused by an accidental yarn over. Be sure you are only wrapping your yarn around the hook when it is inserted into a stitch.
Knit Stitch Patterns

DO YOU HAVE ANY MORE OF THE FREE CROCHET ORGANIZER