
Looking for a quick and easy way to create something beautiful while learning a new stitch pattern? Check out this easy Textured Knitting Headband pattern.
Design Story and Inspiration for the Textured Knitted Headband
I wanted a small, easy knitting project that would allow me to work up a new stitch pattern (well, new to me!) so I decided a headband was just the thing!
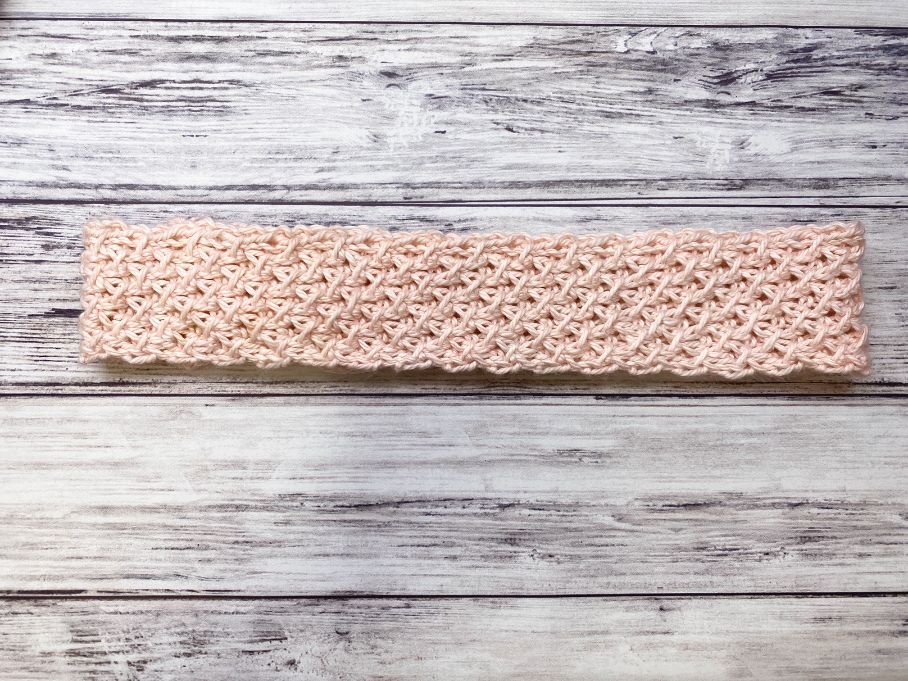
I worked up this headband with the Small Quilted Cross Stitch, which gives amazing texture but doesn’t require any twisted stitches or a cable needle – just passing a slipped stitch over 3 stitches.
Yarn Options for a Knit Headband Pattern
There are a ton of options out there for a knit headband, and you really can’t go wrong here unless you are making this for someone who can’t wear wool and you choose a wool yarn!
I designed mine with Yarn Bee Sugarwheel Cotton (I’m working on using up all the odds and ends I have of this wonderful yarn!) and I love the way it turned out for a warm season headband.
You could easily make this in acrylic or any other yarn that gets gauge. Really, since you are working to length the gauge isn’t even as important for this project as it is for many others – it would just affect the width of your headband, so use a fine or bulky yarn if you choose!
You can also make this pattern super simple by only using Stockinette stitch, ribbing or garter stitch for the entire pattern if you like.
Before we begin… Let’s get Social!
I would love for you to come follow me on
Instagram (get sneak peeks of what’s coming up!)
My Facebook Page (come join the fun!)
Follow me on Pinterest (I pin tons of free patterns to my boards!)
Join my Facebook group (lots of awesome crochet talk there)
Also, you can find me on Ravelry or join my subscribers on YouTube.
How to Customize this Easy Textured Headband
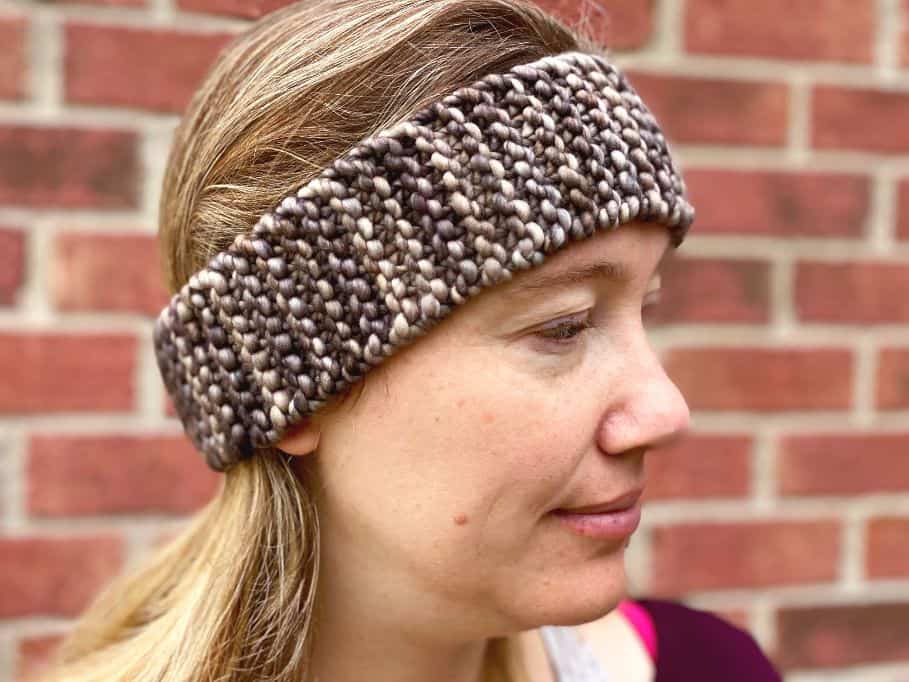
You can easily make this in any circumference you like. I like to make my hats 20″ long so I decided to make the headband the same length and it worked perfectly.
So, if you would like to make this for a smaller child (or need it larger), then just know your desired head circumference and knit until it is that long.
You can also make it wider if you like by casting on more stitches as this stitch pattern is a multiple of 4 + 1, so make sure your total number of stitches matches the number called for in the stitch pattern (the sample here is 17 sts, which is 16 + 1).
A wider band would make a great ear warmer!
More Great Free Knitting Patterns
Get the Ad-Free PDF
You can find the ad-free PDF for this pattern in our subscriber exclusive resource library!! Sign up below for access and get free pattern downloads, printables, charts and more!
Easy Textured Knitted Headband
What You’ll Need
Yarn: Yarn Bee Sugarwheel Cotton (DK weight #3) in Paris Mornings, or any yarn that gets gauge
Knitting Needles: US Size 7 (4.5mm) – you can use straight needles or a circular needle for this simple pattern (I like circulars because then the ends aren’t sticking out while I work)
Notions: Tapestry Needle, scissors
Gauge: 34 sts and 40 rows = 4″ after blocking
Finished Length: Approximately 20″ circumference and 2″ wide
Stitch Descriptions and Abbreviations
Stitch (st)
Knit Stitch (k)
Purl Stitch (p)
Pass Slipped Stitch Over (psso) – Insert tip of left needle into slipped stitch, lift up stitch and pass over stitches indicated
Easy Textured Headband Knitting Pattern
Cast on 17.
Row 1 (WS): K1, *p1, k1; repeat from * to end.
Row 2: P1, *with yarn in back, slip 1 st purlwise, kfb of next st, k1, psso the last 3 sts made, p1; repeat from * to end.
Row 3: Repeat row 1.
Row 4: P1, k1, p1, *with yarn in back, slip 1 st purlwise, kfb of next st, k1, psso the last 3 sts made, p1; repeat from * to last 2 sts, k1, p1.
Repeat rows 1-4 until piece measures 20″ from beginning.
Finishing
Use tail ends to seam edges together using mattress stitch. Weave in ends.
That’s it! I hope you’ve enjoyed this tutorial for the Easy Textured Headband Knitting Pattern. Make sure to check out all of my free knitting patterns.
Happy Knitting!
Amanda