
Today we are going to learn all about the purl stitch and how to knit it. Hone your knitting skills with this easy tutorial.

The purl stitch, along with the knit stitch, form the basis for all knitting patterns. If you can master these two stitches, you have the basics down. From here, it is learning how to manipulate these stitches into different arrangements, work stitches together or increase stitches, etc. You will use these two basic stitches for almost every knitting project you make (a few only use the knit stitch).
Purl stitches leave little “bumps” on the front of the fabric, whereas the knit stitch pushes the bumps to the back, leaving a nice “V” shape on the front of the fabric.
When you work garter stitch, you see these bumps on both sides as you knit each row. In Stockinette Stitch, you work a knit row and then a purl row to keep the bumps on the back of the fabric (when working it flat).
Tips for the Perfect Stitch
1. No matter which method you prefer for purling, continental or English (I will show both below), the working yarn is always held in the front. If you have just completed a knit stitch and now need to purl, bring the yarn to the front in between the needles. (As a new knitter this eluded me for a while! It was so hard to do a rib stitch pattern where you switched back and forth every stitch or two!)
2. You work the new stitch into the front of the stitch on the left needle. This is the opposite of knit, where you work into the back of the stitch.
3. Wrap the yarn counterclockwise around the right hand needle. This goes for either method of knitting. If you are a crocheter learning to knit, it is the opposite of the “yarn over”.
4. When you pull the new loop through, it should be in front of the old stitch on your right knitting needle, then you are ready to slip the original stitch off your left hand needle.
Purl Stitch Video Tutorial
How to Work the Purl Stitch Continental
Step One: Hold the working yarn in your left hand. I like to wrap mine around my pinky and hold it up with my index finger as shown.

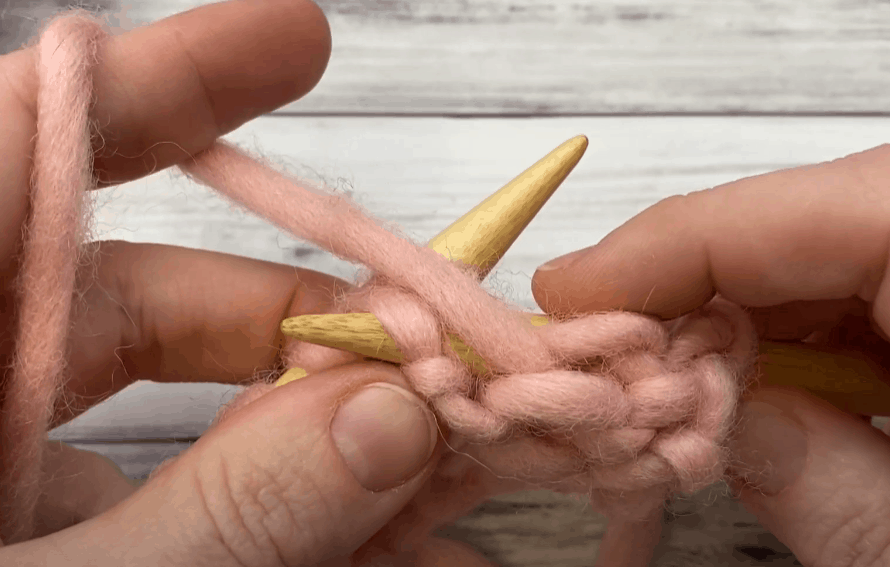
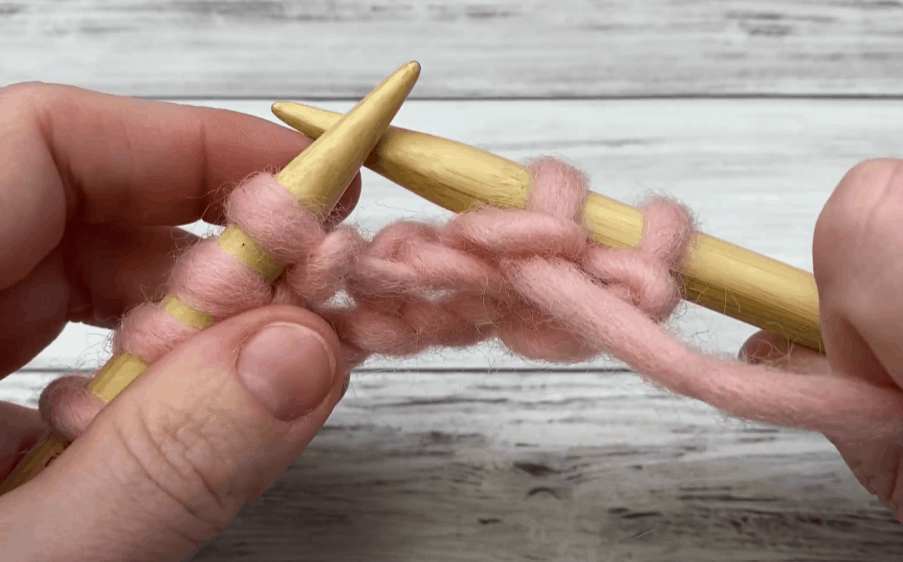
Step Two: With yarn in front, insert right needle into front of stitch from right to left in front of the left hand needle.
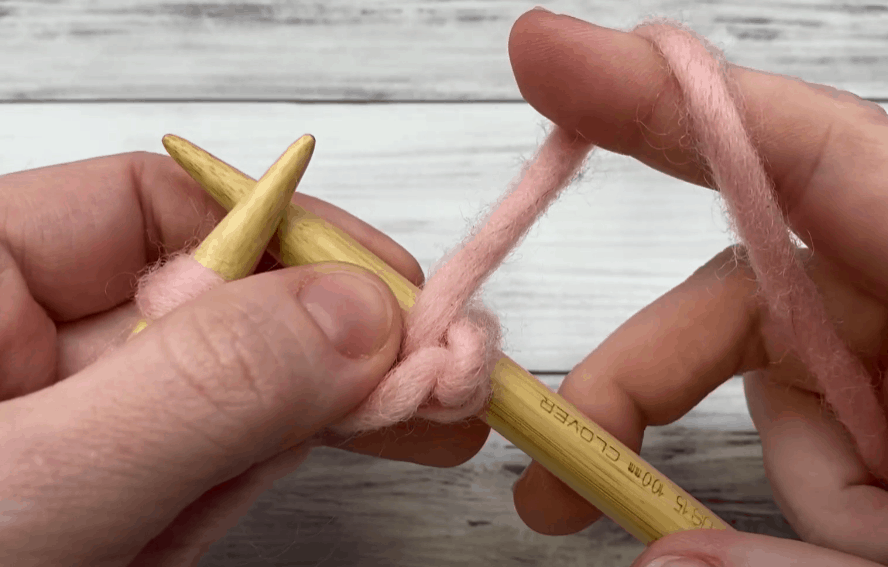
Step Three: Holding the yarn taut on your left index finger, wrap the yarn counterclockwise around right needle.

Step Four: Use the tip of the right needle to pull the yarn through and toward the back of the work.

Step Five: Push the old stitch off the left hand needle.

One purl stitch made!
How to Work the Purl Stitch in the English (or Throw) Method
This is the method that I use and am more familiar with, however it is not as fast as Continental, so if I were a new knitter, I would learn Continental.
Step One: Hold the working yarn in your right hand. I like to wrap mine around my pinky for tension and hold with my index finger.
Step Two: With yarn in front, insert right needle into front of stitch from right to left in front of the left needle.

Step Three: Holding the yarn taut with your right hand, wrap the yarn counterclockwise around the right needle.
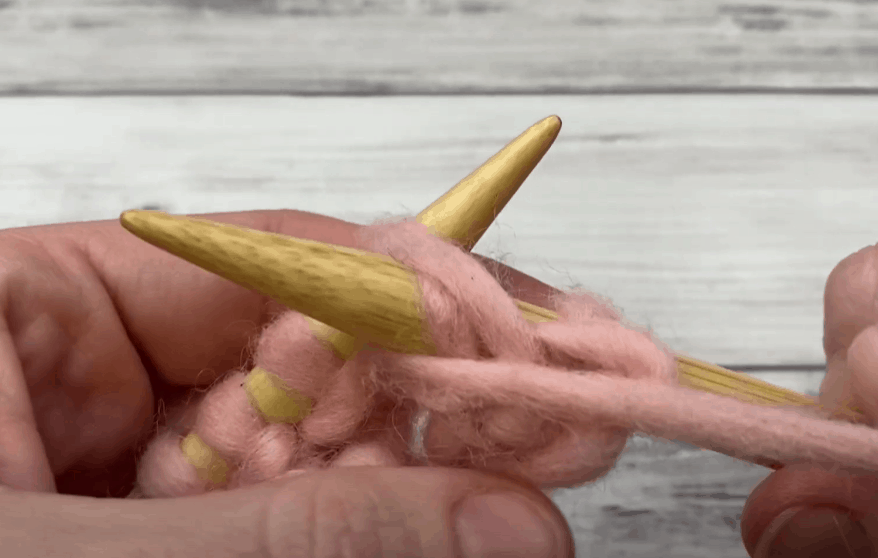
Step Four: Use the tip of the right hand needle to pull the yarn through and toward the back of the work.

Step Five: Push the old stitch off the left hand needle.
One purl stitch made!
Working Purl Stitch in the Round
The good news is that there is no difference in technique when purl stitching in the round. You will still work it in the same manner, whether you are knitting Continental or English.
One note of caution, though, that I have found when working purl stitch in the round is that if I am changing from knit to purl in between needles (as in dpn’s or with the magic loop method), sometimes I don’t get my yarn in the right position and I get it crossed in front of the stitch. If this happens to you, simply take the needle out of the stitch (holding the stitch carefully so it doesn’t unravel) and move he excess yarn to the back of the work, then inserting your needle again to keep working.
You Might Like These Free Patterns That Use the Purl Stitch:
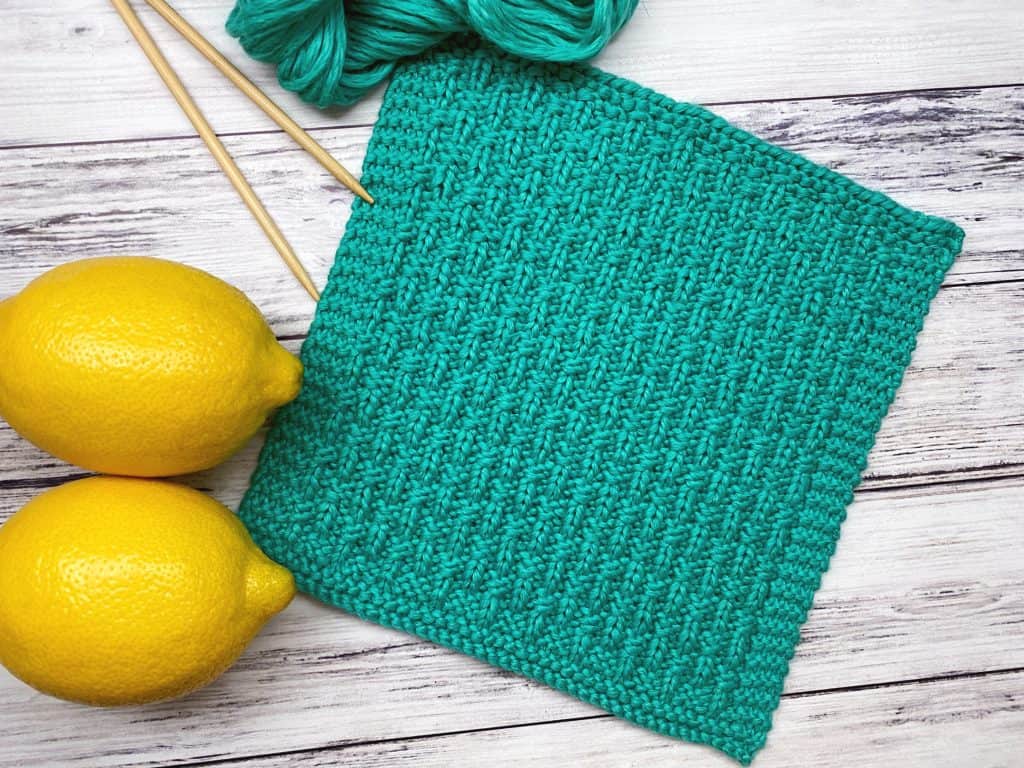
This simple project is great for practicing those knits and purls! It has a border of garter stitch and then a combination of knit and purl stitches to create a rich textured wash cloth that is as beautiful as it is functional.

This hat is knit flat! It has a seed stitch border to get that practice changing between knit and purl, and then it uses Stockinette Stitch to form the rest of the hat. NO shaping required!! Great for beginners.
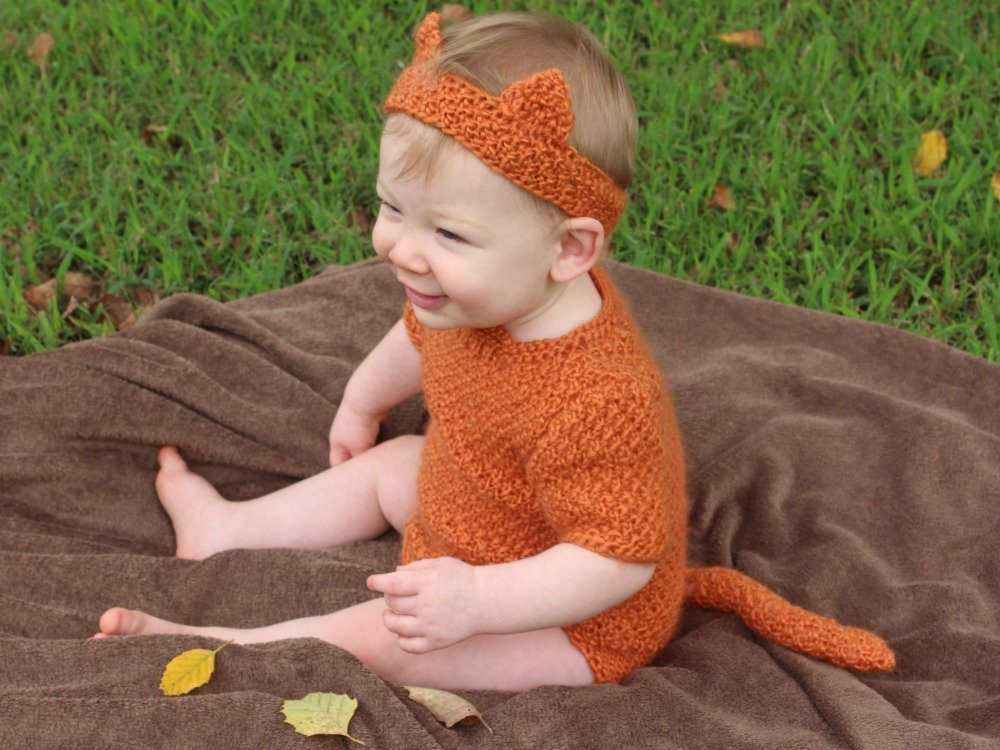
This sweet baby onesie and headband use the seed stitch to give texture. This will give you practice changing from knit to purl, but the onesie does have some shaping skills that you need to know to create this project. The headband is super simple if you can work in the round.
_____________________
That’s it! Today we learned how to work the purl stitch in both Continental and English styles. I hope you’ll give this a go and try a free pattern listed above to practice!
Happy Knitting!
Amanda