
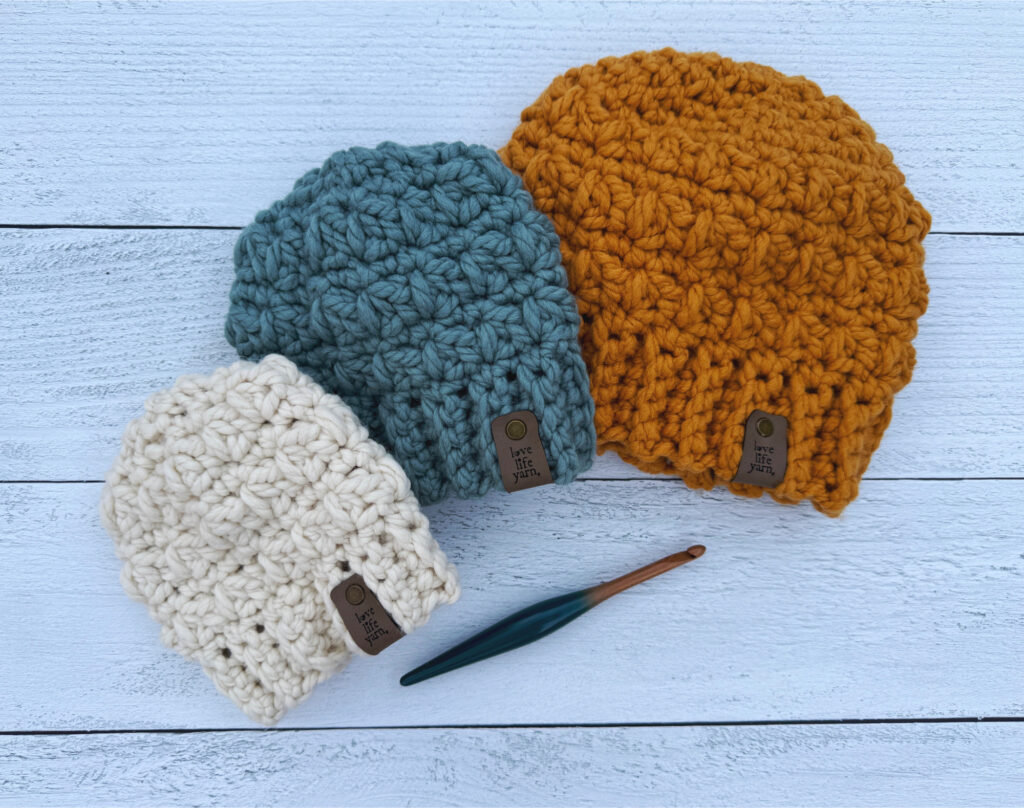
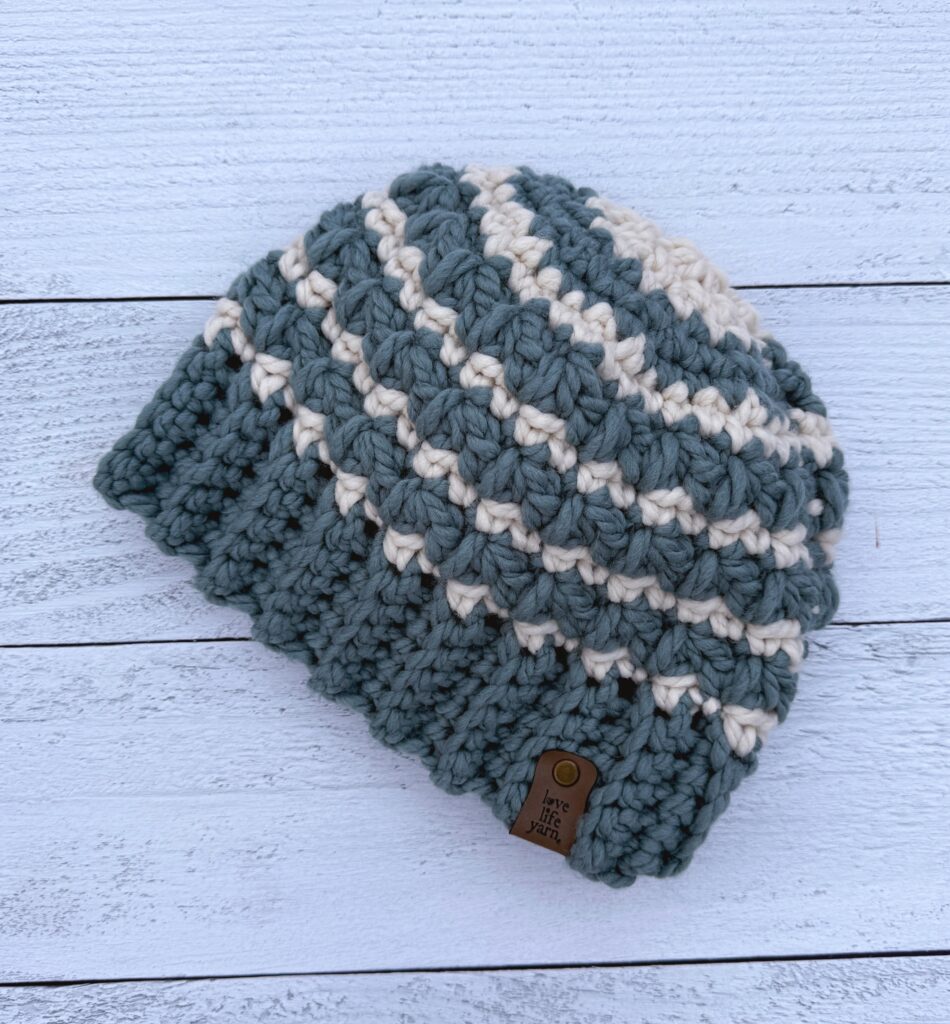
Crochet a warm, snuggly hat pattern in less than an hour with our Textured Super Bulky Beanie pattern. Sized for newborn through adult large!
Purchase the ad-free PDF of this pattern with all 7 sizes here!
Design Story and Inspiration for This Easy Crochet Beanie
Do you ever find yourself in love with a certain stitch and making lots of items with the same stitch? That happens to me, and lately I’ve fallen in love with the mixed cluster stitch.
This stitch is so fun and gives amazing texture! I paired it with an easy single crochet brim, and this project works up super quickly. Like, 30 minutes for the smallest sizes quickly!
If you’re not sure about the mixed cluster stitch, don’t worry, there is a complete video tutorial to walk you through each step. Once you get the hang of this stitch, it’s a fun and enjoyable stitch, and you might find yourself making several projects with it.
I’ve designed a few things using the mixed cluster stitch, and so my next project was definitely a hat! So I set out to design one. It took a few tries to get the decreases just right, but it was totally worth it. I can’t wait to gift these hats!
Other Mixed Cluster projects on the blog:
Mixed Cluster Blanket (a fan favorite!)
Mixed Cluster Mug Cozy
You’ll see this stitch again on the blog for sure!
Yarn Options for This Textured Crochet Hat
I created this pattern using Lion Brand Wool Ease Thick & Quick yarn, which is a super bulky yarn (category #6). I love how quickly it works up and it’s available in SO many different colors.
Feel free to use any super bulky weight yarn that you like for this pattern (you can even hold strands of yarn together!), just double check that it gets the same gauge. Do I hear any stashes getting busted?
Purchase the ad-free PDF with link to video tutorial and crochet on the go (All sizes included)!
Textured Super Bulky Beanie
What You’ll Need
Yarn: Lion Brand Wool-Ease Thick & Quick, or any super bulky weight yarn that gets gauge (Category #6), 1 skein per size
Crochet Hook: US Sizes L (8.00mm)
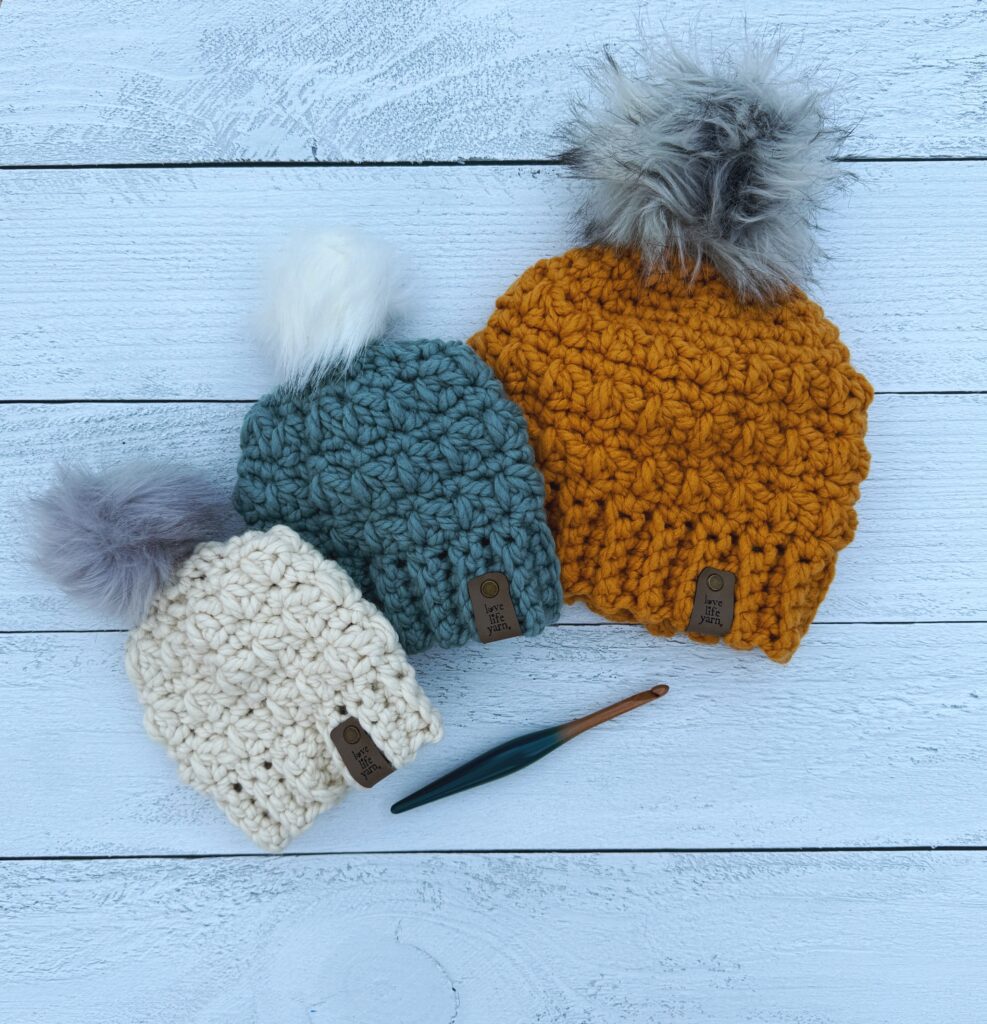
Notions: Yarn needle, scissors, faux fur pom pom (optional)
Gauge: 8 sts and 8 rows = 4” (10 cm) in single crochet
Abbreviations
Chain (ch)
Slip Stitch (slip st)
Single Crochet (sc)
Decrease (dec) – insert hook in first loop only of next 2 sts, draw up a loop, yo and draw through 2 loops on hook
FINISHED SIZES OF HAT:
| Size | Circumference (inches) | Circumference (cm) |
| Newborn | 12 | 30.5 |
| Baby | 14 | 35.5 |
| Toddler | 16 | 40.5 |
| Child | 18 | 45.5 |
| Adult S | 20 | 51 |
| Adult M | 22 | 56 |
| Adult L | 24 | 61 |
Special Stitches
Mixed Cluster Stitch (MC) – yo, insert hook into first st as indicated, yo, draw up loop, yo, draw through 2 loops, skip 1 st, [yo, insert hook into next st, yo, draw up loop] twice all into same st (6 loops on hook), yo, draw through all loops on hook. Note: St is worked across 3 total sts for the first MC, then each subsequent MC begins in the same st as the last. (Please see video for help!)
Notes: Ch 2 at beginning of a row or round does not count as a hdc.
For a two color hat, work all sc rows in a contrasting color (I also worked 2 rows of the top shaping in the main color for my 2 color hat you see in the video).
Super Bulky Beanie Video Tutorial (Adult Small)

Purchase the ad-free PDF of this pattern with all 7 sizes here!
NEWBORN HAT PATTERN (12” Circumference)
Ribbing
Ch 5.
Row 1: Sc in 2nd ch from hook and each ch across; turn (4 sts).
Row 2: Ch 2, sc blo in each st across; turn.
Rows 3-24: Repeat row 2.
Slip st row 24 to row 1 forming a brim. Turn, working along side of rows.
Body
Round 1: Ch 1, sc in side of each row, join with slip st to first sc. (24 sts)
Round 2: Ch 2, MC, beginning in same st as join, ch 1, *MC inserting hook 1st into same st as previous MC, ch 1; repeat from * to end, working second leg of last MC in same st as beg, join with slip st to top of first MC.
Round 3: Ch 1, sc in each st and ch-sp across, join with slip st to first sc.
Round 4: Repeat round 2.
Round 5: Repeat round 3.
Round 6: Repeat round 2.
Shape Crown
Round 1: Ch 1, sc in MC sts only, skipping ch-spaces, join with slip st to first st. (12 sts)
Round 2: Ch 1, (dec) around, join with slip st to first st. (6 sts)
Finishing
Fasten off, leaving a long tail. Draw tail through remaining 6 sts and pull tightly to close. Weave in ends.
Sew on pom pom if desired.
BABY HAT PATTERN (14” Circumference)
Ribbing
Ch 6.
Row 1: Sc in 2nd ch from hook and each ch across; turn (5 sts).
Row 2: Ch 2, sc blo in each st across; turn.
Rows 3-28: Repeat row 2.
Slip st row 28 to row 1 forming a brim. Turn, working along side of rows.
Body
Round 1: Ch 1, sc in side of each row, join with slip st to first sc. (28 sts)
Round 2: Ch 2, MC, beginning in same st as join, ch 1, *MC, ch 1; repeat from * to end, working second leg of last MC in same st as beg, join with slip st to top of first MC.
Round 3: Ch 1, sc in each st and ch-sp across, join with slip st to first sc.
Round 4: Repeat round 2.
Round 5: Repeat round 3.
Round 6: Repeat round 2.
Shape Crown
Round 1: Ch 1, sc in MC sts only, skipping ch-spaces, join with slip st to first st. (14 sts)
Round 2: Ch 1, (dec) around, join with slip st to first st. (7 sts)
Finishing
Fasten off, leaving a long tail. Draw tail through remaining 7 sts and pull tightly to close. Weave in ends.
Sew on pom pom if desired.
TODDLER HAT PATTERN (16” Circumference)
Ribbing
Ch 6.
Row 1: Sc in 2nd ch from hook and each ch across; turn (5 sts).
Row 2: Ch 2, sc blo in each st across; turn.
Rows 3-32: Repeat row 2.
Slip st row 32 to row 1 forming a brim. Turn, working along side of rows.
Body
Round 1: Ch 1, sc in side of each row, join with slip st to first sc. (32 sts)
Round 2: Ch 2, MC, beginning in same st as join, ch 1, *MC, ch 1; repeat from * to end, working second leg of last MC in same st as beg, join with slip st to top of first MC.
Round 3: Ch 1, sc in each st and ch-sp across, join with slip st to first sc.
Round 4: Repeat round 2.
Round 5: Repeat round 3.
Round 6: Repeat round 2.
Shape Crown
Round 1: Ch 1, sc in MC sts only, skipping ch-spaces, join with slip st to first st. (16 sts)
Round 2: Ch 1, (dec) around, join with slip st to first st. (8 sts)
Finishing
Fasten off, leaving a long tail. Draw tail through remaining 8 sts and pull tightly to close. Weave in ends.
Sew on pom pom if desired.
CHILD HAT PATTERN (18” Circumference)
Ribbing
Ch 6.
Row 1: Sc in 2nd ch from hook and each ch across; turn (5 sts).
Row 2: Ch 2, sc blo in each st across; turn.
Rows 3-36: Repeat row 2.
Slip st row 36 to row 1 forming a brim. Turn, working along side of rows.
Body
Round 1: Ch 1, sc in side of each row, join with slip st to first sc. (36 sts)
Round 2: Ch 2, MC, beginning in same st as join, ch 1, *MC, ch 1; repeat from * to end, working second leg of last MC in same st as beg, join with slip st to top of first MC.
Round 3: Ch 1, sc in each st and ch-sp across, join with slip st to first sc.
Rounds 4-7: Repeat rounds 2-3
Shape Crown
Round 1: Ch 1, *sc 4, dec; repeat from * to end, join with slip st to first sc. (30 sts)
Round 2: Ch 1, *sc 3, dec; repeat from * to end, join with slip st to first sc. (24 sts)
Round 3: Ch 1, *sc 2, dec; repeat from * to end, join with slip st to first sc. (18 sts)
Round 4: Ch 1, (dec) around, join with slip st to first sc. (9 sts)
Finishing
Fasten off, leaving a long tail. Draw tail through remaining 9 sts and pull tightly to close. Weave in ends.
Sew on pom pom if desired.
ADULT SMALL HAT PATTERN (20” Circumference)
Ribbing
Ch 7.
Row 1: Sc in 2nd ch from hook and each ch across; turn (6 sts).
Row 2: Ch 2, sc blo in each st across; turn.
Rows 3-40: Repeat row 2.
Slip st row 40 to row 1 forming a brim. Turn, working along side of rows.
Body
Round 1: Ch 1, sc in side of each row, join with slip st to first sc. (40 sts)
Round 2: Ch 2, MC, beginning in same st as join, ch 1, *MC, ch 1; repeat from * to end, working second leg of last MC in same st as beg, join with slip st to top of first MC.
Round 3: Ch 1, sc in each st and ch-sp across, join with slip st to first sc.
Rounds 4-7: Repeat rounds 2-3
Shape Crown
Round 1: Ch 1, *sc 3, dec; repeat from * to end, join with slip st to first sc. (32 sts)
Round 2: Ch 1, *sc 2, dec; repeat from * to end, join with slip st to first sc. (24 sts)
Round 3: Ch 1, *sc, dec; repeat from * to end, join with slip st to first sc. (16 sts)
Round 4: Ch 1, (dec) around, join with slip st to first sc. (8 sts)
Finishing
Fasten off, leaving a long tail. Draw tail through remaining 8 sts and pull tightly to close. Weave in ends.
Sew on pom pom if desired.
ADULT MEDIUM HAT PATTERN (22” Circumference)
Ribbing
Ch 8.
Row 1: Sc in 2nd ch from hook and each ch across; turn (7 sts).
Row 2: Ch 2, sc blo in each st across; turn.
Rows 3-44: Repeat row 2.
Slip st row 44 to row 1 forming a brim. Turn, working along side of rows.
Body
Round 1: Ch 1, sc in side of each row, join with slip st to first sc. (44 sts)
Round 2: Ch 2, MC, beginning in same st as join, ch 1, *MC, ch 1; repeat from * to end, working second leg of last MC in same st as beg, join with slip st to top of first MC.
Round 3: Ch 1, sc in each st and ch-sp across, join with slip st to first sc.
Rounds 4-7: Repeat rounds 2-3
Shape Crown
Round 1: Ch 1, *sc 9, dec; repeat from * to end, join with slip st to first sc. (40 sts)
Round 2: Ch 1, *sc 3, dec; repeat from * to end, join with slip st to first sc. (32 sts)
Round 3: Ch 1, *sc 2, dec; repeat from * to end, join with slip st to first sc. (24 sts)
Round 4: Ch 1, *sc, dec; repeat from * to end, join with slip st to first sc. (16 sts)
Round 5: Ch 1, (dec) around, join with slip st to first sc. (8 sts)
Finishing
Fasten off, leaving a long tail. Draw tail through remaining 8 sts and pull tightly to close. Weave in ends.
Sew on pom pom if desired.
ADULT LARGE HAT PATTERN (24” Circumference)
Ribbing
Ch 9.
Row 1: Sc in 2nd ch from hook and each ch across; turn (8 sts).
Row 2: Ch 2, sc blo in each st across; turn.
Rows 3-48: Repeat row 2.
Slip st row 48 to row 1 forming a brim. Turn, working along side of rows.
Body
Round 1: Ch 1, sc in side of each row, join with slip st to first sc. (48 sts)
Round 2: Ch 2, MC, beginning in same st as join, ch 1, *MC, ch 1; repeat from * to end, working second leg of last MC in same st as beg, join with slip st to top of first MC.
Round 3: Ch 1, sc in each st and ch-sp across, join with slip st to first sc.
Rounds 4-7: Repeat rounds 2-3
Shape Crown
Round 1: Ch 1, *sc 4, dec; repeat from * to end, join with slip st to first sc. (40 sts)
Round 2: Ch 1, *sc 3, dec; repeat from * to end, join with slip st to first sc. (32 sts)
Round 3: Ch 1, *sc 2, dec; repeat from * to end, join with slip st to first sc. (24 sts)
Round 4: Ch 1, *sc, dec; repeat from * to end, join with slip st to first sc. (16 sts)
Round 5: Ch 1, (dec) around, join with slip st to first sc. (8 sts)
Finishing
Fasten off, leaving a long tail. Draw tail through remaining 8 sts and pull tightly to close. Weave in ends.
Sew on pom pom if desired.
Final Thoughts on the Feather Stitch Beanie
I hope you’ve enjoyed this fun crochet beanie pattern! My kids have really been enjoying these warm winter beanies as it’s been cold here in Middle Tennessee (we have even had ice and snow!).
Happy Crocheting!
Amanda