
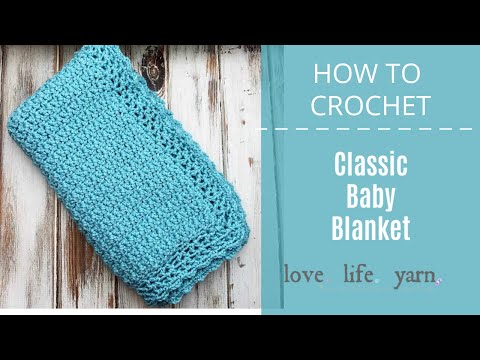
Looking for a classic crochet blanket pattern that works up quickly thanks to bulk yarn? Check out the classic chunky crochet baby blanket!

Design Story and Inspiration for This Crocheted Blanket Made from Chunky Yarn
There’s just something about a simple baby blanket pattern. I love having one to work on in the car (when the hubs is driving, of course!) and for when I want to watch some tv and crochet.
This blanket uses the wattle stitch for the body, which is a combination of simple stitches. It made for a beautiful baby blanket body and then I added a touch of crochet lace with a border that also uses basic crochet stitches, so there’s nothing complicated here.
Yarn Options for Our Chunky Blanket Pattern
I’ve always loved the wattle stitch and wanted to create a blanket with it, so I decided this yummy Paintbox Yarn was the perfect yarn for this blanket project with the wattle stitch.
The Simply Chunky even comes in a 5 ball value pack! That means you can score all the yarn you need for this project at a discount. This is what I did when grabbing the yarn for this project.
Since I knew exactly how many skeins I had I decided to just work the body of the bulky blanket with four of the skeins and save one skein for the border. It worked out perfectly and I still had just a little bit left of the last skein.
This pattern will work with any yarn weight, it doesn’t have to be made in bulky weight yarn. You can use worsted weight yarn or a lighter or heavier choice, just be sure to adjust your stitch multiple for the size blanket you are wanting. (Of course you’ll have to adjust your hook size, too.)
I hope you enjoy this free crochet pattern and make one for someone special in your life! A handmade blanket is the perfect gift for a baby shower, too.
How to Customize This Bulky Yarn Blanket Pattern
You can work this crocheted baby blanket pattern in any yarn you wish, including the popular Bernat Blanket Yarn or Bernat Baby Blanket Yarn. This creates a soft blanket which will be much larger than the finished size listed below.
You can also change up the colorwork of the blanket by using variegated yarn or work in stripes in lots of colors. You can, of course, use any color of yarn, so choose your favorite colors, go with neutral colors, or any color combinations you like – it’s totally up to you! Just be sure to choose soft yarns good for baby’s sensitive skin.
You can also adjust the finished size of your blanket by working the pattern as written in any multiple of 3 that you choose. You can make the blanket wider by enlarging the multiple of 3 to make a throw blanket crochet pattern (or even larger!) or make it smaller for a lovey or security blanket.
Get the ad-free blanket PDF PATTERN in my shop here!

Chunky Baby Crochet Blanket Pattern
What You’ll Need
Yarn: Paintbox Yarns Simply Chunky in Washed Teal (5 skeins) – (Bulky yarn #5)
Crochet Hook: US size K (6.5mm)
Notions: Yarn needle, scissors
Finished Size: Finished blanket measures approximately 27″ x 30″ (Baby blanket size)
Gauge: 16 sts and 11 rows = 4″ in wattle st
Stitch Abbreviations
Chain (ch)
Single Crochet Stitch (sc)
Double Crochet Stitch (dc)
Classic Chunky Crochet Blanket Pattern
Ch 72. (Pattern is a multiple of 3)
Row 1: (Sc, ch 1, dc) in 3rd ch from hook (skipped chains count as sc), *skip 2 ch, (sc, ch 1, dc) in next ch; repeat from * to last 3 ch, skip 2 ch, sc in last ch; turn.
Row 2: Ch 1, *(sc, ch 1, dc) in ch-1 space; repeat from * to last st, sc in turning ch; turn.
Repeat row 2 until desired length. For me, I used up 4 skeins before switching to the border.

Border
Row 1: Ch 1, sc evenly around edge, working (sc, ch1, sc) in each corner.
Row 2: Ch 3 (counts as dc), dc in corner, *skip 2 sts, (dc, ch 1, dc) in next st; repeat from * to corner, (2 dc, ch 1, 2 dc) in corner; repeat to last corner, 2 dc in last corner, hdc in top of turning ch.
Row 3: Ch 4 (counts as dc, ch 1), dc around post of hdc, *(dc, ch 1, dc) in next ch-1 space, repeat from * to corner, (dc, ch 1) 3 times in corner space, dc in corner space; repeat to last corner, (dc, ch 1, dc) around post of hdc from row below.
Fasten off.

Chunky Crochet Baby Blanket
Looking for a classic crochet blanket pattern that works up quickly thanks to bulk yarn? Check out the classic chunky crochet baby blanket!
Materials
- Yarn: Paintbox Yarns Simply Chunky, 5 skeins
Tools
- Hook: US size K (6.5mm)
- Notions: Yarn needle, scissors
Instructions
- Ch 72 or desired multiple of 3.
- Work in the wattle stitch for desired length.
- Work border pattern around perimeter of blanket.
- Weave in ends.
Notes
Finished Size: Approximately 27″ x 30″
Gauge: 16 sts and 11 rows = 4″ in wattle st
Final Thoughts on Our Bulky Yarn Crochet Blanket
That’s it! I hope you’ve enjoyed this free pattern for the Classic Chunky Crochet Baby Blanket! It’s easy to crochet with basic stitches. The wattle stitch gives this cozy blanket a lovely texture that is easy enough for a beginner but fun for experienced crocheters as well. The lacy border gives this beautiful blanket a classic touch.
Want the Ad-Free PDF of this pattern? Head to the shop here!
Happy Crocheting!
Amanda
Check out these other crochet baby blanket patterns:
Beginner Crochet Baby Blanket
Duchess Baby Blanket Project
Super Chunky Yarn Blanket Pattern
And our beautiful crochet blanket collection:
Over 50 adorable crochet baby blanket patterns
Hi Amanda,,,,I hope you are safe…I lived outside of Knoxville several years and miss TN very much. I have a question….what hook size would I use to make this baby blanket with worsted weight? Best to you and your family and your project….Joyce-Anne
Thanks! We are safe but our community was hit hard. We’ve been busy helping our school clean up – it took a direct hit. Thankfully no students were in the building since it was overnight. If you make this blanket with worsted weight, I would recommend going up one hook size from the size recommended on the ball band. That’s typically what I will do when I design a blanket and it usually works out well so just check the ball band of the yarn you want to use. 🙂
Hello! I have watched and followed the video tutorial for this pattern. (Which I love!). I was starting the second row of the border, following the directions for that, but the video seems to end before I get to the first corner of the second row of the border and does not tell me how to finish off the blanket like I thought I said it was going to do? 🤷♀️ Am I missing something?
Thanks!