
Lately I had hit a design block and was having trouble thinking of new things to make for the blog. Every so often this happens to me and I know it passes (they call it losing your crojo – haha!) so I decided to challenge myself to make things I didn’t create very often, so the Lop Eared Crochet Bunny was born.
Buy the ad-free PDF of this pattern in my shop here!
One of the things my boys have been loving lately is the larger stuffed animals. My four year old said if we got him a big animal he would stay in his bed because he would feel like someone was in bed with him.
He has the habit of coming into our room in the middle of the night. We’ve always said the kids had to go to sleep in their beds and we have stuck to that, but if they get scared in the middle of the night they can come in our room.
At about age three they all developed a habit of coming in most every night. Child number three, though, has kept this up far longer than the others, so we decided to give the large animal a try and bought one.
Now they all want a big animal to sleep with! So instead of buying them all, I decided to see if I could make one.
I found skeins of the Lion Brand Yarn Go for Faux Thick & Quick on sale at Wal Mart and picked up a bunch. I had made a hat out of the regular Go for Faux and loved it, so I thought “why not?”
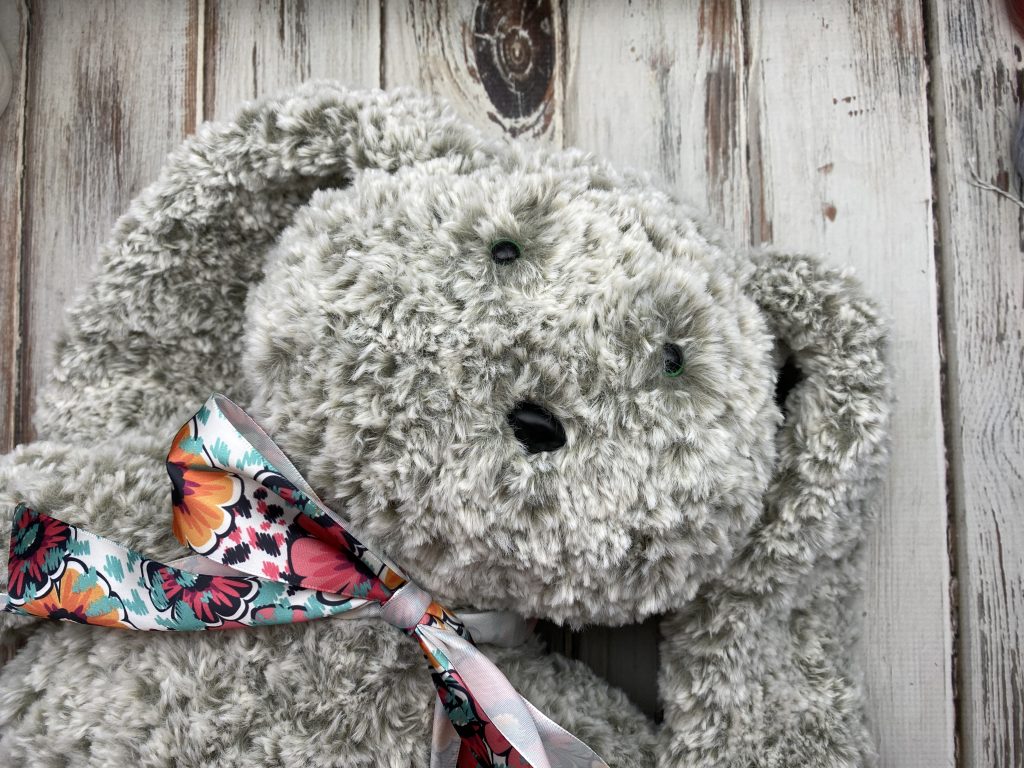
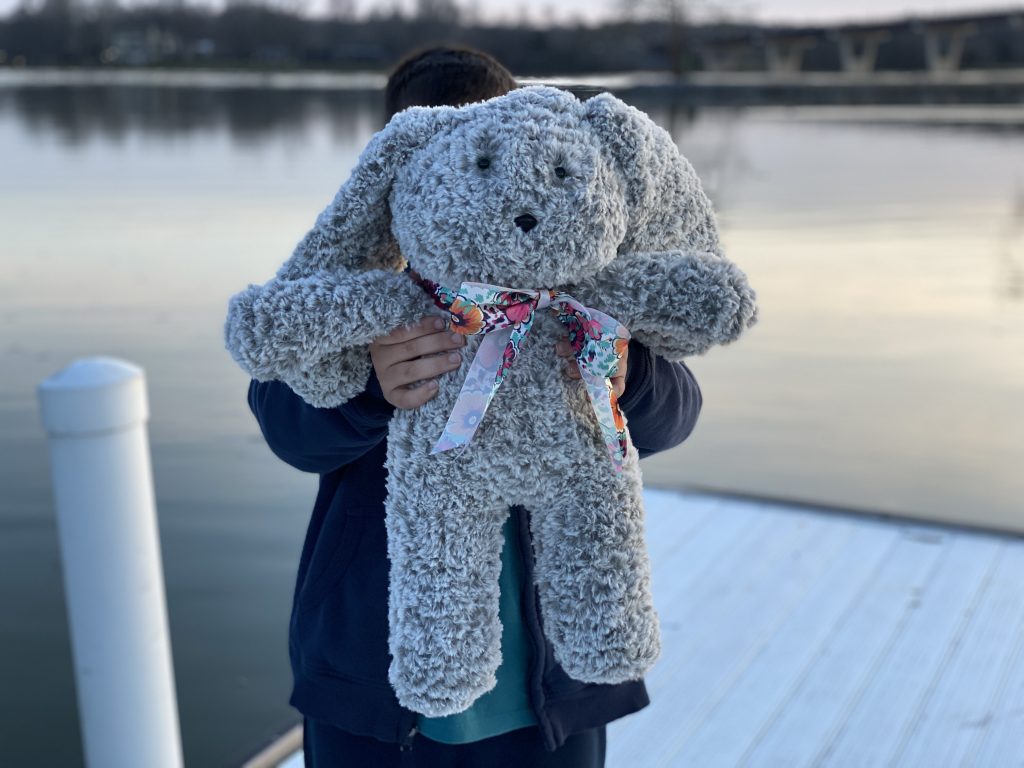
I love how this turned out!!! I hope you love this sweet rabbit as much as I enjoyed making him!
Buy the ad-free PDF of this pattern and crochet on the go!
Lop Eared Crochet Bunny
What You’ll Need
Yarn: 4 skeins Lion Brand Go for Faux Thick and Quick Bonus Bundle in Husky
Hook: US Size N (11.00mm)
Notions: 2 large safety eyes, 1 large safety nose, bag of polyester fiberfill, yarn needle, scissors, stitch marker
Finished Size: Approximately 20″ tall
Gauge: Not crucial for this project.
Notes
You could easily make a smaller version with the regular Go for Faux yarn or any furry yarn. Go down two sizes from the recommended size on the label.
Rounds are not joined but worked in continuous rounds. Mark your first stitch for keeping track of rounds.
I found it easier when seaming to separate the strands of this super thick yarn. It has 3 plies of fur and seaming with one was easier than trying to work with all three.
****If you are making this for a baby or small child, please use felt or embroidery for the face. I did use safety eyes and nose, but I’ve had these come out of an amigurumi before, so to be completely safe it’s best not to use them. We used a bit of superglue on the back of our eyes (as mentioned in the patter) to ensure they stayed on because this fabric is so thick).

Leg (make 2)
Ch2.
Round 1: 6 sc in 2nd ch from hook (6 sts).
Round 2: 2 sc in each st (12 sts).
Rounds 3-12: Work even in sc.
Fasten off first leg. Continue to body at the end of second leg without fastening off.
Stuff legs with fiberfill.
Body
Ch 3 and join to first leg.
Round 1: Sc 12 sts from first leg, 3 sts front loop only on ch-3, 12 sts from second leg, 3 sts front loop only on ch-3 (30 sts).
Rounds 2-6: Work even in sc.
Round 7: Sc 4, sc2tog, (sc 8, sc2tog) two times, sc 4 (27 sts).
Round 8: Work even in sc.
Round 9: (Sc 7, sc2tog) three times (24 sts).
Round 10: Work even in sc.
Round 11: Sc 3, sc2tog, (sc 6, sc2tog) two times, sc 3 (21 sts).
Round 12: Work even in sc.
Round 13: (Sc 5, sc2tog) three times (18 sts).
Round 14: (Sc, sc2tog) six times (12 sts).
Stuff body with fiberfill.

Head
Round 1: 2 sc in each st (24 sts).
Round 2: (Sc, 2 sc in next st) 12 times (36 sts).
Round 3: (5 sc, 2 sc in next st) six times (42 sts).
Rounds 4-6: Work even in sc.
Round 7: (Sc 5, sc2tog) six times (36 sts).
Round 8: (Sc 4, sc2tog) six times (30 sts).
Round 9: (Sc 3, sc2tog) six times (24 sts).
Round 10: (Sc 2, sc2tog) six times (18 sts).
Place safety eyes and nose. It may be helpful to place a small amount of superglue on the back to keep the nose and eyes secure since the fabric is so thick.
Round 11: (Sc, sc2tog) six times (12 sts).
Round 12: Sc2tog six times (6 sts).
Stuff head with fiberfill.
Fasten off, leaving a long tail. Draw tail through remaining 6 sts and pull tight to close.
Arm (Make 2)
Ch 2.
Round 1: 4 sc in 2nd ch from hook (4 sts).
Round 2: 2 sc in each st (8 sts).
Rounds 3-7: Work even in sc.
Fold arm flat and sc 4, working through both sides of fabric. Fasten off. Leave arms unstuffed.
Sew to side of body as seen in photos.
Ear (Make 2)
Ch 5.
Row 1: Sc in 2nd ch from hook and next 3 ch; turn (4 sts).
Row 2: Ch 1, 2 sc in first st, sc 2, 2 sc in last st; turn (6 sts).
Rows 3-17: Work even in sc.
Row 18: Ch 1, sc2tog, sc 2, sc2tog; turn (4 sts).
Row 19: Ch 1, sc2tog twice (2 sts).
Fasten off.
Sew ears to sides of head as seen in photos.
Weave in all ends.

That’s it! This guy turned out HUGE and we all love it so much. The boys are actually fighting over who gets to keep it (but it may be mine!).
Be sure to check out my other animals and more free crochet patterns here!
Happy Crocheting!
Amanda
I do have a question. On the legs, how many rounds to you do? You only show 3->>. So I do believe there’s a typo.
Hi Jeanne! Thanks for letting me know about this – it didn’t save my last edit. I changed it now to 12, which is what it should have been. 🙂
How many rows to make the legs. It does not say in the pattern just says he is 20 inches tall total?????????
Hi Peggy, in the instructions is says to work 12 rounds total to make the legs. The first 2 rounds are increase rounds and then you work even.
When using safety eyes/nose on my crochet or knit projects, I take a piece of material (quilt quarters work great) that covers the facial area, poke small holes with scissors, where the eyes and nose will go, place it on the back of the face and put the safety pieces on. The holes in the fabric are small enough that the safety stems have to be pushed (sometimes forced) through them and I have never, through 4 grandchildren and many animal faces and laundry cycles, had an eye or nose come through or off. I still embroider if the child is under 3 years old. If there is a mouth to be embroidered on, I make the fabric large enough so I can use that for backing on the mouth.
Cindy I love that idea! I’ver never tried using fabric as a backing but I will certainly do it now. With just pushing it through the yarn I had one pulled off by one of my kiddos (older than 3 so thank goodness it didn’t go in anyone’s mouth) and this sounds like the perfect way to keep that from happening. If you don’t mind I might make a tutorial for this to help those who are using safety eyes and noses. Thanks so much for sharing!
Hi, Amanda! Love this bunny but I have a question about joining the head and body. Is there a certain way this should be done; like the legs are joined to the body or just simply sew the head to the body? Thanks!
You don’t fasten off after making the body. You just continue making the head. The only parts that are sewn on are the arms and ears. 🙂