
Whip up this easy crochet top in a flash using dk weight yarn and basic single and double crochet!

Design Story and Inspiration for this Easy Crochet Top Pattern
I really wanted a warm weather crochet top this year – something I’ve not made many of. Usually when I think of a crochet top or sweater I think of fall and winter clothing, but I was determined to make myself something to wear in the summer!
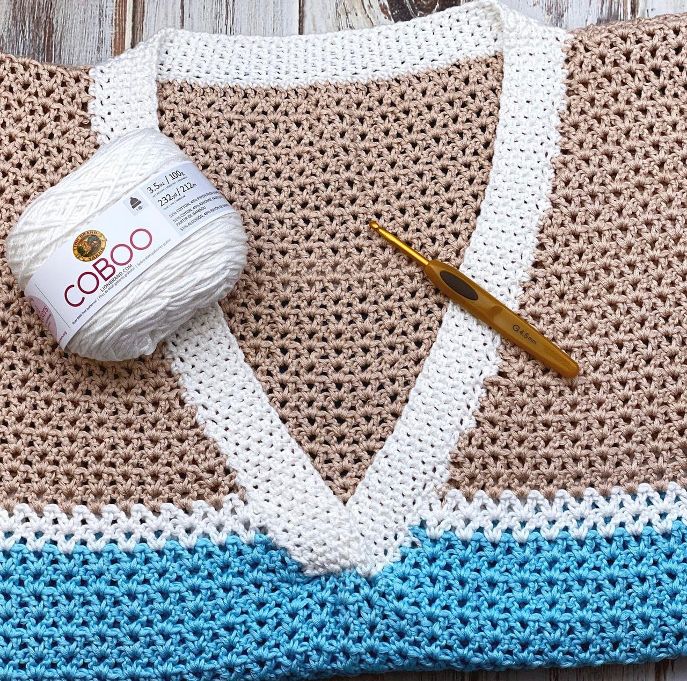
I chose an open v-stitch pattern created by double crochets and chains, and it worked up really quickly with this DK weight yarn. I love these colors and it reminds me of a beach getaway, which is something we haven’t done as a family in a long time.
I’m super happy with how this turned out and love wearing it. You can choose to make the belt loops and belt as seen here, or forgo the belt loops and belt and just make a simple top with very minimal shaping!
Yarn Options for this Simple Crochet Top
I used Lion Brand Coboo for this top pattern, which is a wonderful choice for warm weather. It’s a combination of cotton and bamboo fibers that feels wonderful in the summer. It’s DK weight makes it perfect for a crochet top because it covers nicely without being heavy.
Another yarn option that will work well for this top is Lion Brand Truboo as it has very similar characteristics to Coboo, but you can use any DK weight yarn that gets gauge.
Before we begin… let’s get Social!
I would love for you to come follow me on
Instagram (get sneak peeks of what’s coming up!)
My Facebook Page (come join the fun!)
Follow me on Pinterest (I pin tons of free patterns to my boards!)
Join my Facebook group (lots of awesome crochet talk there)
Also, you can find me on Ravelry or join my subscribers on YouTube.
Crochet Top Pattern Details
This top is made in two panels, just a simple rectangular back and top. The only shaping is for the V-neckline.
The stitch pattern is a multiple of 3 stitches plus 4 and is a v-stitch (dc, ch 1, dc in same st) pattern with a dc at each end. It’s a very simple stitch that you can work on mindlessly, and is great for beginners.
Crochet Top Video Tutorial
This video tutorial will show you how to complete the necessary steps. Please note that it is NOT a substitute for the written pattern – you will need to refer to the written pattern to check for the number of stitches to work for your selected size.

How to Customize this Easy Crochet Top
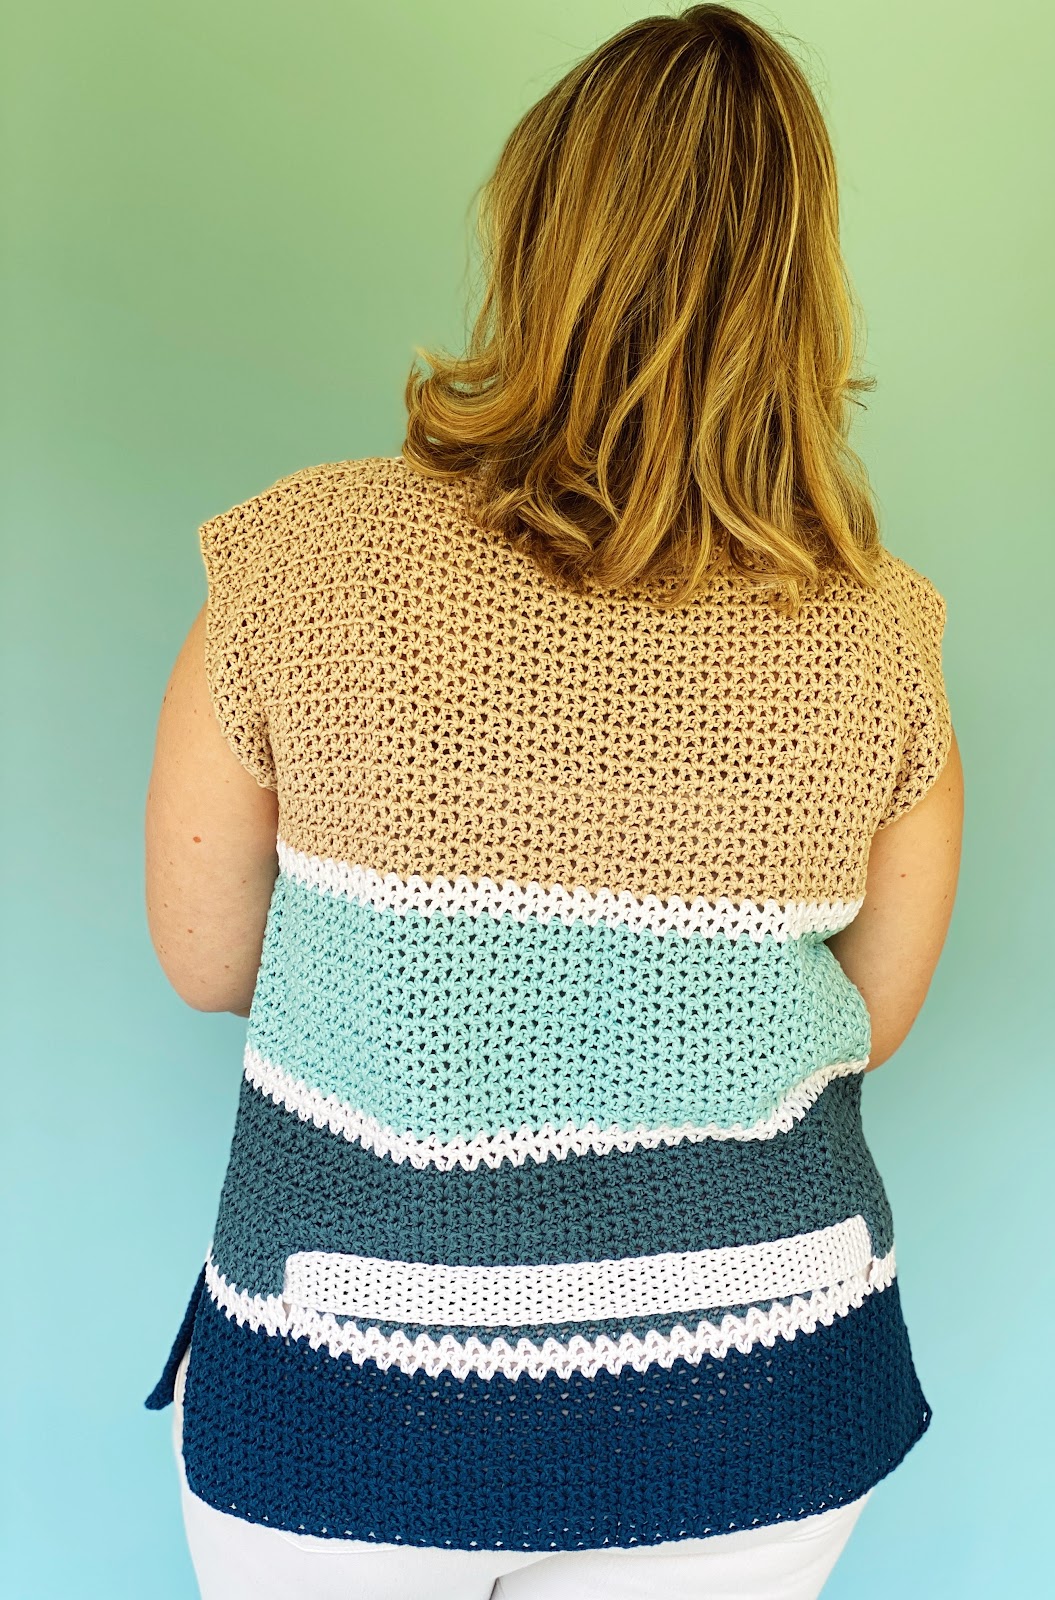
There are plenty of ways to customize this top! First, you can choose to make it in one color, or multiple colors as I did. Honestly I created mine in these colors because they were what I had in my stash, and I’m trying to use up my stash yarn.
Second, you can choose to make it with the belt loops and belt as shown, or you can make it solid without these. You could also make the belt loops higher and tie around your natural waist. The belt as seen here is lower.
More Free Crochet Top Patterns

GET THE AD-FREE PDF
This pattern is completely free and can be viewed in its entirety below. However, many readers have requested ad-free PDF’s of my patterns so I provide an inexpensive option for these.
If you like to crochet on the go or just prefer paper, you can print this PDF and take it with you anywhere.
Buy the ad-free PDF of this pattern in my shop here!
Easy V-Neck Crochet Top
What You’ll Need
Yarn: Lion Brand Coboo, 2 skeins White (A), 2 (2, 2, 3, 3, 3, 4) skeins Steel Blue (B), 3 (3, 3, 4, 4, 4, 5) skeins Denim (C), 4 (4, 5, 5, 5, 6, 6) skeins Ice Blue (D), 6 (6, 6, 6, 7, 7, 8) skeins Tan (E)
Crochet Hook: US Size G (4.0mm)
To save time, be sure to check your gauge! This stitch is a multiple of 3 sts +4, so make a gauge swatch by chaining any multiple of 3, then add 4 chains to it and start with row 1 of back.
Notions: Yarn Needle, Scissors
Gauge: 7 vsts and 10 rows = 4” in vst pattern
Finished Sizes XS (S, M, L, XL, 2XL, 3XL): Bust 34 (38, 42, 46, 50, 54, 58)” / 86 (97, 107, 116, 127, 137, 147)cm
Stripe Pattern:
13 rows B
2 rows A
13 rows C
2 rows A
13 rows D
2 rows A
25 rows E
Special Stitches:
V-Stitch (vst) – (dc, ch 1, dc) in same st, ch or space
Notes: Ch 3 at beginning of row counts as dc.
PATTERN
Back
With B, ch 94 (103, 115, 124, 136, 145, 157).
Row 1: Vst in 5th ch from hook, *skip 2 ch, vst in next ch; repeat from * to last 2 ch, dc in last ch; turn – 30 (33, 37, 40, 44, 47, 51) vsts.
Row 2: Ch 3, *vst in vst of previous row; repeat from * to end, dc in top of ch-3; turn.
Rows 3-13: Repeat row 2. Following Stripe Pattern as described above.
Belt Loops (if not making belt, continue to repeat row 2 for next 4 rows)
First side: Ch 3, vst in 7 vsts, dc in next v-st; turn. Repeat row 2 for 2 more rows. Fasten off.
Middle: Join yarn in same vst as last dc from first side, ch 3, vst in next 14 (17, 21, 24, 28, 31, 35) vsts, dc in next vst; turn. Repeat row 2 for 2 more rows. Fasten off.
Second side: Join yarn in same vst as last vst of first side, ch 3, vst in last 7 sts, dc in top of ch-3; turn. Repeat row 2 for 2 more rows.
Joining row: Ch 3, vst in first 7 vsts, ch 1, skip over the 2dc in next vst, vst in next 14 (17, 21, 24, 28, 31, 35) vsts, ch 1, skip over the 2dc in next vst, vst in next 7 vsts, dc in top of ch-3; turn.
Repeat row 2 for 53 rows, working a vst into the ch-1 spaces to join belt opening. Fasten off.
Front
Work same as back to row 49 (46, 40, 40, 40, 40, 40).
Shape Neckline
First side
Row 1: Ch 3, vst in next 14 (15, 17, 19, 21, 22, 24) vsts, dc in next vst; turn.
Row 2-4: Repeat row 2 from previous section.
Row 5 (Dec row): Ch 3, vst in each vst to last vst, dc in last vst; turn.
Rows 6-7: Repeat row 2.
Row 8 (Dec row): Slip st to next vst, ch3, vst in each vst to end, dc in top of ch-3; turn.
Rows 9-10: Repeat row 2.
Repeat rows 5-10 until 7 (7, 7, 9, 11, 12, 14) vsts remain. Fasten off. Size XS will end up ending after a row 7 repeat. All other sizes will finish after a row 10 repeat.
Second Side
Join yarn in next vst to left of first side. (If size has an odd number of vsts (S, M, 2X, 3X), skip 1 vst and join in next vst).
Row 1: Ch 3, vst in next 14 (15, 17, 19, 21, 22, 24) vsts, dc in top of ch-3; turn.
Rows 2-4: Repeat row 2.
Row 5 (Dec row): Slip st to next vst, ch3, vst in each vst to end, dc in top of ch-3; turn.
Rows 6-7: Repeat row 2.
Row 8 (Dec row): Ch 3, vst in next 18 vsts, dc in next vst; turn.
Rows 9-10: Repeat row 2.
Repeat rows 5-10 until 7 (7, 7, 9, 11, 12, 14) vsts remain. Fasten off.
Finishing
Join front to back at shoulders and side seams using mattress stitch, leaving side seam open from belt opening to hem, and leaving 9” open at top for armholes.
Collar
With RS facing, join yarn at left neck edge of first row of neckline shaping. You will be joining at the center of the V, working up the side of the V with a sc in each row, working across the back neck edge, and then down the opposite side of the V to the starting point.
Row 1: Ch 1, sc in same st as join, *sc in next st, skip next st, ch 1; repeat from * to side of first neckline row, sc in first row of v-neckline, slip st into next row of v-neckline; turn.
Row 2: Ch 1, skip sc, sc in ch-1 space, *ch 1, skip sc, sc in ch-1 space; repeat from * to last st, sc in sc; turn.
Row 3: Ch 1, sc in sc, *ch 1, skip sc, sc in ch-1 space; repeat from * to end, ch 1, sc in next row of v-neckline, sl st into next row of v-neckline; turn.
Repeat rows 2-3 around to opposite side of v-neckline. Stitch loose end of neckline behind opposite edge to form V-Neckline.
Please see video tutorial if you are having any problems with the collar.
Belt
Ch 11.
Row 1: Sc in 2nd ch from hook, *ch 1, skip next ch, sc in next ch; repeat from * to last ch, sc in last ch; turn – 10 sts.
Row 2: Ch 1, sc in first sc, *ch 1, skip sc, sc in next ch-1 space; repeat from * to end, sc in last sc; turn.
Repeat row 2 until belt is 52” from beginning.
Weave in all ends.
Thread belt through loops as seen in photos.
Today we’ve learned how to crochet an easy crochet top pattern. I hope you enjoyed this free pattern!
Happy Crocheting!
Amanda
Amanda you knocked it out of the park with this one! She is a beauty! I cannot wait to make one for myself, I am testing a pattern right now so I cannot do it at the moment but when I am done I have to do this one. Thanks for giving this pattern to us. We are so blessed to have you, our personal fashion designer!
I would love to make this buy with long sleeves. Is this possible?
I’m sure you could add sleeves if you like after the front and back are seamed.
surely it is a neckband not a collar or am i missing something
True, it could also be called a neckband.