
Create a soft, squishy friend with a removable shell using Bernat Pipsqueak yarn. This crochet turtle is a free, easy crochet pattern.

Buy the ad-free PDF of this pattern in my shop here!
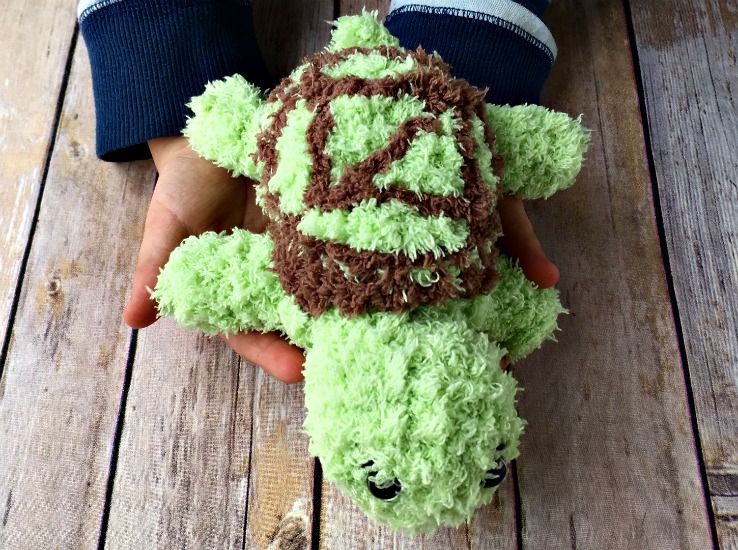
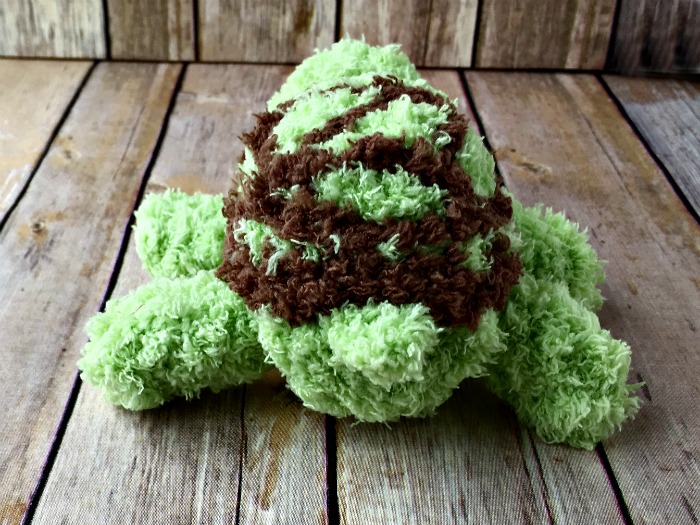
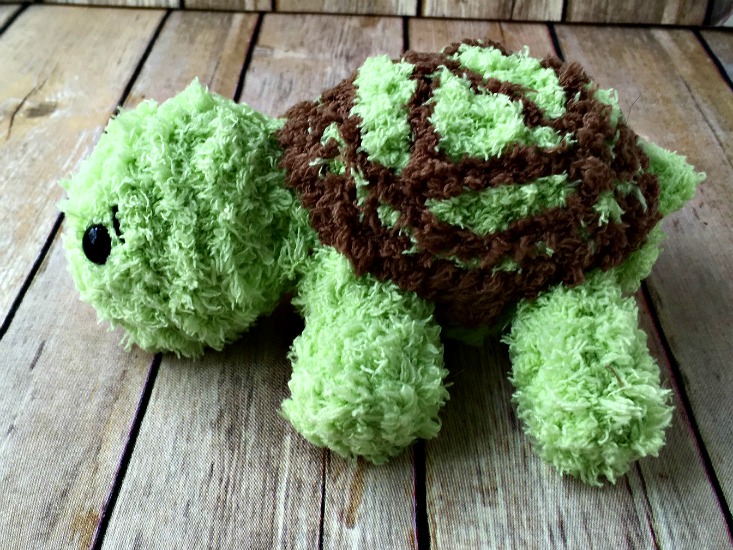
Look at this little guy – and his removable shell!! I have wanted to crochet a turtle with a separate shell for a loooong time and finally sat down and did it. I love the way he turned out and hope you enjoy this free pattern.
I really love this yarn for stuffed animals. The soft, squishy texture is amazing, plus you can’t even see the stitches! When I make animals out of this yarn people are always shocked that it is crocheted. My first experience using this yarn was with my Pipsqueak Owls and I loved them so much I went out and bought this yarn in other colors to experiment with. I knew I wanted to make a crochet turtle with a removable shell – and the Pipsqueak Turtle was born!
Pipsqueak Turtle
What You’ll Need
Yarn: Bernat Pipsqueak in Lime and Chocolate
Hook: J/10/6.0mm
Notions: yarn needle, safety eyes, fiberfill
Notes: Do not join or turn unless instructed to do so.
Place a st marker in first st of each round to keep track of row counts.

Buy the ad-free PDf of this pattern and crochet on the go!
PATTERN
HEAD AND BODY
Ch 2.
Round 1: 6 sc in 2nd ch from hook – 6 sts.
Round 2: Work 2 sc in each st – 12 sts.
Round 3: *Sc, 2 sc in next st; repeat from * – 18 sts.
Round 4: *Sc 2, 2 sc in next st; repeat from * – 24 sts.
Rounds 5-7: Sc in each st.
Round 8: *Sc 2, sc2tog; repeat from * – 18 sts.
Round 9: *Sc, sc2tog; repeat from * – 12 sts.
Round 10: Sc in each st.
Round 11: *Sc, 2 sc in next st; repeat from * – 18 sts.
Place eyes and attach securely. Stuff head.
Rounds 12-21: Sc in each st.
Round 22: *Sc, sc2tog; repeat from * – 12 sts.
Round 23: *Sc2tog; repeat from * – 6 sts.
Finish stuffing body. Cut yarn, leaving a long tail. Draw yarn through remaining 6 sts and pull tight to close. Weave in ends.
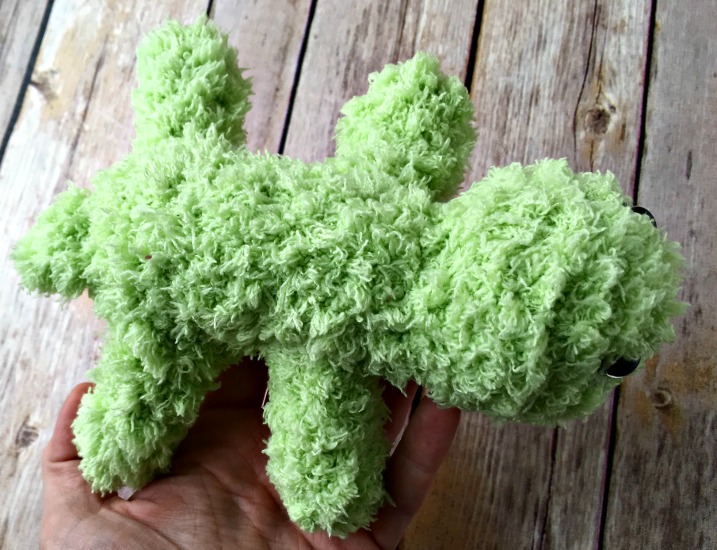
LEG (Make 4)
Ch 2.
Round 1: 6 sc in 2nd ch from hook – 6 sts.
Rounds 2-8: Sc in each st.
Fasten off, leaving a long tail. Stuff with fiberfill. Use remaining yarn to sew legs to body as seen in photo above.
TAIL
Ch 3.
Row 1: Sc in 2nd ch from hook and next ch; turn – 2 sts.
Row 2: Ch 1, sc2tog – 1 st.
Fasten off, leaving a long tail. Use remaining yarn to sew tail on body.
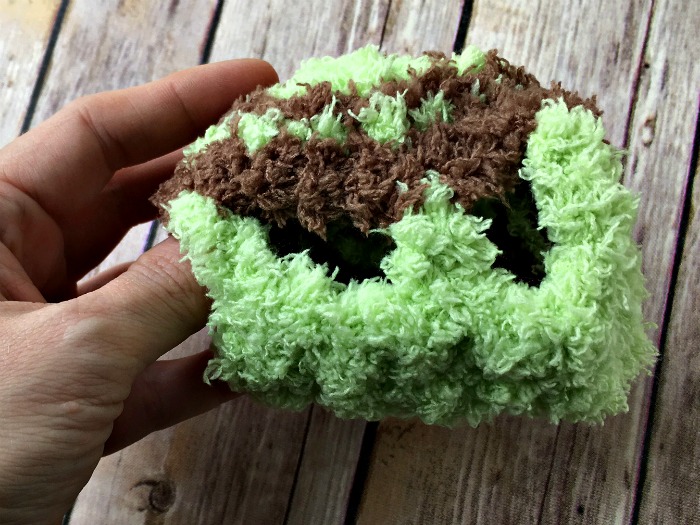
SHELL (Bottom)
Ch 9.
Row 1: Sc in 2nd ch from hook and each ch across; turn – 8 sts.
Row 2: Sl st in first 2 sts, ch 1, sc 4, leave remaining 2 sts unworked; turn – 4 sts.
Rows 3-4: Ch 1, sc in each st; turn.
Row 5: Ch 3, sc in 2nd ch from hook and next ch, sc 4; turn – 6 sts.
Row 6: Ch 3, sc in 2nd ch from hook and next ch, sc 6; turn – 8 sts.
Row 7: Repeat row 2 – 4 sts.
Rows 8-10: Ch 1, sc in each st; turn.
Row 11: Repeat row 5 – 6 sts.
Row 12: Ch 3, sc in 2nd ch from hook and next st, sc 4, sl st in last 2 sts.
Fasten off.
SHELL (Top)
Ch 7.
Row 1: Sc in 2nd ch from hook and each ch across; turn – 6 sts.
Row 2: Ch 1, 2 sc in first st, sc to last st, 2 sc in last st; turn – 8 sts.
Row 3: Repeat row 2 – 10 sts.
Row 4: Repeat row 2 – 12 sts.
Rows 5-8: Ch 1, sc in each st; turn.
Row 9: Ch 1, sc2tog, sc to last 2 sts, sc2tog; turn – 10 sts.
Row 10: Repeat row 9 – 8 sts.
Row 11: Repeat row 9 – 6 sts.
Join CC, sc evenly around. Join with sl st. Ch 1, sc in each st.
Use surface slip st to create shell pattern.
Fasten off.

FINISHING
Weave in all ends.
Sew shell top to bottom as shown in pictures.
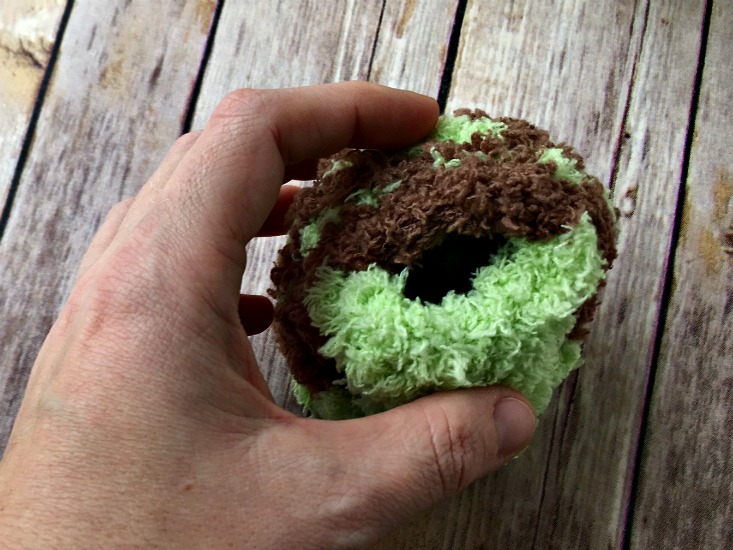
Embroider face as seen in the photo below. I used black sock-weight yarn to give him a smile and eyebrows. I thought it really added to his personality. He looked a little sad with just the eyes.

I hope you’ve enjoyed this free pattern for the Pipsqueak Turtle as much as I have enjoyed making it. This is one of my favorite animals I’ve created so far and I can’t wait to design more with this amazing yarn!

Also be sure to check out the pipsqueak whale!
I don’t crochet but love your turtle. I appreciate your hard work and planning. Thank you for sharing your pattern.
Thank you so much! 🙂
I totally love this pattern, making this for my Mom for her 80th Birthday I am confused when do I use the Chocolate yarn where do I fit the lime yarn in??? I figure the head & body, legs & tail use Lime yarn but the shell looks like u used both so how does that work , use them together???
You crochet the shell with lime and do a border of chocolate… then use surface slip stitch to make the shell “pattern” 🙂
oh now that makes sense.. THANK YOU for responding…. Happy Mother’s Day! 🙂