

For the teacher Christmas gifts this year I’ve decided to make all of the boys’ teachers a pair of mittens! Last year I designed my first pair of mittens for my oldest son’s teacher and they were a hit. I usually do hats but none of the teachers seem like they would wear them much – so mittens it is!! I’m hard at work on the other pairs but this pair is done and ready to share!!
I had one skein of this beautiful Malabrigo Rasta yarn and I had been trying to decide what to make from it. A hat would be really nice as well as a cowl as this yarn is super bulky and works up so fast, but nothing just seemed right until I decided to make these mittens with it. I love the subtle color changes in all of the Malabrigo yarns and this one is no different.
If you are looking for a quick and easy gift for the holidays – here it is! I made the first mitten and then filmed a complete video tutorial for the second. The mittens are interchangeable (meaning they can be worn on either hand) so just make two the same and you’re ready to gift!
I am really enjoying designing all these mittens and I hope you enjoy!

Buy the ad-free PDF of this pattern in my shop here!
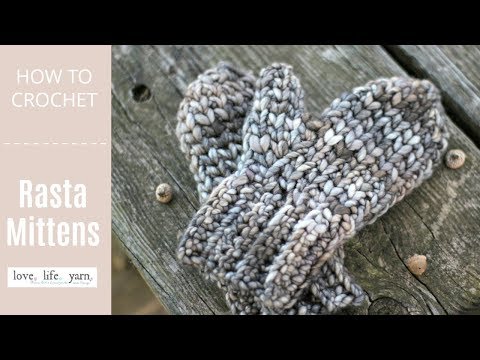
Rasta Mittens
What You’ll Need
Yarn: Malabrigo Rasta, 1 skein Sombras
Hooks: US size L (8.00mm) and P (11.50mm)
Notions: Yarn needle, stitch marker
Gauge: 7 sts and 9 rows = 4″ (10 cm) in waistcoat stitch
Note: Mitten is worked in the round using the waistcoat stitch. Do not join with a slip st at end of round.
Abbreviations:
blo – back loop only. Work stitch in the back loop, leaving front loop unworked.
Special Stitches:
waistcoat st – single crochet into the V of the stitch in the previous round (see video below for help if needed)

Buy the ad-free PDF and crochet on the go!
Pattern
Ribbing
With smaller hook, ch 9. Leave a long tail to seam up ribbing.
Row 1: Sc in 2nd ch from hook and each ch across; turn – 8 sc.
Row 2: Ch 1, sc blo in each st across; turn.
Rows 3-18: Repeat row 2.
Seam ribbing if desired. It can also be seamed at the end after the mitten is complete.
Thumb Shaping
Change to larger hook. Turn ribbing to long side and work as follows:
Round 1: Ch 1, sc 13 sts evenly along ribbing – 13 sts.
Begin working all rounds using the waistcoat st.
Round 2: Sc in each sc around.
Round 3: 2 sc in the first st, sc, 2 sc in next st, sc to end – 15 sts.
Round 4: 2 sc in first st, sc 3, 2 sc in next st, sc to end – 17 sts.
Round 5: 2 sc in first st, sc 5, 2 sc in next st, sc to end – 19 sts.
For the left handed video, click here
Hand
Round 1: Ch 1, skip next 7 sts, sc in next st and each st around – 13 sts including ch-1.
Work even in waistcoat st for 6 rounds.
Top Shaping
Round 1: Sc 6, sc2tog, sc 5 – 12 sts.
Round 2: *Sc, sc2tog; repeat from * – 8 sts.
Round 3: *Sc2tog; repeat from * – 4 sts.
Fasten off, leaving a long tail. Use tail to close top 4 sts tightly and sew any gaps that might remain.
Thumb
Join yarn with larger hook at ch-1 space of hand.
Round 1: Sc2tog ch-1 space and first sc, sc 4, sc2tog last 2 sts – 6 sts.
Rounds 2-4: Work even in sc.
Round 5: *Sc2tog; repeat from * – 3 sts.
Fasten off, leaving a long tail. Use tail to close top 3 sts tightly and sew any gaps that might remain.
Finishing
Weave in ends. Sew ribbing if not done at beginning.
That’s it! These are super easy and quick and make great gifts. I hope you enjoy this free pattern. 🙂
Happy Crocheting!
Amanda

Hi thank you so much for your website, love it.
I was very pleased and supprised that you offer left handed ways of the pattern.
Would it be possible if you could send me a link or something to teach my neice crocheting, she is left handed?
Thanking you
Val
Thanks for the kind words, Val! I’m so glad you like the site! I am making left handed versions of all my videos and I’m getting ready to teach a left handed friend of mine to crochet. I really liked this tutorial from Red Heart and there are lots of videos on youtube to help, which is how I plan to help my friend. We can watch the tutorials together and I can help clarify where to put the hook and such. 🙂
Thanks Amanda! Just made one mitten this morning. I can testify that the pattern is very clear and understandable. Now on to the other one!
P.S. This was my first time making the waistcoat stitch, so I needed the video.
So glad to hear the mitten went well! I was unfamiliar with the waistcoat stitch before this, too, so I understand how helpful a video can be. Enjoy your new mittens! 😀
Thank you, Amanda. I made the other one! I’m ready for the cold weather now. These will be my “warm up” mittens.
Hi what other yarn could I use for this pattern?
Hi Laura!
Any Super Bulky (size 6) yarn that gets gauge should work for this pattern. Just look for a yarn that says super bulky or has the size 6 emblem on it. 🙂
Hi. Love the Rasta mittens. I want to make them with some yarn I already have to match a hat I made but the yarn is #5 bulky weight, not as heavy as the yarn you used for these mittens. Could you tell me the size hooks to use for this type of yarn and how to edit the pattern to work for smaller hooks and yarn? Thank you.
Hi Jan, the easiest way to do this would be to hold two or three strands of the yarn together (whatever it takes to get the same gauge). Then you would work the mitten pattern as written and not worry about changing the stitch count.
Hi these mittens look great, just wondering if you have a mens version? Hoping to make some for my partner but don’t think he’ll fit these!
No I don’t have these in a men’s size, sorry, but I do have a Basic Men’s Mittens pattern. 🙂
I love this pattern!! I have made four pair already. They look like knitted mittens.
Yay!! That makes me so happy that you enjoy the pattern. The knit look was my favorite part of these – and how quickly they work up. 😀