
Purchase the ad-free PDF of this pattern in my shop here!
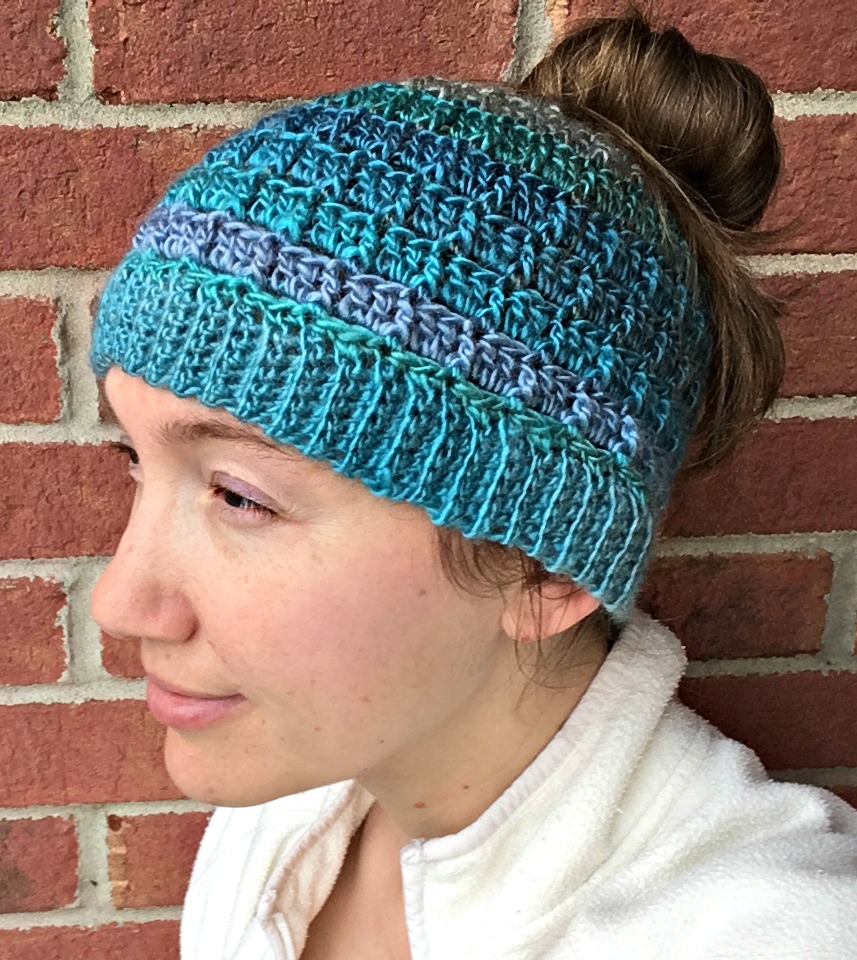
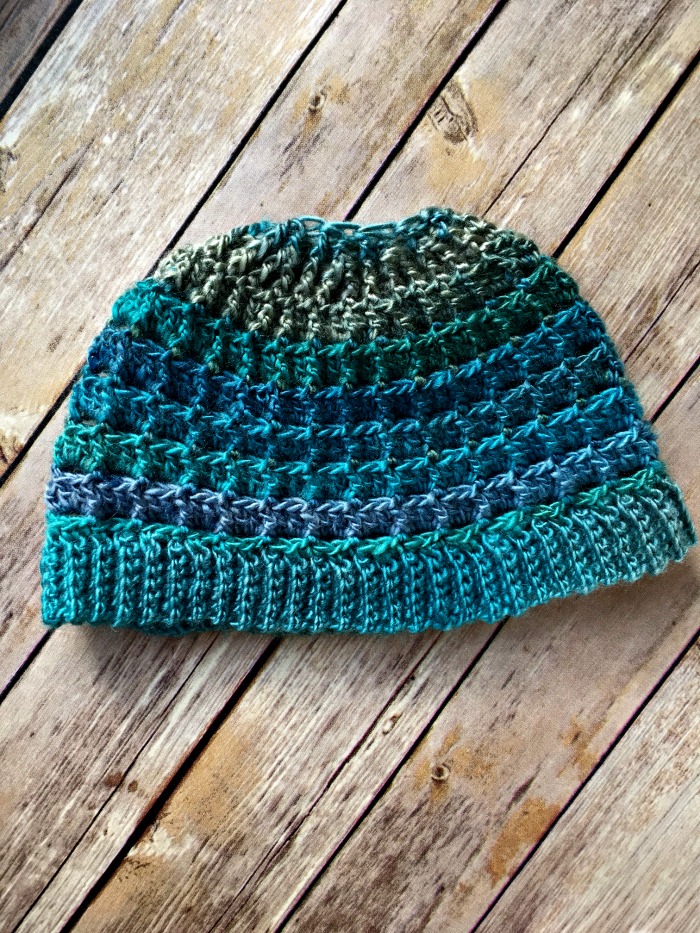
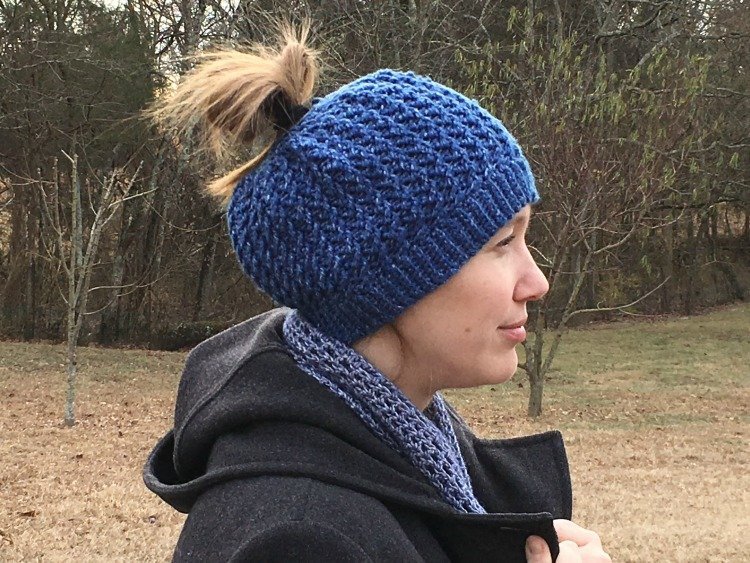
Yay! Another messy bun hat! I had so much fun creating the Quick and Easy Messy Bun Hat that I decided another one was in order. This hat uses a wonderful textured stitch and Red Heart Unforgettable yarn.
If you’ve been around a while you know that I love this yarn. I’ve created several projects with it including the very popular Unforgettable One-Skein Scarf (a knit AND a crochet version!) and then created the Unforgettable Hat to go with it. All of those projects used the Petunia color so for this project I grabbed a skein of Tidal and went to work.
I really liked this stitch pattern and it worked out great for this project. I love trying out new stitches and coming up with new ideas! The color changes in this yarn are great and give the hat that extra something special, but I could see this working well in a solid color, too. The possibilities are endless!
Like messy bun hats? Be sure to check out the newest one on the blog – the Ripple Lace Messy Bun Hat.
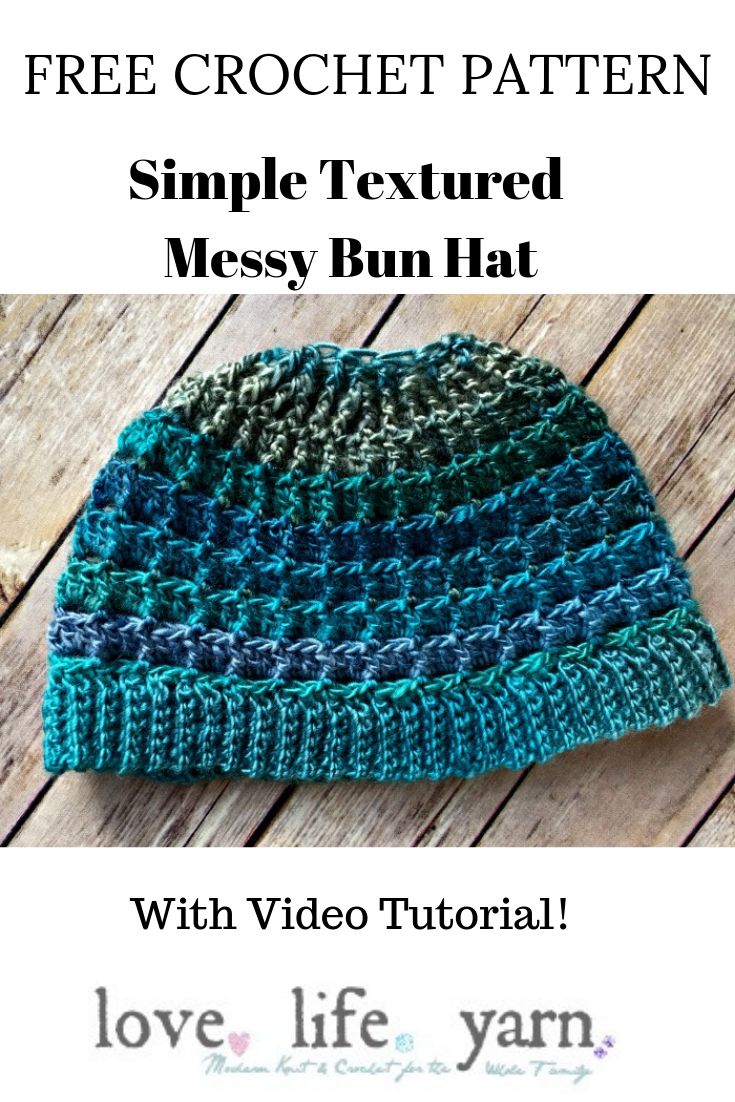
Simple Textured Messy Bun Hat
What You’ll Need
Yarn: Red Heart Boutique Unforgettable, 1 skein Tidal
Hook: J/10/6.0mm and I/9/5.5mm
Notions: Yarn needle, hair elastic
Gauge: 18 sts and 10 rows = 4″ in stitch pattern
Finished Measurements: Approximately 20″ circumference and 7 1/2″ tall
Notes: Do not turn at end unless instructed to do so. Ribbing is worked in rows and turned but body of hat is worked in rounds without turning.
Buy the ad-free PDF of this pattern and crochet on the go!
PATTERN
Rib:
With smaller hook, ch 7.
Row 1: Sc in 2nd ch from hook and each ch across – 6 sts.
Row 2: Ch 1, sc back loop only in each st; turn.
Repeat row 2 until piece measures 20″ from beginning, ending with a WS row. Join with sl st to beginning.
Change to larger hook.
Body:
Round 1: Ch 1, sc 87 sts evenly around, join with slip st to first sc – 87 sts.
Round 2: Ch 1, sc in same st as join, *ch 2, skip 2 sc, sc in next sc; repeat from * to last 2 sts, ch 2, skip 2 sts, join with slip st to first sc.
Round 3: Ch 3 (counts as dc), *2 dc in ch-2 space, fpdc around sc; repeat to last ch-2 space, 2 dc in ch-2 space, join with slip st to turning chain.
Round 4: Ch 1, sc in same st as join, *ch 2, skip 2 dc, sc in fpdc; repeat from * to last 2 dc, ch 2, skip 2 dc, join with slip st to first sc.
Rounds 5-14: Repeat rows 3-4.
Round 15: Repeat row 3.
Favorite on Ravelry or buy the ad-free pdf here!
Shape Cap:
Round 1: Ch 1, sc in same st as join, *ch 2, sc in next fpdc, ch 2, sc in next fpdc, ch 1, sc in next fpdc, repeat from * to last 5 sts, ch 2, sc in next fpdc, ch 2, join with slip st to first st – 78 sts.
Round 2: Ch 3 (counts as dc), *2 dc in ch-2 space, fpdc around sc, dc in ch-2 space, fpdc around sc, dc in ch-1 space, fpdc around sc; repeat from * to last 2 ch-2 spaces, 2 dc in next ch-2 space, fpdc around sc, dc in last ch-2 space, join with slip st to turning ch – 68 sts.
Round 3: Ch 1, sc in same st as join, *ch 1, sc in fpdc; repeat to last dc, ch 1, join with slip st to first sc – 58 sts.
Round 4: Ch 3 (counts as dc), fpdc in each sc, join with slip st to turning ch – 29 sts.
Round 5: Ch 3 (counts as dc), fpdc2tog, *fpdc, fpdc2tog; repeat from * to last 2 fpdc, fpdc2tog, join with slip st to turning ch – 18 sts.
Round 6: Ch 3 (counts as dc), *fpdc2tog; repeat from * to end, join with slip st to turning ch – 10 sts.
Optional:
Round 7: Ch 1, sc in each st around hair elastic.
Fasten off.
Use tail to sew seam in ribbing. Weave in ends.
You’re done! I hope you have enjoyed this free pattern for the Simple Textured Messy Bun Hat. I really enjoyed making it – and I gave it away as a quick Christmas gift, too! 🙂 Happy crocheting!
Amanda
nice work
Thank you!
Is there a video tutorial for this?
Not yet – I’m working on getting videos up. ?
pretty texture! I love RH Unforgettable too 🙂 If I wanted to make this a regular hat, could I just stitch the top shut, or how would you end it?
Hi Amy! If I was going to make this a regular hat I would change the last round (round 7) to Ch 3, *fpdc2tog around – you should have 5 (or 6 if you count the ch-3) and then I would cut the yarn and use the tail to close up the hole at the top. 🙂 It should work just fine!
ok great thank you!
I am confused. Is this two different patterns? I see “Body” and “Shape Cap”?
No, it is one pattern. The “body” is worked without any shaping until you reach the “shape cap” portion. Shaping the cap is when you start decreasing to fit the top of the head. Sorry for the confusion!
Thank you love this pattern
So glad you like it! 🙂
May I download this pattern please to my iPad.
Hi Tammy – you can view the post on your ipad or head to Etsy to pick up a downloadable pdf for $1.99 if you would like an ad-free, large print version.
Thanks! 🙂
Is the video down/uploaded yet?
Not yet – it should be up later this week. 🙂
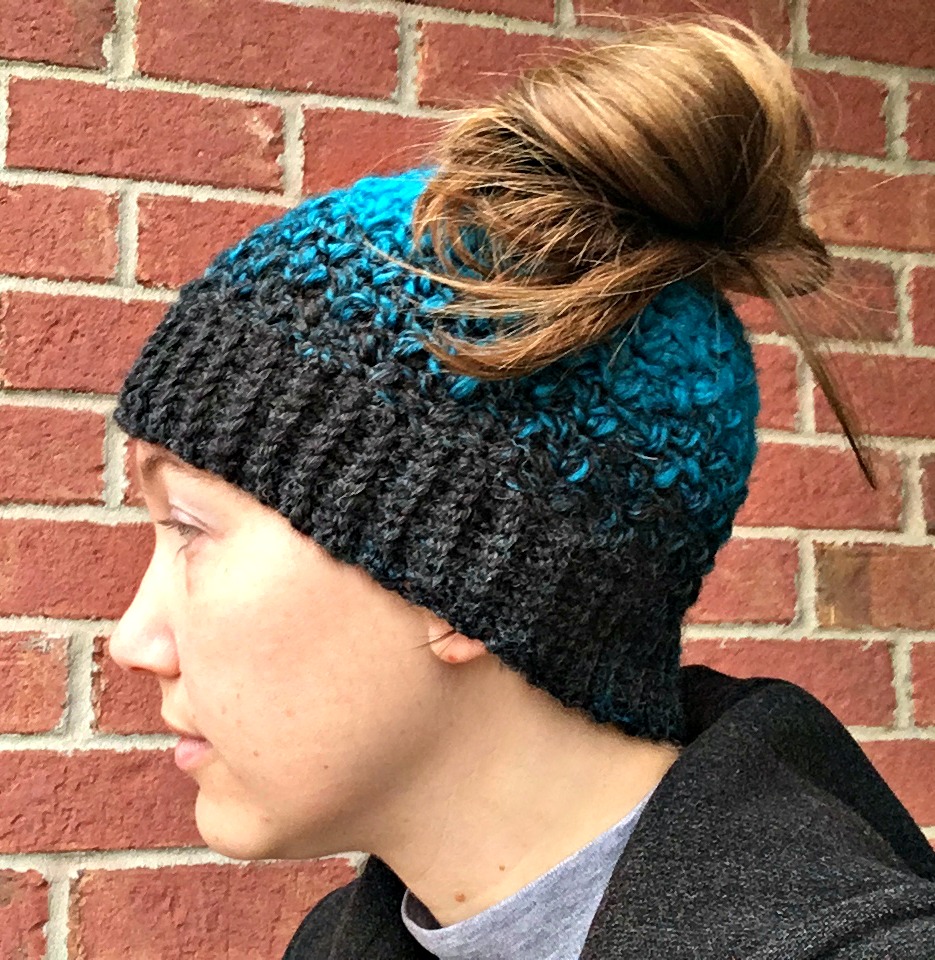
I love the look of this pattern. I haven’t tried it yet but will very soon . It’s neat how the color of the yarn you used gives it almost a waffle stitch look by its color changes and combo of the fpdc. I too love playing around coming up with new ideas with different yarns and/or stitches. Great job on the tutorial. Thanks for your time and effort!
Thanks so much for the kind words! I’ve been working on the video for this pattern and finally have it ready. It will be on the site tomorrow. 🙂
How can make this smaller for a child? how do i alter the numbers? I’m new to crocheting.
Hi Amber! How much smaller are you looking to make it? For a baby or toddler the pattern would have to be rewritten, but you could make it some smaller by trying a smaller hook.
I didn’t even think of a smaller hook, I’m so silly! This should work fine, thanks!
In the previous comment you said to make a smaller hat, use a smaller hook. I’d like to make a messy bun hat for my 5 year old granddaughter. She’s tall but a ‘regular’ size. What size hook would I use? Thank you. So many nice crochet patterns now!
Hi Pat! Taking it from an adult to a 5-year-old maybe try 1 or 2 sizes smaller than the recommendation – and a typical child’s hat is 18″ in circumference, so that is how long you would need to make the ribbing.
My mother in law needs help with the d cresses.
Hi Irene,
I have a complete video tutorial for this pattern, you can access it here. That should help out with the decreases. 🙂
HI I’m currently making this. I went to JoAnn Fabric and could not get the exact yarn and the associate suggestion using a Red Heart yarn as long as it was a 4. Did they advise me well or should I start over? What are some options if I cant find the exact yarn suggested? lI did not do a sample gauge either, so the hat appears big so I need to start over and I think I need to find the exact yarn?
Hi Raquel,
The Unforgettable Yarn does state that it is a 4 but I have found that it seems a little thinner than a lot of worsted weight yarns and doesn’t work up the same as some of the other Red Heart yarns. If you can’t find the Unforgettable Yarn, try using a smaller hook as it will give you a tighter gauge and make the hat smaller. You can order the yarn online at different places (I just googled it and found a wide price range including Joann) or you can look for a yarn that is labeled a 4 but is a bit thinner. I’m surprised your local Joann didn’t have this yarn, that’s where I’ve gotten mine before but I know they all carry different items. If you want to try the smaller hook first, go for it, then try to find another yarn if that doesn’t work. I know several people on Ravelry have made it in other yarns and it’s worked out just fine. 🙂
Thanks! I will try that! ok
I am not getting 87 sc after joining the rib. I got 60 something
I made up two of these. Absolutely beautiful. One I did in strips, changing color ever four rows and one I did in a solid green. Easy to read and use pattern.
I made mine with a yarn that I think is the I Love This Yarn from Hobby Lobby and it’s working fine. I made the brim tso that I could make a child size and I decreased the number of stitches I put on the brim after sewing it tog and making circle. I love the pattern. Waffle looking stitch without the waffle
First of all i love this and an looking forward to making it. Secondly OMG you hold your hook and crochet the same way i do! I was getting paranoid about it because everyone i know holds their hook more like a pencil holding the yarn up on a finger of the other hand and i just have never been able to coordinate that myself. Thank you for your pattern AND your VIDEO.
Hi Cherie!!
I know exactly what you mean! I have had several people complain about how I crochet in the videos so I taught myself how to do it holding the yarn up on my finger, but this is the way I still crochet when I’m not filming a tutorial. 😉
I am working with different yarn and I wanted to know how many inches from the bottom of the ribbed band to round 15 is so I can get it the right size
Looking at the gauge, I would say it is 6″ tall at that point.