
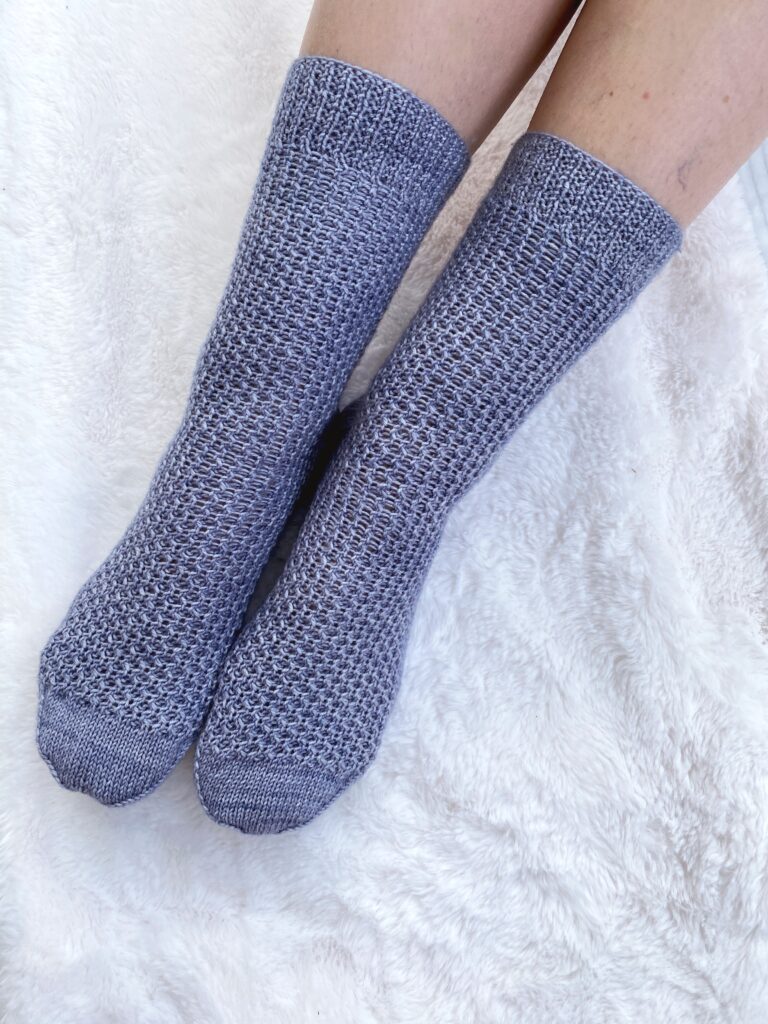
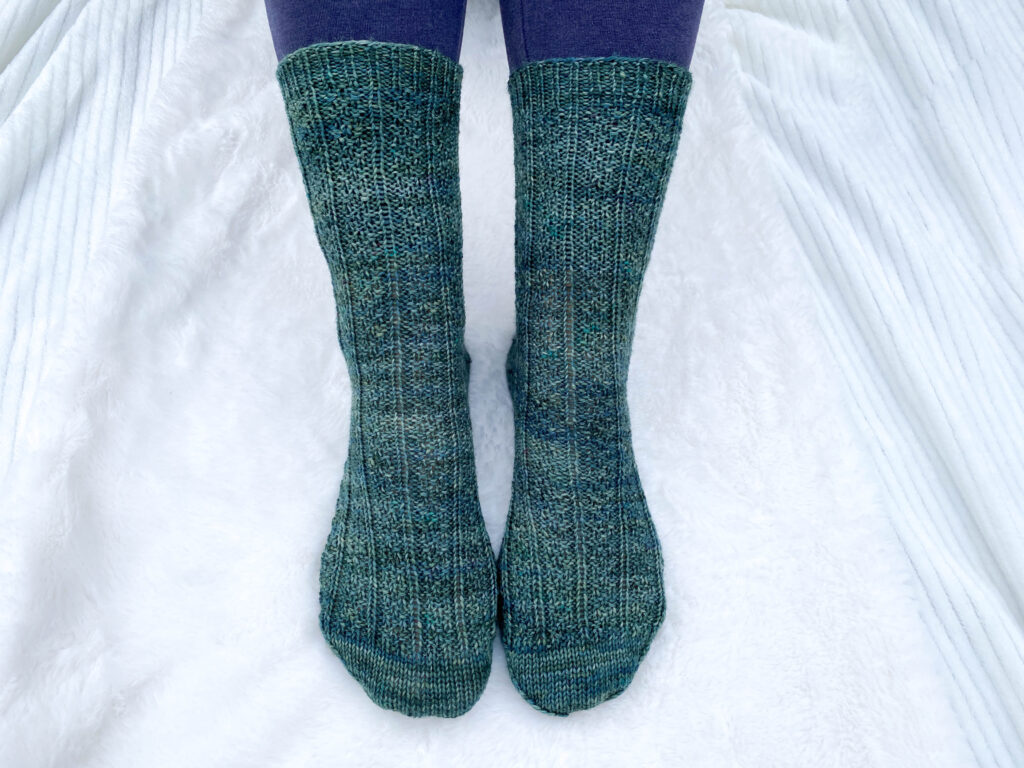
Looking for a fun pair of textured socks to knit? Try the Ray of Honey Socks for a sweet textured sock kniting pattern!
Buy the ad-free PDF of this pattern in my shop here!
Design Story and Inspiration for This Textured Sock Knitting Pattern
I love designing socks! There are so many different textures and patterns to play around with, and in the end you get something super functional.
I loved this fun textured stitch pattern and wanted to use it on a pair of socks. While it does use a cable needle, you’ll find that this stitch pattern is not complicated, and fun once you get it going!
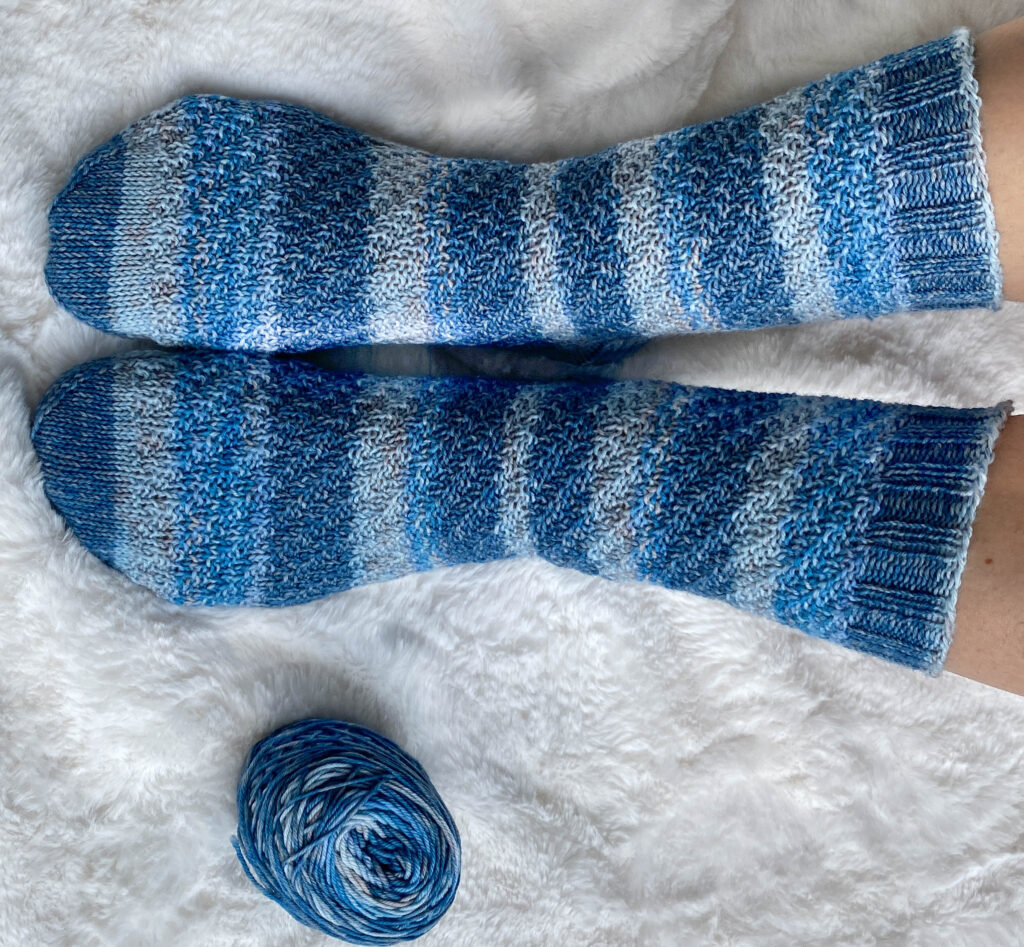
Yarn Options for the Ray of Honey Socks
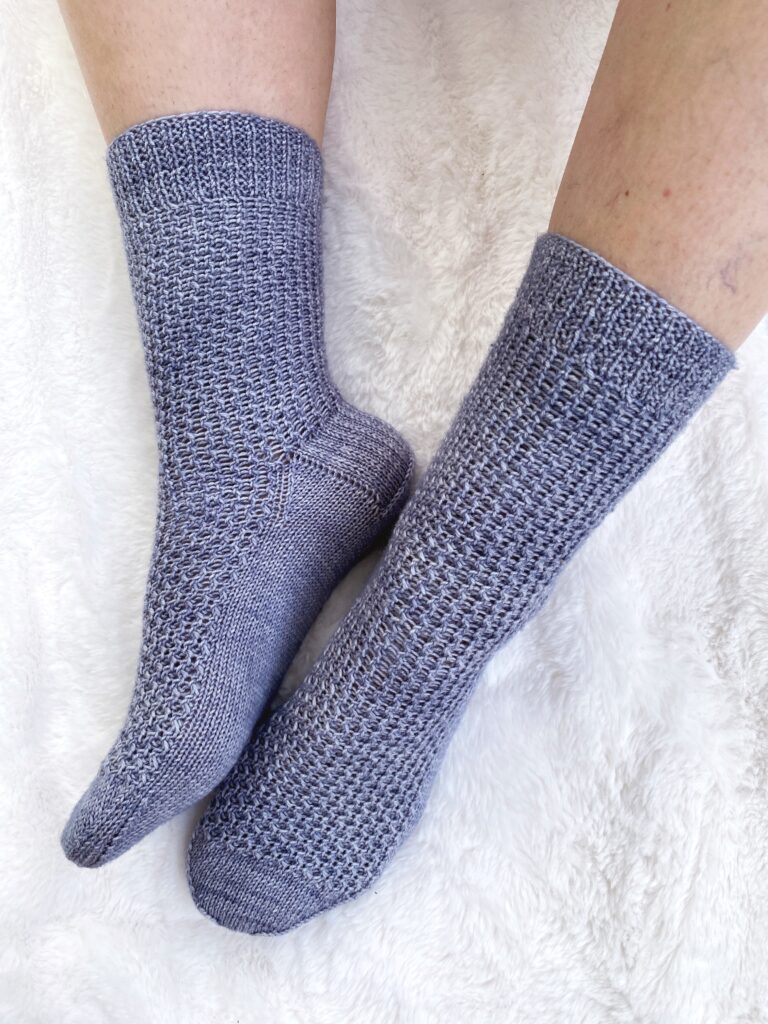
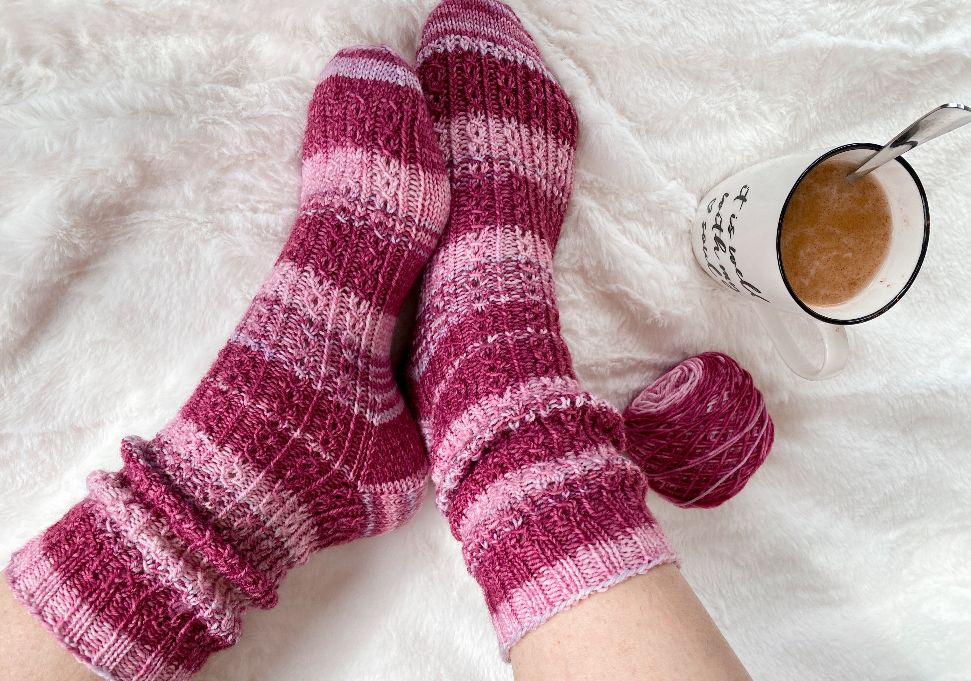
You can use any sock yarn that gets gauge for this pattern as it is a very versatile pattern. I chose Malabrigo Sock, which is a wonderful sock yarn with great color variations.
Feel free to swatch with different yarns and use up some of that stash!
Purchase the PDF of this pattern on Etsy here!
Ray of Honey Socks
What You’ll Need
Yarn: Malabrigo Sock, 1 skein (440yds/100g)
Needles: 5 dpn, US size 2 (2.75mm)
Notions: Yarn needle, scissors, stitch marker
Style: Cuff to Toe
Gauge: 32 sts and 40 rows = 4” (10cm) in St st
Finished Sizes: Small (Large), 7 (7.75) inch circumference to fit shoe size 4-8 (9-11)
Stitch Guide
Knit (k)
Purl (p)
Beginning of Round (BOR)
Special Stitches
Twist two Back (T2B) – place next stitch on cable needle and hold at back of work, knit the next stitch, purl stitch from cable needle
Twist two Front (T2F) – place next stitch on cable needle and hold at front of work, purl next stitch, knit stitch from cable needle.
Stitch Pattern
Row 1: *T2B, T2F; rep from *.
Row 2: Knit.
Row 3: *T2F, T2B, rep from *.
Row 4: Knit.
Purchase the PDF of this pattern on Etsy here!
Textured Sock Knitting Pattern
Cast on 56 (64) sts loosely.
Divide sts on 4 dpns as follows:
N1: 14 (16) heel sts
N2: 14 (16) instep sts
N3: 14 (16) instep sts
N4: 14 (16) heel sts
Join. BOR
Cuff
Rnd 1: Knit.
Rnd 2: (K1, p1) to end.
Repeat 2 rows of rib for 1.50″ from cast on edge. End at BOR.
Leg
Work in stitch pattern until 7.5 (8)” from cast on edge. Complete sts on N3. Stop.
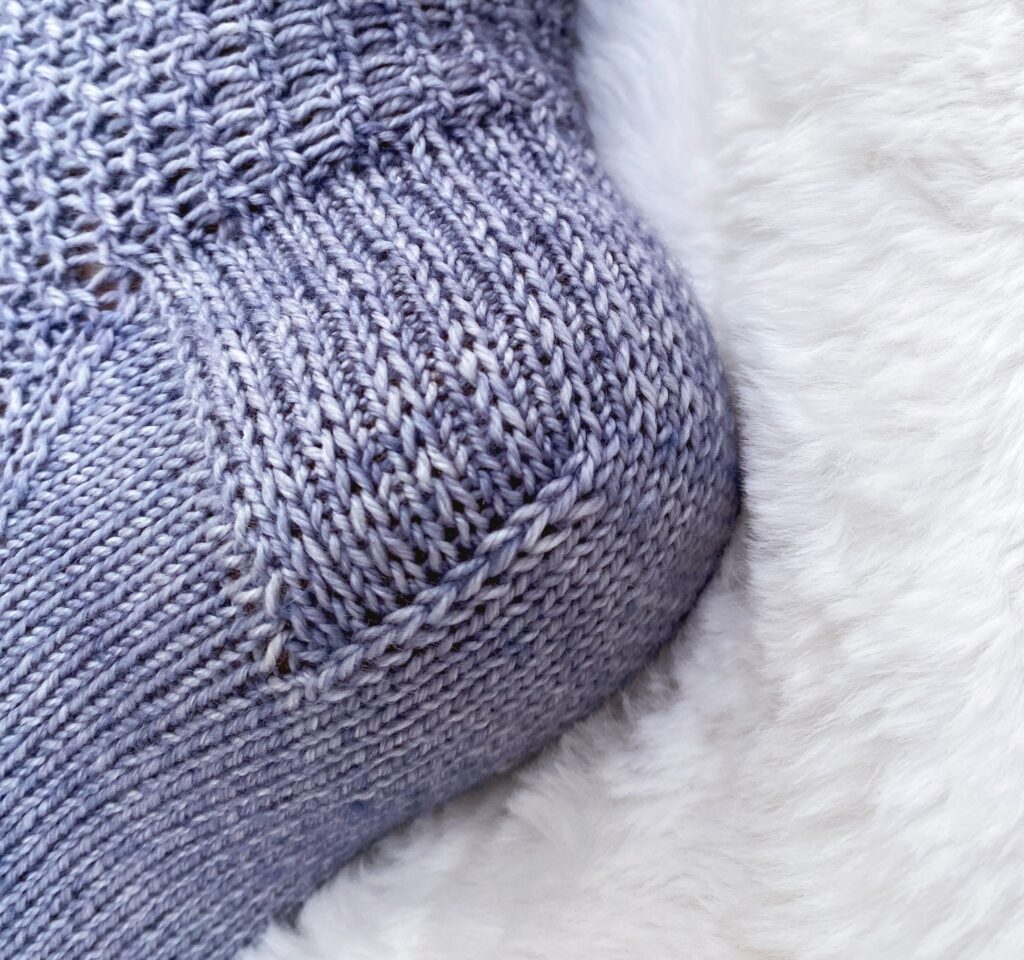
Heel Flap with Heel Stitch
Slip N4 sts onto N1. 28 (32) sts
With RS facing,work back and forth as follows:
Rw 1: *Sl 1 purlwise, k1. Repeat from * to end. Turn.
Rw 2: Sl 1 purlwise, p to end. Turn.
Repeat these 2 rows until 28 (32) rows are complete.
Turn Heel
Note: Sl 1 = slip 1 purlwise
Rw 1: (RS) k 18 (21), ssk. Turn.
Rw 2: (WS) Sl 1, p 8 (10), p2tog. Turn.
Rw 3: (RS) Sl 1, k 8 (10), ssk. Turn.
Rw 4: (WS) Sl 1, p 8 (10), p2tog. Turn.
Rows 5-18: Repeat rows 3-4.
Size Large ONLY
Rw 19: (RS) Sl 1, k 10, ssk. Turn.
Rw 20: (WS) Sl 1, p 10, p2tog. Turn.
All Sizes
10 (12) sts remain.
Work 5 (6) sts. BOR
You’ll Also Love These Other Great Sock Knitting Patterns
Heel Gusset
With a free needle, knit remaining 5 (6) heel sts. [N1]
Continuing with the same needle, pick up 14 (16) sts along the side of the heel.
Pick up and knit a st from row below the first instep st to prevent a hole. [N1: 20 (23) sts total]
With a free needle, work across 14 (16) instep sts. [N2]
With a free needle, work across 14 (16) instep sts. [N3]
With free needle, pick up and knit from row below the first heel st to prevent a hole.
With same needle, pick up 14 (16) sts along side of the heel and work across remaining heel sts. [N4: 20 (23) sts total] BOR
Shape Gusset
Rnd 1: (Dec Rnd)
N1: Knit to 3 sts from end. K2tog, k1.
N2: (Instep) Work even maintaining pattern
N3: (Instep) Work even maintaining pattern
N4: K1, ssk, knit to end.
Rnd 2: Work even maintaining pattern as established
Repeat Rnds 1 and 2 until there are 56 (64) sts remaining.
Foot
Continue working in rnds working top of foot in pattern stitch and sole (heel sts from beg of pattern) in Stockinette st until foot measures 7.5 (8.25)” from base of heel.
Complete sts on N4. BOR
Shape Toe
Rnd 1:
N1: (Sole) Knit to last 3 sts, k2tog, k1.
N2: (Instep) K1, ssk, knit to end.
N3: (Instep) Knit to last 3 sts, k2tog, k1.
N4: (Sole) K1, ssk, complete round.
Rnd 2: Work even.
Repeat Rnds 1 and 2 until 36 (40) total sts remain.
Work decrease rnd only until 16 sts remain. [8 instep sts, 8 sole sts]
Finishing
Work sts on N1. Slip sts from N4 to opposite end of N1.
Slip sts from N3 onto N2.
Holding two needles together, graft sts using Kitchener Stitch.
Weave in ends.
Work second sock.
Final Thoughts on Our Ray of Honey Socks
I hope you love this free knitting pattern as much as I loved designing it! It’s so much fun to design socks… an endless array of patterns and colors. Plus I love to wear them when I’m feeling a bit chilly!
Happy Knitting!
Amanda