

Buy the ad-free PDF of this pattern in my shop here!
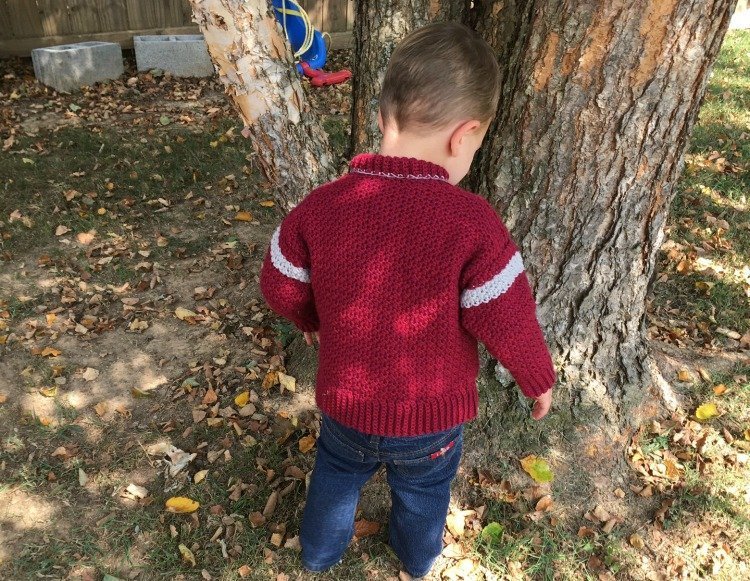
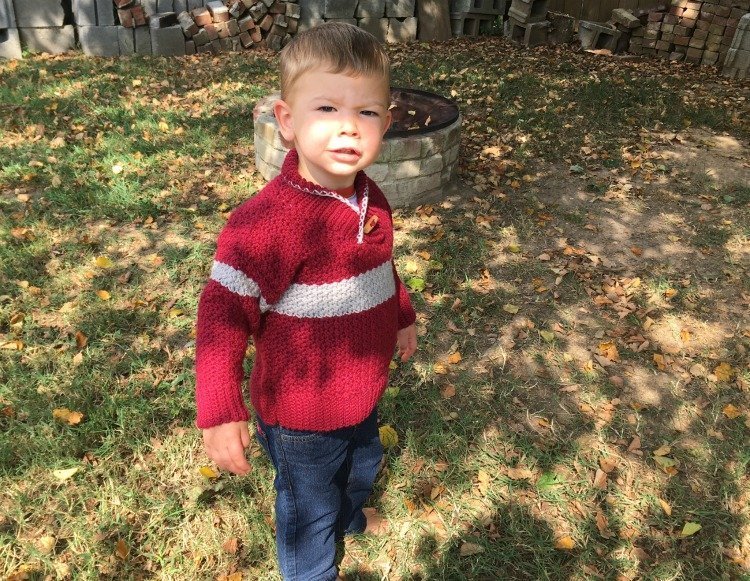
I’m definitely in the fall mood and love it when it starts to cool off – that’s when I get really excited for the hooks and needles to come out. (Not that I ever put them away… but I’m not as motivated to work with yarn when it’s hot. I wish I was!) One of my favorite items to design is sweaters. I love making sweaters. I know a lot of people hate them because of the finishing, but I even enjoy the finishing part. Granted, when I’m making an adult sweater I sometimes find myself griping about how long it takes, so I focus a lot on making baby and child sweaters. This one fits my youngest son and he graciously modeled it for me (even though it was almost 90 degrees that day!). I love it and can’t wait for it to be cool enough for him to wear it to school.
Since we are having another baby this December I am already planning lots of cute things for him to wear. We have all boys (this will be number 4!) so when I design something cute and girly I have to photograph it without a model, but I have a lot of boys to model different sizes! I’m working more on some things my boys can wear this fall and winter (hats, mittens, sweaters, etc) so be sure to check back often for more free patterns!

Buy the ad-free PDF and crochet on the go!
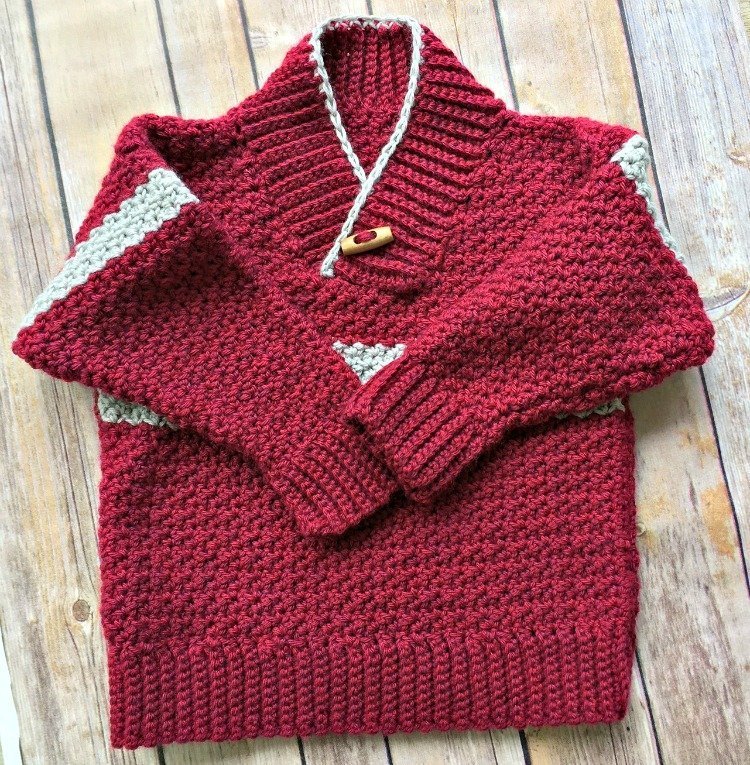
Boy’s Shawl-Collared Sweater
What You’ll Need
Yarn: Berroco Vintage (52% Acrylic, 40% Wool, 8% Nylon; 218 yards [199 meters]/100 grams): 5118 Ruby (MC), 3 (4, 4, 5) balls; #5116 Dove (CC), 1 ball
Hooks: US size I/9 (5.5 mm) for body; US size H/8 (5.0 mm) for ribbing
Notions: Tapestry needle; one 1” (2.5 cm) wooden toggle
Skill Level: Easy
Size: Finished Chest Size 26 (28, 30, 32)” to fit boy’s size 4 (6, 8, 10)
Shown in size 4
Gauge: 8 clusters and 16 rows = 4” [10 cm] in Stitch Pattern after blocking
Special Stitches: Cluster (Cl): (sc, ch 1, sc) in same st
PATTERN
Back Ribbing
With smaller hook and MC, ch 11.
Row 1: Sc in 2nd ch from hook and each ch across, turn – 10 sc.
Row 2: Ch 1, sc in back lp only of each sc across, turn.
Rep Row 2 until piece meas 13 (14, 15, 16)”.
Back
Change to larger hook.
Row 1: Work 26 (28, 30, 32) Cl evenly across long side of ribbing, turn.
Row 2: Cl in each ch-1 sp, turn.
Rep Row 2 until piece meas 14 (16, 18, 20)” from beginning.
Fasten off.
Front Ribbing
Work same as Back Ribbing.
Front
Work same as Back until piece meas 7 (9, 11, 13)”
Change to CC.
Rows 1-8: Cl in each ch-1 sp, turn.
Change to MC.
Rows 9-13: Cl in each ch-1 sp, turn.
Shape Neck
Row 1: Cl in next 11 (12, 12, 13) Cl, turn, leaving remaining Cl unworked.
Row 2: Cl in each ch-1 sp, turn.
Row 3 (Dec): Cl to last 2 Cl, (sc, ch 1) in next Cl, sc2tog in last 2 Cl, turn – 10 (11, 11, 12) Cl.
Rows 4-5: Rep Row 2.
Row 6 (Dec): Sc2tog first 2 Cl, ch 1, sc in same Cl, Cl in each ch-1 sp to end – 9 (10, 10, 11) Cl.
Rows 7-8: Rep Row 2.
Row 9 (Dec): Rep Row 3 – 8 (9, 9, 10) Cl.
Rows 10-11: Rep Row 2.
Row 12 (Dec): Rep Row 6 – 7 (8, 8, 9) Cl.
Rows 13-14: Rep Row 2.
Row 15 (Dec): Rep Row 3 – 6 (7, 7, 8) Cl.
Fasten off.
Join MC at opposite edge and rep Rows 1-15 of neck shaping.
Sleeve Ribbing
Work same as Back Ribbing until piece meas 7 (7, 8, 8)” from beginning.
Change to larger hook.
Row 1: Work 14 (14, 16, 16) Cl evenly across long side of ribbing, turn.
Rows 2-3: Cl in each ch-1 sp, turn.
Row 4: Work 2 sc in first ch-1 sp, Cl in same sp, Cl in each ch-1 sp across to last Cl, Cl in last ch-1 sp, sc in same sp, turn.
Row 5: Cl in first sc, cl in each ch-1 sp across, Cl in last sc, turn – 16 (16, 18, 18) Cl.
Rows 6-8: Cl in each ch-1 sp, turn.
Row 9: Rep Row 4.
Row 10: Rep Row 5 – 18 (18, 20, 20) Cl.
Rows 11-15: Rep Rows 6-10 – 20 (20, 22, 22) Cl.
Rows 16-20: Rep Rows 6-10 – 22 (22, 24, 24) Cl.
Rows 21-25: Rep Rows 6-10 – 24 (24, 26, 26) Cl.
Sizes 6 (8, 10) Only
Rep Rows 6-10, 1 (2, 3) times more – 26 (28, 30) Cl.
All Sizes
Change to CC.
Work 3 rows even in CC.
Change to MC.
Work 3 rows even in MC.
Fasten off.
Buy the ad-free PDF of this pattern in my shop here!
Finishing
Sew front to back at shoulder seams.
Collar
With smaller hook and MC, join yarn at left front neck edge.
Row 1: Ch 1, sc across 9 unworked sts, sc2tog last st and side of neck edge – 10 sts.
Row 2: Ch 1, sc back lp only in each st.
Row 3: Ch 2, sc back lp only in first 9 sts, sc2tog last st and side of neck edge.
Rep Rows 2-3 around right front edge, back of neck, and left front edge, ending at left front neck edge. Fasten off.
Stitch collar in place at bottom front neck edge.
Join CC at left edge of collar. Sc evenly around collar. Fasten off.
Sew sleeves and side seams.
Weave in ends.
That’s it! I hope you’ve enjoyed this free pattern for the Boy’s Shawl-Collared Sweater. I sure enjoyed designing it and love seeing my little guy wear it. There’s nothing like making an item and seeing it worn. 🙂
Happy Crocheting!
Amanda
This pattern originally appeared in the February 2017 issue of I Like Crochet.

one of the best sweaters for little boys I have seen Shortie from Virginia
Thanks so much! 🙂
I would like to print this FREE patterns, but you are requiring that I download a program first. I do not think that is fair to advertise a FREE pattern, but in order to receive it, we have to download some unknown print app which we don’t need or want. Please let me know how to bypass this mode in order to print the pattern off.
Thanks, an interested customer.
Hi Stannie,
I am not sure what program you are speaking of. I have not been contacted by any other readers that they are being asked to download a program to print and I certainly have never set up anything that would require a download. I’m sorry for what is going on.
No, you can print the pattern with adds but if it’s you want it add free you go to Etsy and pay $1.99 for it .
It’s actually $2.99. I just went to purchase it and it’s not $1.99.
Sorry I need to change that. The fees on places like Etsy keep going up forcing us to charge a bit more for patterns.
I printed the free pattern with ads (no problems). Stannie may have gotten caught up in the ads that lead one to believe clicking on it will download the pattern. I’ve fallen victim to it myself a couple of times. Amanda, thank you for the adorable sweater pattern. It’s tough to find these sizes! So excited to make this for the Fall!!
Thanks Cheri! I’m so glad it worked for you. I have so many boys at home to make projects for that I couldn’t resist creating one for toddler + older boys. I can’t wait to add more sweater patterns. Let me know how it turns out!
This is so adorable! I think I’ll have to make one of these for my son. Thanks for sharing your lovely pattern! 🙂
You are so welcome! 🙂
my great grandson will have one or more of these soon…love the pattern, and he will look so cute in it
So glad you like it, Joan 🙂
The pattern only gives one size for chain to start rubbing on back and front, and also no number of stitches needed for sleeve, just says ” as for back”, so do all the sizes start with only 11 chain stitches ? I am confused ?
Hi Connie!
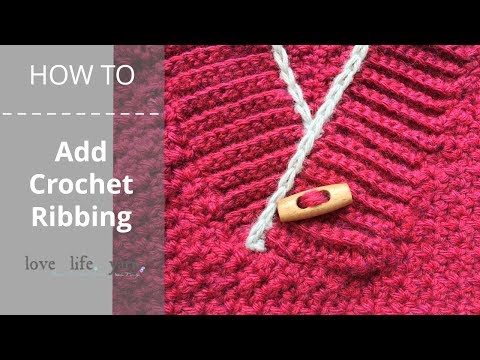
This was confusing to me, too, the first time I tried a pattern that used this ribbing technique. You are working the ribbing back and forth until it is as wide as the front/back or sleeve will be, then you turn it and work on the side. I don’t have a video of this for a sweater, but I do have a tutorial for a hat that uses the same type of ribbing – you can check it out here.
Hey! LOVE the sweater! I am trying to make one for my son, but I am really struggling with the special cluster stitch though…it seems like it never lines up no matter what I try. I know it’s me, so is there a tutorial or more “beginner” directions to help me? Thanks!
Hi Sarah,
What’s probably happening is that you are working into another space besides the ch-1 space (probably one of the sc). I know my ch-1 spaces in between stitches are often smaller than the stitches themselves and I have to be careful where I put my hook until I get the hang of it. While you are working a row and are sure which are the ch-1 spaces, turn your work over and see if you can identify them. Like I said, mine were smaller than the sc around them! Once you know what to look for they should line up as little “V” shapes. Let me know if you are still having trouble and I will see what I can come up with to help. 🙂
Hi! On the backside after you’ve done the ribbing and you start the rest of the back body, you say to work until the piece measures 14” from the beginning. Can you confirm if the beginning here includes the ribbed pattern? Or does it start after the ribbed pattern?
Thanks!
Hi Veronica,
Yes, you include the ribbing when measuring. From the very bottom of the ribbing to the point you need to stop is 14″. I always hate measuring from the top of the ribbing up so I always measure from the very edge. 🙂
Hi! Thanks so much for sharing this adorable pattern! I have a question about the collar. As it reads in the pattern, the collar would be 6 rows of sc but it looks like the ribbing for the body and sleeves to me. Did you make a piece of the ribbing and sew it on? I can’t seem to get it to look the way it does in your pictures 🙁
Hi Tiffany!
The collar is worked just like the body and the sleeves but you attach it as you go. You are working one row away from the body and the next row towards it. On the row that comes toward the body of the sweater, you do a sc2tog in the last st of the ribbing and a st (or into a row) of the body of the sweater. I hope that makes sense! Just be careful not to put them too close together – I see this as the main problem a lot of people have when working ribbing of this sort. If you put them too close together it makes it flare out and looks really strange. Let me know if you still need help!
Hi Amanda,
I’m loving this pattern so far, although I too am confused with the collar. The pattern details only 3 rows to the collar, although there looks like there are around 10 rows of the collar in the pictures. How many times do I need to repeat rows 2 & 3 for each section of the collar? I am making a size 8. I’m based in New Zealand, so it’s still winter here! Thanks in advance.
Hi Milly! I created a short video to hopefully help with the ribbing. You can view it here. Let me know if you still have questionts!
Hi, I am finishing up the sweater but the front on mine is longer than the back. It looks like the shoulder seam should be at the top of shoulder. Should front measure 14″ to top of shoulder too?
Hi Maureen,
Yes, both pieces should be the same length.
I am having the same issue. In shaping the neck i have gotten to the end of row 5 andbim the same length as my back piece. Will it work if i just stopped there and continued with the rest of the pattern?
What size are you making? I’ll check the numbers. This pattern was tech edited but sometimes things can still slip through.
I am making size 10.
I checked out the math and the row gauge adds up if I’m looking at it correctly. You work the back until it is 20″ from beginning. The front is worked until 13″ and then there are 28 more rows after that. If you are getting gauge at 4 rows per inch it should match up. How many rows per inch are you getting?
Truth be told I used a different stitch and a smaller hook. But I just measured and I’m getting about 2 rows per inch. I’ll have to rip out and eyeball it. Thanks for your help!
Always glad to help 🙂
Hi Amanda!
I’m stuck at the end of my robbing for the back. It measures our to 14″. However, when I turn my work to start the back on the long-side of ribbing. I’m not sure if i chain-up any? OR, where to put my hook (in row 1 of back). Also, going into row 2 of the back do we chain-up any from row 1?
Hi Sara!
For this particular stitch pattern you don’t chain at the beginning of a row. When you work the first row onto the ribbing it is the same technique as this hat (except instead of regular sc you would do the Cluster sts) but it will at least give you an idea for where to put your hook. 🙂 Just go past where you actually make the ribbing. Hope this helps! Let me know if you have any other questions!
I am really confused with the collar instructions. It says to “Ch 1, sc across 9 unworked sts”, What stitches are you referring to? I feel like I should join to the neck edge, then ch 11 or so like we did for the ribbing, then work back and forth on those chained stitches, joining to the neck edge of the sweater? Or something like that?
Hi Chris,
You should have unworked stitches at the very front and middle of the sweater where the V-neck will come to its deepest point. You work 9 sts across that center area (above the stripe), then continue to work ribbing just like the bottom ribbing except you join to the body of the sweater. Am I making sense? I hope so!
Do you have a pattern for this in adult size?
Hi Deanna,
Unfortunately for right now it’s only in the kids sizes.
Can you make a u tube video for this? It would help
Hi Helen, I’m working my way through my free pattern library as fast as I can. I will move this one up on the list. My boys make it hard to find time to film so I’m a bit slow right now with a baby in the house. 🙂
Hi Amanda! You’re so kind for create and share this free pattern, I love it!
I’m a little bit confused about the row 3 in “shape neck “, and I’m almost finishing the sweater 😅 Can you explain me, please? I’m a beginner but I’ve crocheted before ❤️
Hi Laura! Glad to hear you are making this sweater! For that row you work the (sc, ch 1) in the next to last Cl, then sc2tog that same Cl and the last one. That way you are still making a cluster when you decrease. Let me know if that makes sense – sometimes it’s hard to tell if it makes any sense or not when writing it out this way. 🙂
Thanks a lot Amanda!!! It ‘s finished and my son loves it! ❤️ Thanks so much for sharing, and helping 😉
So I’m trying this pattern in the size 6, while my ribbing is measuring 14″ wide my actual sweater is about 16″ however my gauge is measuring a little less than yours help!!
Hi Hayley,
The gauge can be a bit tricky to measure on this stitch pattern. Try going down a hook size and see if it helps you come closer to the measurements. Sorry for my delayed reply – we went on a family vacation this week. 🙂
Hi;
I’m working on the collar and I’m very confused. I watched the video and it makes sense but when I read the directions for the pattern it doens’t make any sense to me at all.
In the pattern it sounds as though work a sc in the 9 unworked stitches in the front. But that doesn’t really make sense with what is shown in the video.
Is the ribbing supposed to be 9 stitches wide?
Can I make the collar based on what is shown in the video or is there another way you can explain the directions,.
Also, the front, where I’m supposed to pick up the unworked stitches in straight, Is this what it’s supposed to be?
Thank you in advance
Hi Shirley,
I was out of town this weekend without internet. You start this collar differently than shown in that quick video. You do attach the first row to the unworked sts from the body, then the rest of the collar is worked the same way as the video. If that is confusing just work the collar back and forth like the video and sew it in place at the bottom when you are done. 🙂
Hi there!!
You wouldn’t happen to have an adults version of this pattern??
Not yet – I would love to make one soon, though! 🙂
Is there an easy way to make it smaller and still work?
Hi Hannah – you can try making the smallest size with a smaller hook and see how it works out. If you do it that way, I would suggest adding the bottom ribbing after you are done since you aren’t sure how wide the pieces will be. I’ve done that before and it still looks the same. 🙂
Although I crochet the UK way, this pattern was fairly simple to make. I did make it for my great grand daughter though using my scrap yarn and lots of stripes instead of the one band of colour.
I will attempt to add a photo of the finished project to one of the FB or ‘I love crochet’ pages.
Thanks again
Hi Melanie! So happy to hear the sweater turned out well! I’d love to see a finished picture. 🙂
Hi. I would love to make this jumper formy grandson. We live in Australia. What ply is the wool you used.
Hi Wendy! This is a worsted weight yarn (a size 4 here in the US). I did a quick google search and it says a worsted weight yarn is a 10 ply. Hope this helps! 🙂
Thankyou
Hello…Your sweater looks amazing…..you chose great combination of colours…. i have a question….i havent seen any ch 1 aftr turning….isnt it necessary for this pattern ?? Please tell me fast ..thanks alot for sharing….
Hi! Yes, there should be a ch 1 at the beginning of the row. I’ll change the pattern to reflect that. 🙂
Hello, I love this sweater and want to make them for my boys. Im wanting to make a smaller sweater to fit my one year old who happens to fit a 2T. I’m following you pattern as closely as possible with some adjustments. Do you have any suggestions for making a smaller sweater like this… ( i’m hoping to use another 2t sweater for size comparison).
Hi Angela,
Are you making them matching sweaters or will another pattern work? I have several other boy’s patterns, and many of them go down to a 2T, which is the size my youngest is in right now. 🙂
Hi I’m making a size 8 for my grandson and am a bit confused on the sleeves it says to repeat rows 6 to 10 and in brackets it says for size 8 repeat 2 times more and you should have 28 clusters but if I add 2 more row as it says I’ll end up with 30 clusters, could you please clarify? Thanks love the pattern
Hi Dale, sorry it has taken me a few days to get to your comment… it does look like you will end up with 30 clusters. Sorry about that! I’m not sure how this error slipped through me and my tech editor. I’ll be sure to update the pattern. 🙂
I’m a bit confused on your stitch name. What you have described as a cluster stitch sounds, to me, like a V- stitch. I was taught a cluster stitch is several, about 4 stitches in one. Just want to make sure I do the pattern right.
Cluster and V-Stitches are similar and maybe this is technically a V-stitch, but if you follow the stitch as written you’ll be fine. A lot of people have successfully made this pattern 🙂