
Learn how to line a crochet bag in this simple and quick tutorial as we walk together through the steps to line a tote bag.
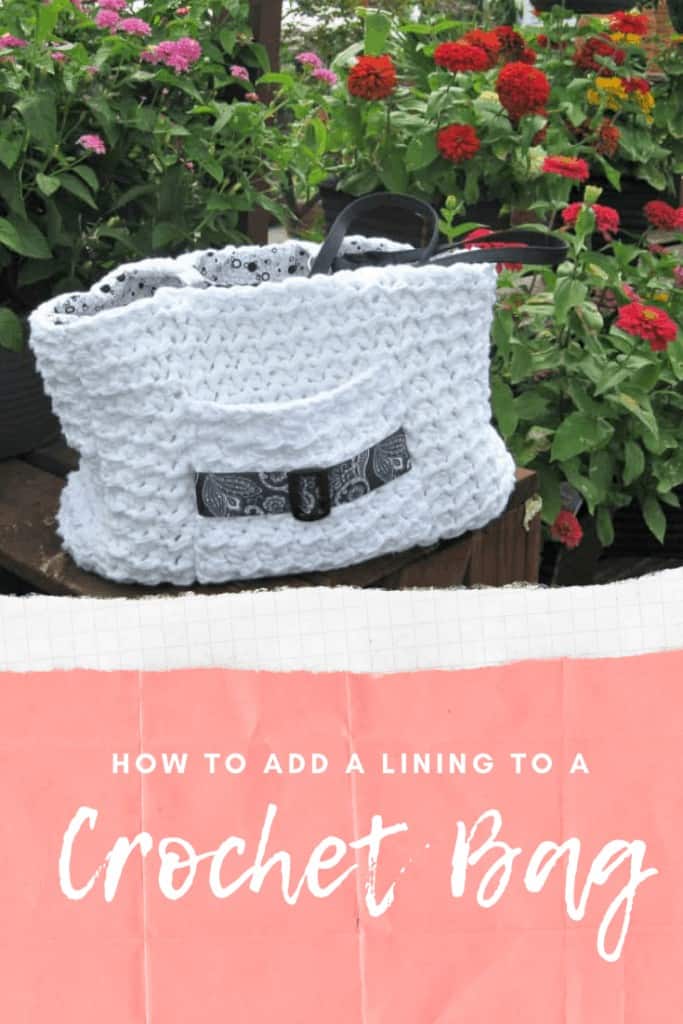
Today we will be lining the Buckle Bag – a free crochet pattern here on the blog. This tutorial could easily be used to line a shoulder bag, market bag, or any other type of crochet purse that you desire.
We are adding a fabric lining to the crochet fabric, which gives any handmade bag a more polished look. To me, most crochet bags need a lining. The fabric that is created by most yarn is not sturdy enough to hold up to the amount of strain a bag gets from holding the purse’s contents.
These instructions would be the same if you were lining a knit bag as well.
If you want to be really professional, a closure such as a zipper would really make the bag stand out, but that’s a different tutorial.
Crochet Bag Lining Tutorial
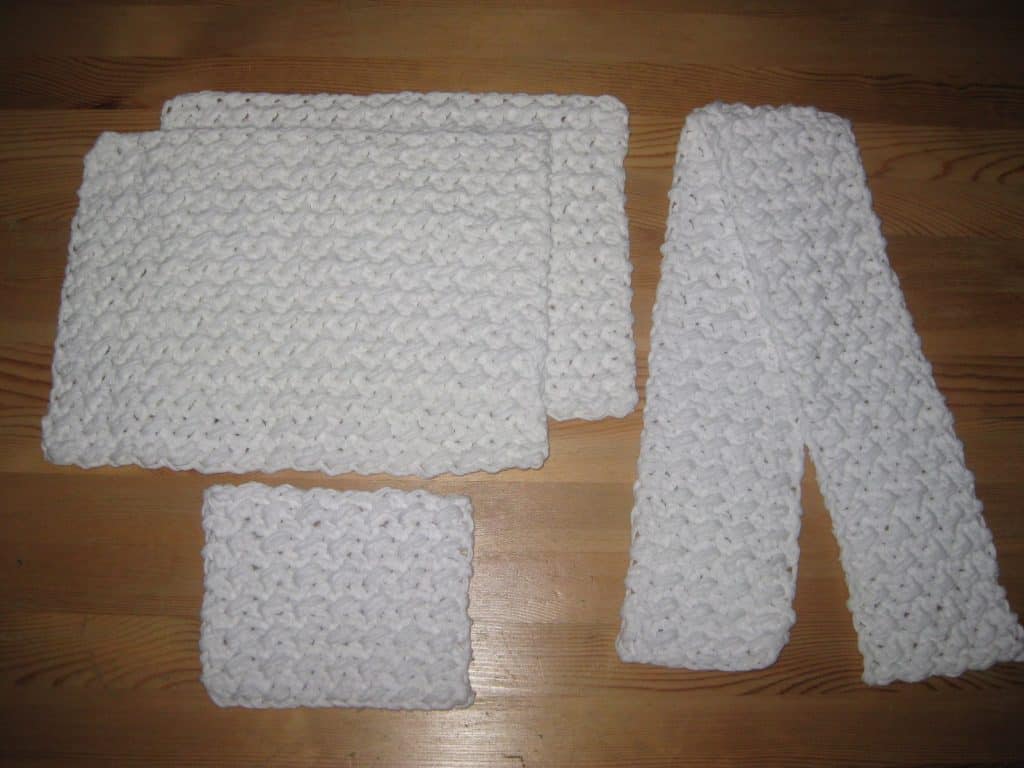
Step One: Crochet the pieces needed for the bag.
First, for my method you will need to crochet the pieces for the bag. I always create my fabric lining and interfacing layer from the finished crochet pieces themselves, that way I don’t end up having to redo it (or be disappointed in the way it turns out!).
It doesn’t matter what crochet stitch is used for the crochet fabric, whether it’s simple single crochet, double crochet or elaborate tapestry crochet, the lining method is the same.
In this example, we are looking at a bag that is made with the crunch stitch in cotton yarn and has a front, back and one long strip that makes up the side panels and back. This would work the same if you have a separate bottom and sides, too.
Here are all my crocheted pieces ready for construction:
Step Two: Create structure in the bag from backing fabric
Create backing for panels by cutting backing fabric (craft stabilizer or other stiff interfacing) same dimensions as crocheted pieces and hand stitching to backs. I like to use a whip stitch or back stitch to attach mine.
The backing fabric to help it hold its shape is optional. I have found it holds up really well – even with the bag full. This is two layers of crinoline, but I was originally looking for a very stiff canvas. Any stiff fabric should do fine.
**Update: I found that my favorite backing is craft stabilizer, which can be found with the interfacing at any craft store.
Adding a backing to your crochet pieces will give them the structure and support it needs and is almost like giving it a double lining.
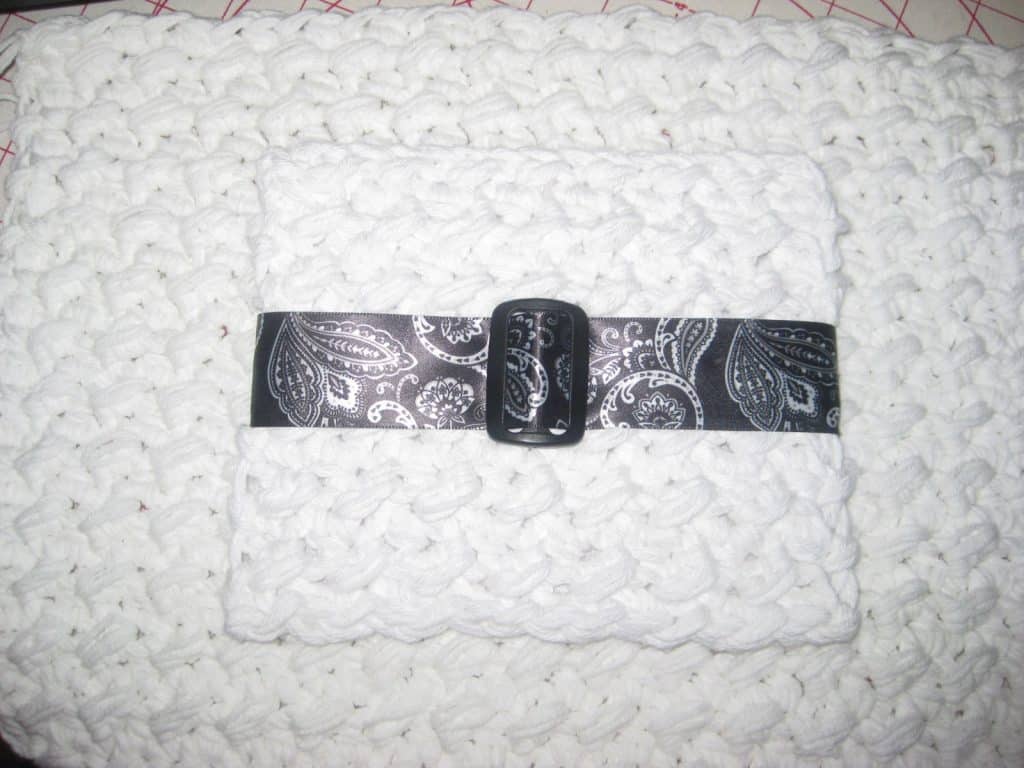
Step Three: Sew on exterior pockets (optional)
The Buckle Bag has a large exterior pocket that is made of crocheted fabric. Since I created my bag to take to a conference and lug around papers and such, I knew the large size would allow smaller things to get lost inside, so I wanted a pocket on front to hold smaller items.
This pocket also had a ribbon and buckle component, so I made sure to sew those on before stitching the pocket to the bag.
Fold ribbon around and sew ribbon in place around pocket, placing slide buckle through ribbon before stitching. (I didn’t take a picture of just the pocket with the ribbon folded, but this is how I laid it out before I tucked the ends under and sewed in place.)

Center pocket on front and stitch in place on three sides, leaving top open.
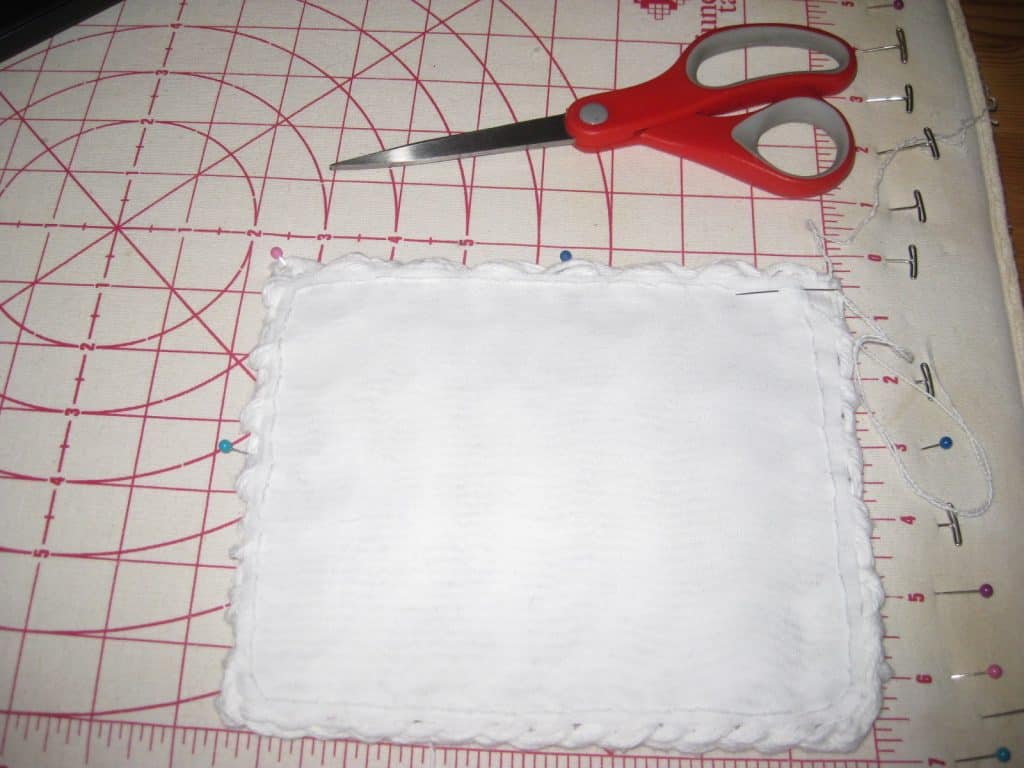
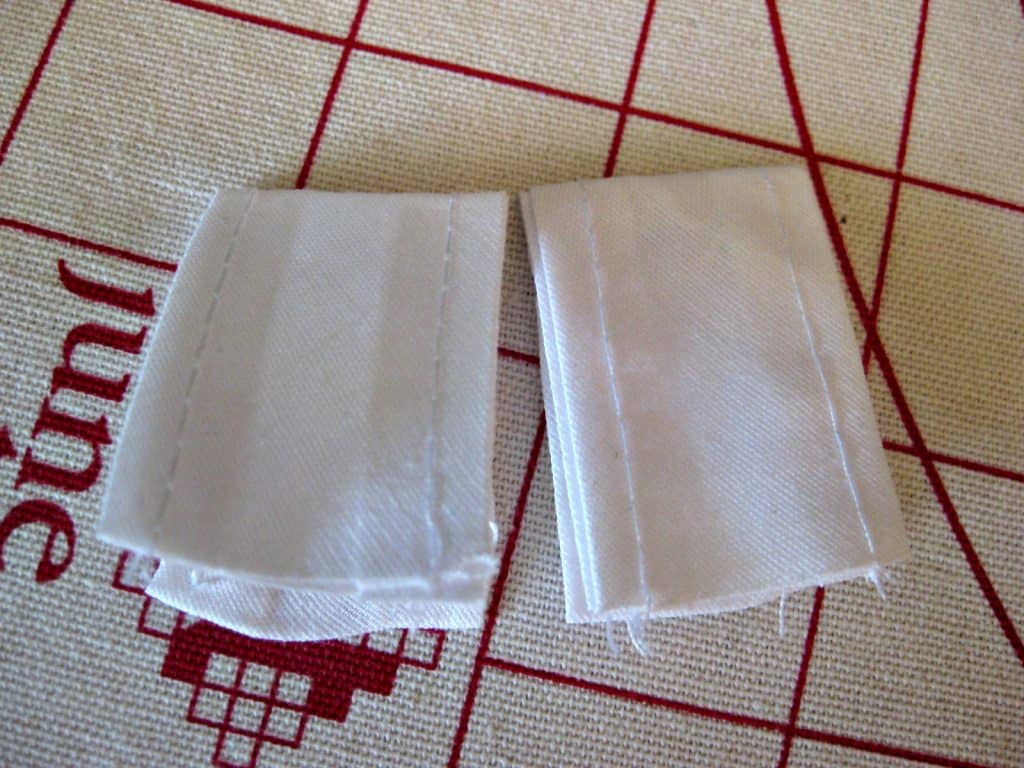
Step Four: Create Fabric Lining
Create lining for bag by cutting lining fabric 1″ wider and taller than crocheted pieces. I will place my crocheted piece on the fabric and draw the seam allowance 1/2″ around each side to ensure it is the same size.
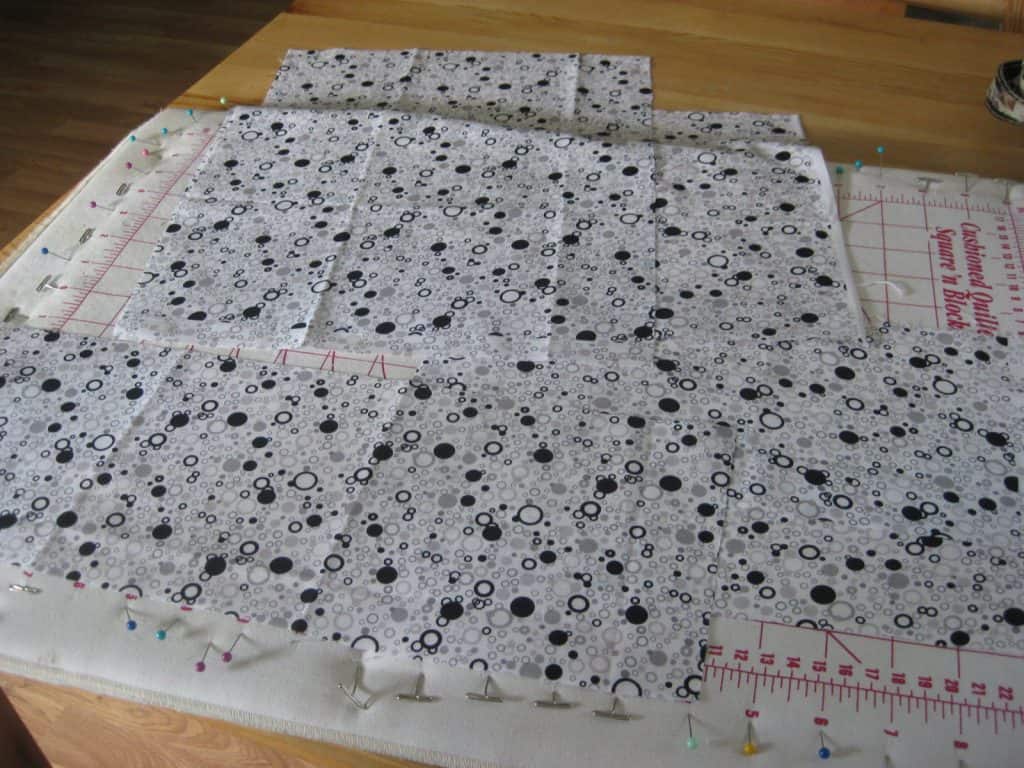
Sew together by hand with a sewing needle or with sewing machine with ½” seam allowance on all sides. I did not take a picture of just the lining after it was sewn.
Step Five: Sew Crocheted Pieces Together to Create Bag Exterior
Sew front and back crocheted pieces to side/bottom strip. You can do this with a slip stitch (sl st) and your crochet hook if you don’t want to sew them with a needle.
If you did not want a lining, this is the next step after finishing the crochet and fixing the pocket. I love having a lining as it really makes the bag look professional. I get so many compliments on this bag!
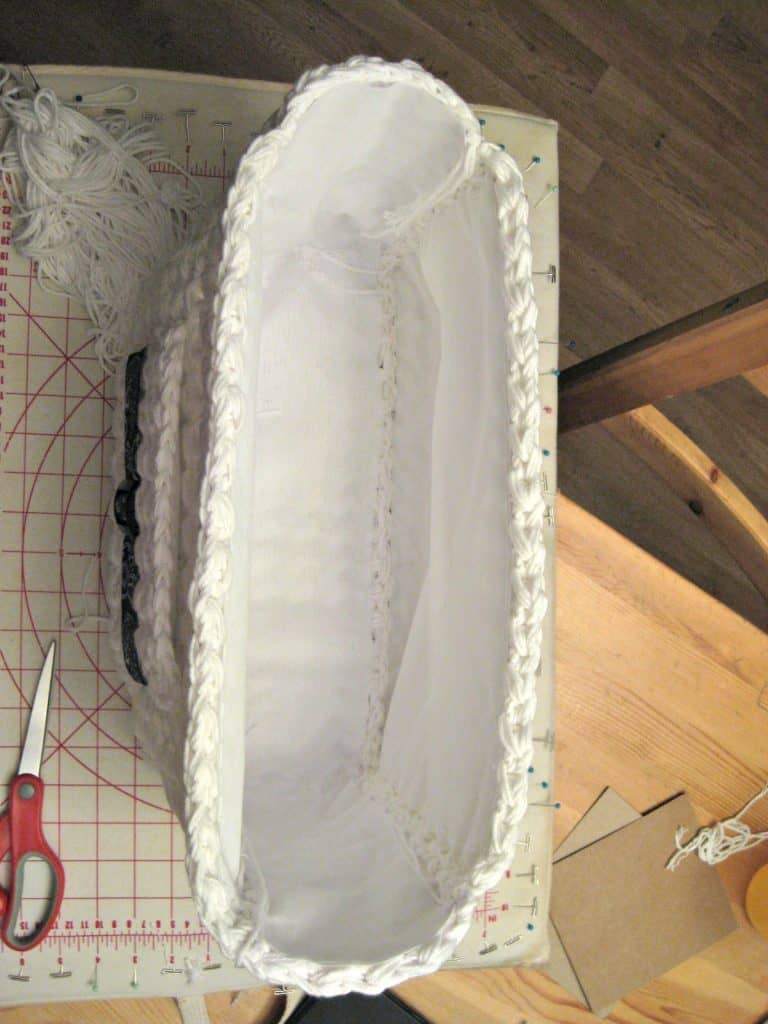
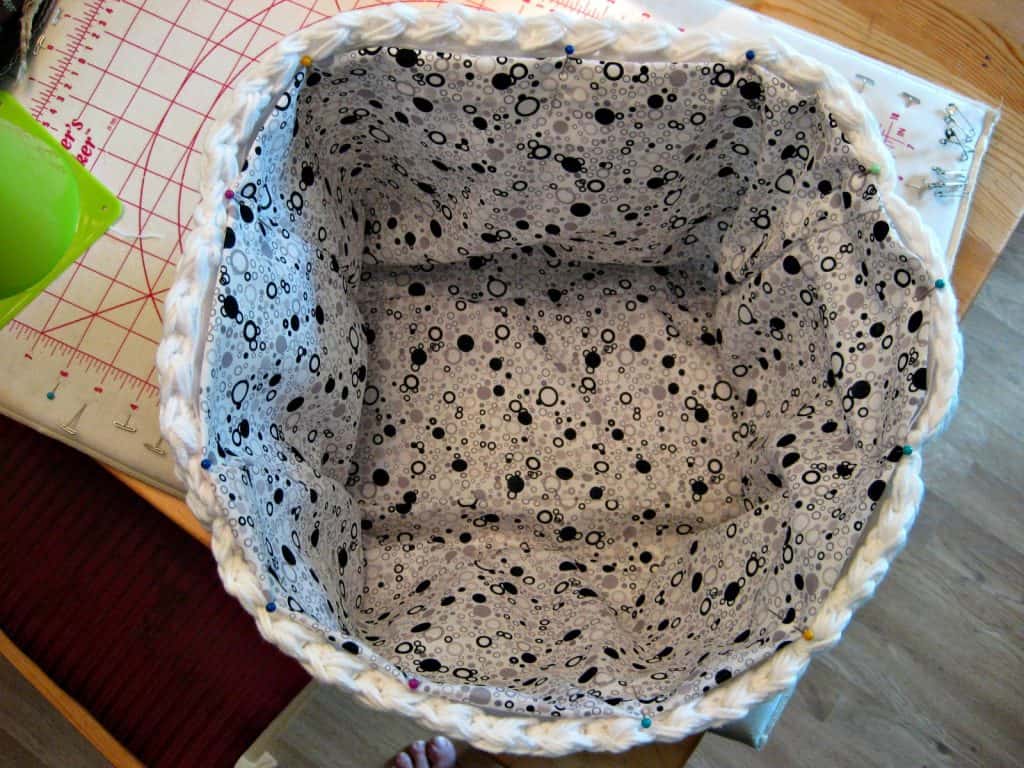
Step Six: Attach Lining to Bag
To attach lining, fold down ½” on top, press with iron if desired, and pin to top of crocheted bag with right side of fabric showing inside bag. Here it is ready to be sewn with pins in place. Fits nicely!
I like to sew this part my hand, but you can also sew through all layers with a sewing machine. I use an invisible stitch to secure mine now that I’ve made a few bags and I really like the way it turns out.
Step Seven: Attach Handle(s) or Strap
The handles I chose for the Buckle Bag came from my local JoAnn store and had closed rings, so I had to create a way to attach them.
I could have crocheted strips to attach the handles to the bag, and in the future I might try that with a backing and lining.
To attach these handles, I used bias tape to secure them in place.
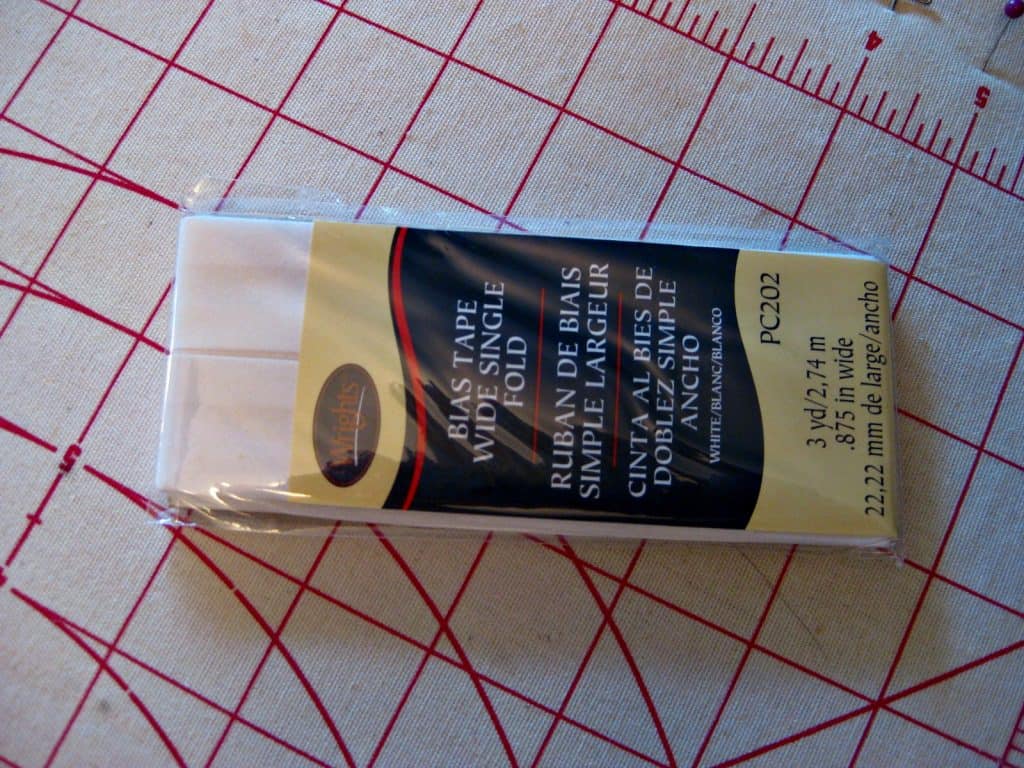
Here is how you can use bias tape to attach handles like these:
First, cut 3″ strips, then sew the sides shut. Next, press them in half with an iron.
Place the bias tape through the handle rings. These rings did not have an opening.

Stitch the bottom of the bias tape closed.
Place bias tape between lining and bag and stitch in place (I even went through the crocheted bag with my machine stitching – you can’t even really tell.) I wish I had taken a picture of this step!
I used a machine for this point because I really wanted to make sure the handles were secure. Since then I have hand sewn many handles and have never had a problem with my handles coming apart.
You can see how the bias tape is positioned in the photo below. Hand sew the rest of the lining with a whip stitch, or machine stitch around the top of the bag. You’re done!
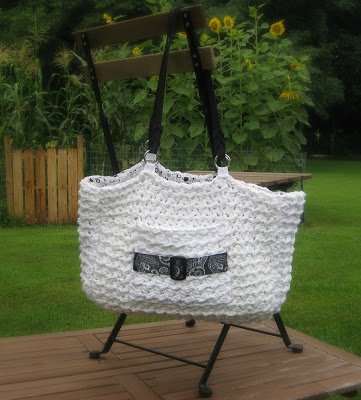
I have to admit, I created this bag as a free pattern and for my CGOA conference, not thinking that I would carry it much (especially with it being white), but I have found that I love this bag!! It is roomy and easy to carry and I’ve even managed to keep it clean after carrying it for weeks!
I did add a very stiff piece of cardboard to the bottom to help the bottom stay flat and next time I make one I will add interior pockets, but for a basic tote it is amazing. I can’t wait to try my hand at another bag design! Hope you enjoy!
The crochet instructions for the bag pattern can be found here.
Today in our bag lining tutorial, we learned what materials we need for lining a handmade bag, how to construct the bag and how to attach purchased handles.
I hope you’ve enjoyed the bag lining tutorial for the Buckle Bag and will be inspired to create one yourself!
Happy Crocheting!
Amanda
Hello
Many thanks for this very helpful tutorial & I know it is some years since you created it but I hope you will see my request – which is probably obvious to other people but as I’ve never done this before I would like to understand before i go ahead. My query is – should Step 7 (the straps) be Step 6 and Step 6 be Step 7 because if I sew the lining in at Step 6, how can I fit the straps between the lining & the outside in Step 7 or, does Step 6 attaching the lining mean stitching the sides & the bottom but leaving the top free to insert the straps? Sorry, I have just got so confused.
With very many grateful thanks for your help please.
Hi Lorna! It depends on what kind of straps you use. This type does need to be inserted between the lining and the bag, so yes, do that before attaching the lining all the way. Since I have written this I have begun using purchased handles that go on the outside of the bag and they are sewn right onto the crochet itself, not in between.
Confused Stitch Pattern reads Row 1 Ch2 skip net st. *slip st in hdc. hdc in next slip st. repeat from* to end slip st in top of turning ch turn.
FRONT reads
ch 31
Row 1 Slip st in 3rd ch from hook*hdc in next st. Slip st.in next ch repeat from* to end turn. This seems quite different from stitch pattern Also do you ch 2 at the beginning of each row.
I quess I do not understand stitch pattern from instructions for Row 1.
Thank you
Row 1 is setting you up to work the stitch pattern, which is alternating hdc and sl st. Then you’ll always work a sl st into the hdc from the previous row and a hdc into a sl st from the previous row. Yes, ch 2 at beginning of each row, except row 1 because you are working into the foundation chain.
When you use the craft stabilizer you mentioned, is it the sew-in kind or fusible iron-on? Also, do you use a heavy weight stabilizer? Thanks so much!
I use the sew-in kind 🙂 It’s a very heavy weight and will stand up on its own.