
Ready to test your crochet colorwork skills? Try out the crochet fair isle hat – uses four colors of worsted weight yarn for a fun free pattern.
Design Story and Inspiration for the Crochet Fair Isle Hat
I’ve really, really wanted to design a crochet fair isle sweater but I wanted to try out my hand with some color work to practice.
I figured a beanie was the perfect thing to try out my color work skills that wouldn’t be as labor intensive as an entire sweater, but would still give an awesome result.
This pattern has definitely been a labor of love – I’ve had amazing testers that picked such a wide variety of colors and this was also tech edited, especially to get that top shaping just right.
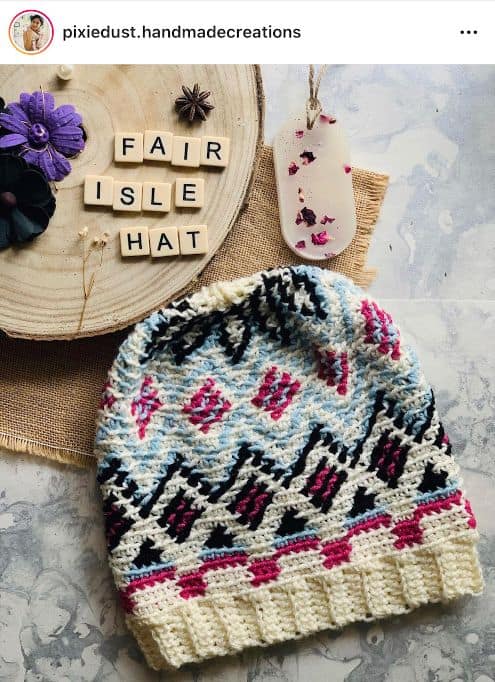
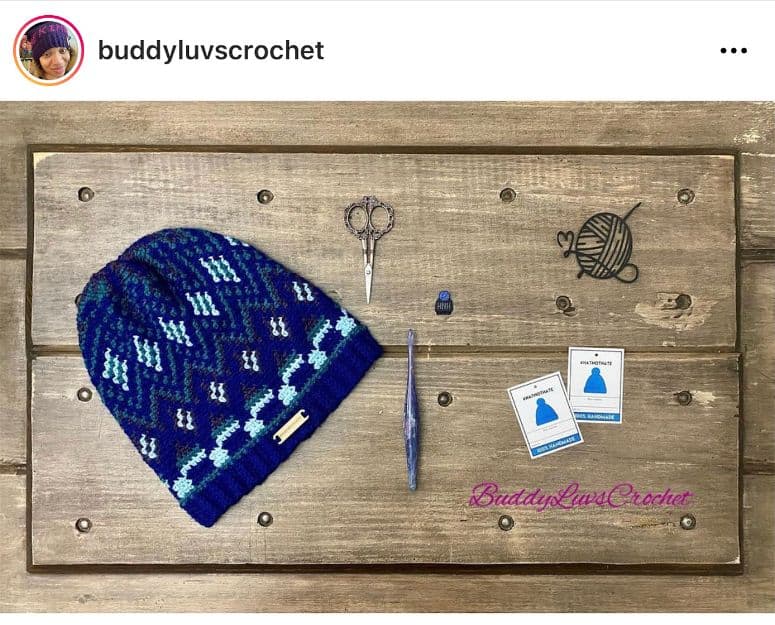
Check out the amazing tester photos throughout this post – I couldn’t pick all of them, but they all did an amazing job!
The pattern here is for the adult small – you can get all the sizes from preemie to adult large just by signing up to my newsletter!
About the Yarn
I’ve used Patons Classic Wool before and I know I enjoy working with it, so when I saw the perfect color combination at my local JoAnn, I knew it was meant to be!
Feel free to substitute any worsted weight yarn that gets gauge. The tester versions were made with many different yarns and turned out great!
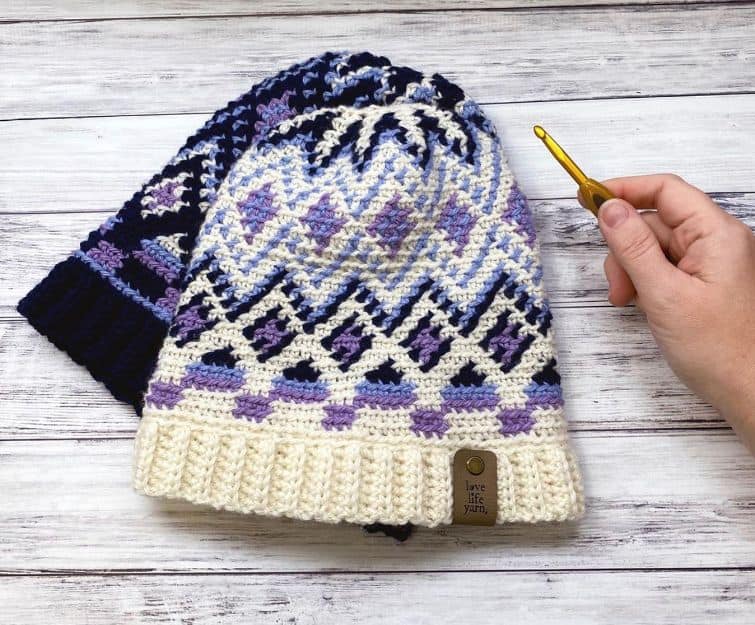
My original beanie was cream with the other colors as accents. Since I apparently work tighter in tapestry crochet in the round, the hat turned out a bit small for me, so I decided to go up a hook size and make another.
The navy version turned out perfectly, but it was a little bit taller than I liked, so I wanted one more version, which is the purple one you see in the video.
For this version, I created a double brim by making the crochet brim wider and folding it in half. I really like the way this turned out. Then, to get it a bit shorter, I also took off the first 5 rows of the chart, and started where the diamonds began.
So – there are options for you here! Double or single brim? Tall, more slouch-like hat or regular (although I would definitely recommend stranding instead of tapestry if you want a slouchier hat, as the tapestry gives it a stiffer feel. Testers tried both techniques and they both work well).

Pattern Details
This crochet fair isle hat pattern is worked from the bottom up. The ribbing is worked side to side in rows, whether you want to do the single or double ribbing.
Then, the hat is worked in rounds using the different colors and chart. ALL stitches are worked in the back loop only.
After the chart, the top shaping can either be worked using the symbol chart or the written instructions. If done correctly, the top of the hat should appear as a star shape.
Want more tapestry crochet patterns? Click here!

Crochet Fair Isle Hat
What You’ll Need
Yarn: Patons Classic Wool, 1 skein each in Aran (A), Blue Fog (B), Navy (C), and Soft Orchid (D). These were the colors for the original beanie. I used to leftover colors to make the other 2 hats – and didn’t have to buy a single extra skein (plus I still had yarn left over).
Hooks: US Size I (5.50mm) hook for body and H (5.00mm) hook for rib, OR SIZE TO OBTAIN GAUGE. I cannot stress enough how important gauge is for this project – please check your gauge.
Notions: Yarn needle, scissors, pom pom (optional – I chose not to use one)
Gauge: 16 sts and 16 rows = 4” in sc blo
Finished Size: Adult Small (Approximately 20″ circumference)
Crochet Fair Isle Hat Video Tutorial
Want this downloadable pattern in sizes from preemie to adult large? Join the newsletter and get access to the free resource library!
Notes: Ch 2 at beginning of row does not count as hdc.
Ribbing is worked in rows, then seamed and body of hat is worked in round in sc back loop only.
Join each round with a slip stitch. Then chain 1. Pull both the slip st and ch-1 tight to hide the join.
ALL sts worked in back loop only.
Color Key (based on sample seen in photo): A= Main Color (cream), B=lighter blue, C=Navy, D=Lilac
Please Note: This pattern has several options. One is the ribbed brim for the beanie, which can be single brim like the cream and navy in the picture, the other option is the double brim which is the light purple beanie (NOT the tester photo, which is a single rib). Also, the adult sizes tended to be a bit tall when the entire color chart was worked, so the light purple beanie had several rows of the chart left off. See the video tutorial for more information about these.

Crochet Fair Isle Hat Pattern
Choose either single or double ribbing and complete only those ribbing instructions.
Single Ribbing
With MC and smaller hook, ch 8.
Row 1: Hdc in 3rd ch from hook and each ch; turn (6 sts).
Row 2: Ch 2, hdc in back loop only; turn.
Repeat row 2 until ribbing measures 20″ from beginning. Slip stitch seam closed and begin working in rounds. Continue to instructions for body.

Double Ribbing
Ch 17.
Work same as single ribbing, including seaming, then fold in half lengthwise and work through both sides of rib.
Body (Worked the same for both ribbing methods, except that the double ribbing must be folded and worked through both layers at the same time)
Change to larger hook, turn to long edge and sc 80 sts around. (Alternatively, work this round in one of the contrasting colors. I did this after making my first beanie and really like the result.)
Begin chart, starting at round 1 or 6, depending upon which version you choose to make. See pattern details above for more information.
Work chart. Shaping begins after last round of the chart.

Shape Crown
Row 1: *Sc 1 A, sc 1 C, sc 1 B, sc2tog A, sc 1 A, sc 1 B, sc 1 C; repeat from * around (70 sts).
Row 2: *Sc2tog A, sc 1 C, sc 2 B, sc 1 C, sc 1 A; repeat from * around (60 sts).
Row 3: *Sc A, sc C, sc2tog B, sc B, sc A; repeat from * around (50 sts).
Row 4: *Sc 1 A, sc2tog C, sc 1 C, sc 1 A; repeat from * around (40 sts.)
Row 5: *Sc 1 A, sc2tog C, sc 1 A; repeat from * around (30 sts).
Row 6: With MC, sc2tog around (15 sts).

Fasten off, leaving a long tail. Weave through stitches and pull tightly to close.
Weave in ends.
That’s it!! I hope you love the Crochet Fair Isle Hat as much as I do (and yes, I know it’s not technically fair isle because there are times when you work three colors… but it looks like Fair Isle to me :).
You Might Also Like…


Happy Crocheting!
Amanda
Amanda! What a fabulous pattern and an outstanding tutorial!! You really outdid yourself this time and aren’t we the lucky ones! I can’t wait to try this as I did make a sweater for myself in colorworks. And yes, it was very difficult, but I did do it. This, though, is just mind boggling and so ;well done; it defies words to tell you how excited I am with this pattern. Now you’ll understand why it is so great to follow you and congratulations on another superb job. Thank you!
Hello, l love this hat but I was wondering if you ever do the full written pattern as I don’t understand graphs and find videos very hard to follow? Thank you 😊
I love it, after I completed my first hat following your instructions I got a better sense of it. I am going to keep trying this pattern method you made, but try other colors I have for scrap. As it looks harder but simple once you see it.
I ended up making this hat in several colors with the skeins I bought for the original hat. I had so much fun making them! Glad you like it!