
Enjoy a rustic fall pumpkin that’s easy to crochet and works up quickly in bulky yarn!

Buy the ad-free PDF of this pattern in my shop here!
Design Story and Inspiration for This Crochet Pumpkin
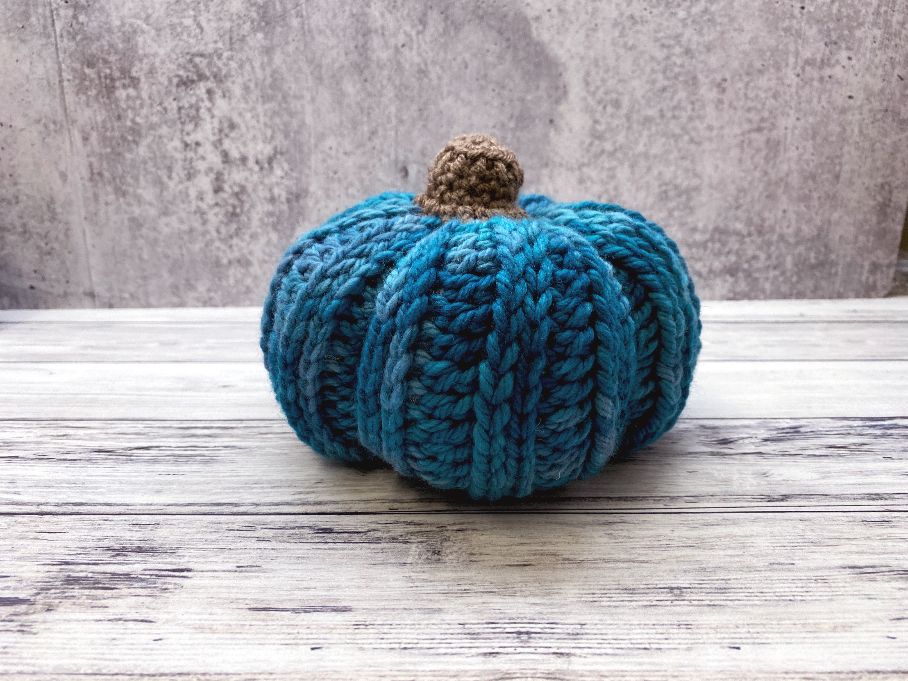
I fell in love with this hand dyed bulky yarn at my Local Yarn Store and while the rest of it is still more than likely going to become a hat, the color tones were just perfect for a cute fall pumpkin!
I really love this simple ribbing pattern that is worked flat. I used it for the ribbing of my Hygge Mittens and for a Reversible Crochet Beanie that is made flat and seamed. It just has so many uses!
Yarn Options for This Pumpkin Pattern
I used a hand dyed bulky yarn, but you can really use any yarn you wish for this pattern. Just make sure to use a hook that is a size or two down from the recommended hook size on your yarn label.
My stem is made from a Dollar Tree skein of Just Yarn Worsted. Again, go with what you have and use a hook a size or two down from the recommended hook size. Doing this will help ensure your stuffing isn’t seen through the stitches.
Before we begin… Let’s get Social!
I would love for you to come follow me on
Instagram (get sneak peeks of what’s coming up!)
My Facebook Page (come join the fun!)
Follow me on Pinterest (I pin tons of free patterns to my boards!)
Join my Facebook group (lots of awesome crochet talk there)
Also, you can find me on Ravelry or join my subscribers on YouTube.
Ribbed Pumpkin Pattern Details
This simple pumpkin is crocheted flat and seamed, then the bottom is gathered. Once you have the bottom gathered you stuff it firmly, then gather the top.
This will give you the general pumpkin shape. From there you run your yarn needle through the middle of the pumpkin to make it more squat in shape and if you like you can run the yarn around the sides to give it more definition.
Finally, the stem is crocheted in the round starting with a magic ring and then stitched on.
How to Customize This Easy Crochet Pumpkin Pattern
This pattern is so easy to customize!
Want to change the shape? No problem – this stitch pattern can be worked over any number of stitches and you can work as many rows as you want.
Instead of crocheting a stem, try using a branch or cinnamon stick hot glued to the top.
Add leaves or curly leaf stems. It’s up to you!
More Free Fall Crochet Patterns


Ribbed Crochet Pumpkin
What You’ll Need
Yarn: Bulky (Category #5) yarn of your choice for pumpkin and Worsted (Category #4) yarn of your choice for stem
Crochet Hook: US Size K (6.50mm) for pumpkin and I (5.50mm) for stem
Notions: Yarn needle, scissors, polyester fiberfill
Gauge: 16 sts and 10 rows = 4” (10cm) in stitch pattern
Finished Size: Approximately 6″ circumference
Stitch Abbreviations
Chain (ch)
Slip Stitch (sl st)
Single Crochet (sc)
Double Crochet (dc)

Buy the ad-free PDF of this pattern in my shop here!
Ribbed Crochet Pumpkin Pattern
With bulky weight yarn and larger hook, ch 27.
Row 1: Dc in 4th ch from hook and each ch across; turn – 24 dc.
Row 2: Working through both loops across row, sc in first st, insert hook in same st and draw up a loop, insert hook in next st and draw up a loop, draw last loop directly through 2 loops on hook, *insert hook in same st as last completed st, yo and draw up a loop, insert hook in next st and draw up a loop, draw last loop directly through 2 loops on hook; repeat from * in each st across, work additional slip st in last st; turn.
Row 3: Ch 3, dc blo in each st across; turn (24 dc)
Rows 4-26: Repeat rows 2-3, working a row 2 last to hide the seam.
**If you are having trouble with this stitch pattern, it is the same as the ribbing from the Hygge Mittens (there is a video tutorial on this pattern to show you how to work the ribbing).
FINISHING
Using tail end, thread through a yarn needle and sew short ends together, then use same tail end to weave through one long side, pulling tightly to gather and sew shut.
Fill with a small amount of rice, beans or plastic pellets. If using smaller items, you might consider placing them in a piece of pantyhose or a snack size zip top bag to keep them from falling out.
Stuff the rest of the way with fiberfill.
Gather top same as bottom, hiding all ends inside pumpkin.
If you would like to have it segmented like in the pictures, use the tail (or a new piece of yarn if the tail end is too short) to run yarn along sides of pumpkin in between ribbing on the dc rows, through bottom until there are strands of MC between each segment.
Stem
With worsted weight yarn and smaller hook, make magic ring.
Round 1: 6 sc into magic ring – 6 sts.
Round 2: 2 sc in each st – 12 sts.
Round 3: Sc into back loop only of each st – 12 sts.
Rounds 4-5: Sc in each st around – 12 sts.
Round 6: *Sc, 2 sc in next; repeat from * around – 18 sts.
Stuff lightly and stitch to top of pumpkin as seen in photos.
Weave in all ends.
Final Thoughts on Our Ribbed Crochet Pumpkin Pattern
Today we learned how to crochet an easy ribbed crochet pumpkin made flat and seamed. These are great for decor and favors!
I hope you’ve enjoyed this free crochet pattern as much as I enjoyed designing it! Make sure you join the email list and download it! If you are on the list already, just check the bottom of any of my emails for instructions on how to access the free resource library!
Happy Crocheting!
Amanda
Thanks so much for sharing your knowledge. I am disabled and no longer able to do much of anything. I ,was going crazy, as I was an athlete, a ballroom dancer, acrobat, a banking operations supervisor and my proudest, a US Navy medic duri the Vietnam era. After my problems escalated, Crocheting in about all I CAN do. So your paterns and generosity are very much appreciated. GOOD LUCK IN ALL YOUR EFFORTS.
Especially that you help others. L.E.B.