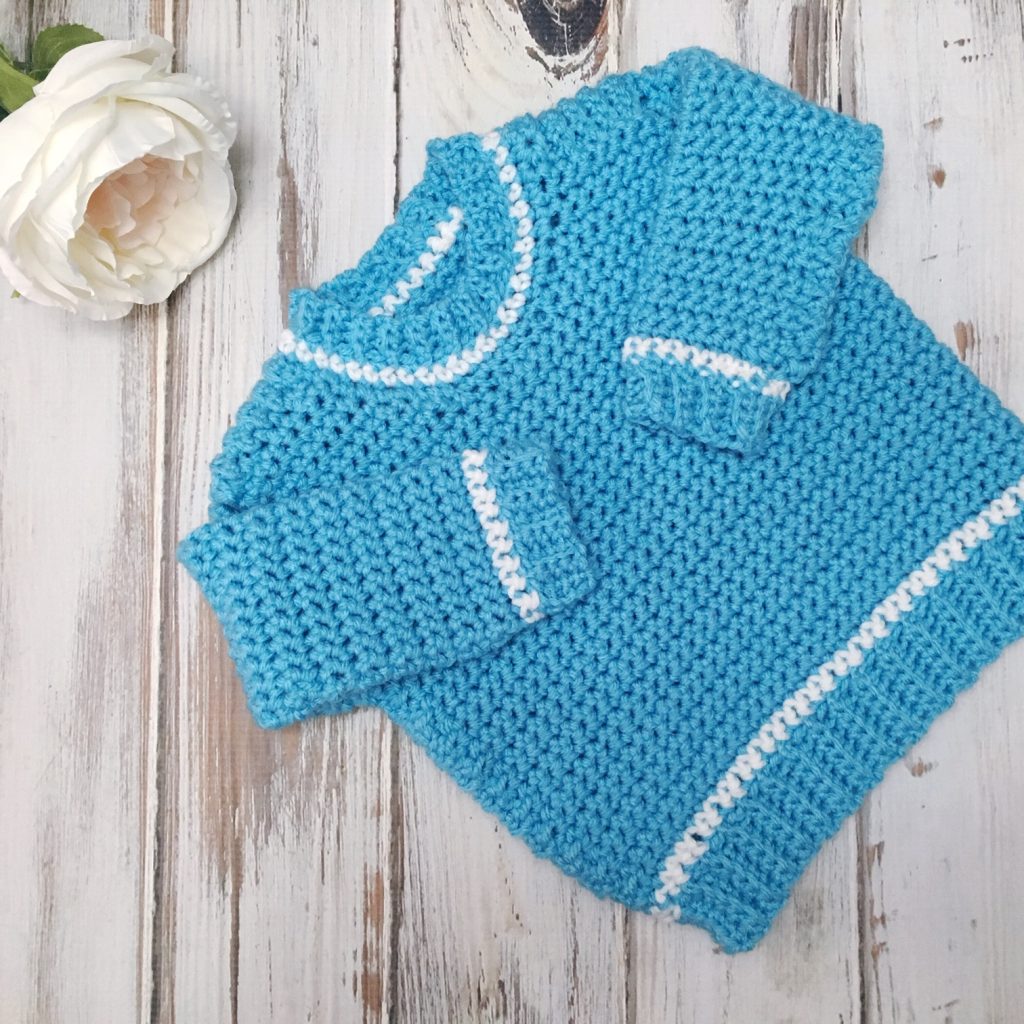
Everything you ever wanted to know about single crochet, all in one handy post. Video tutorial, photo tutorial and more.
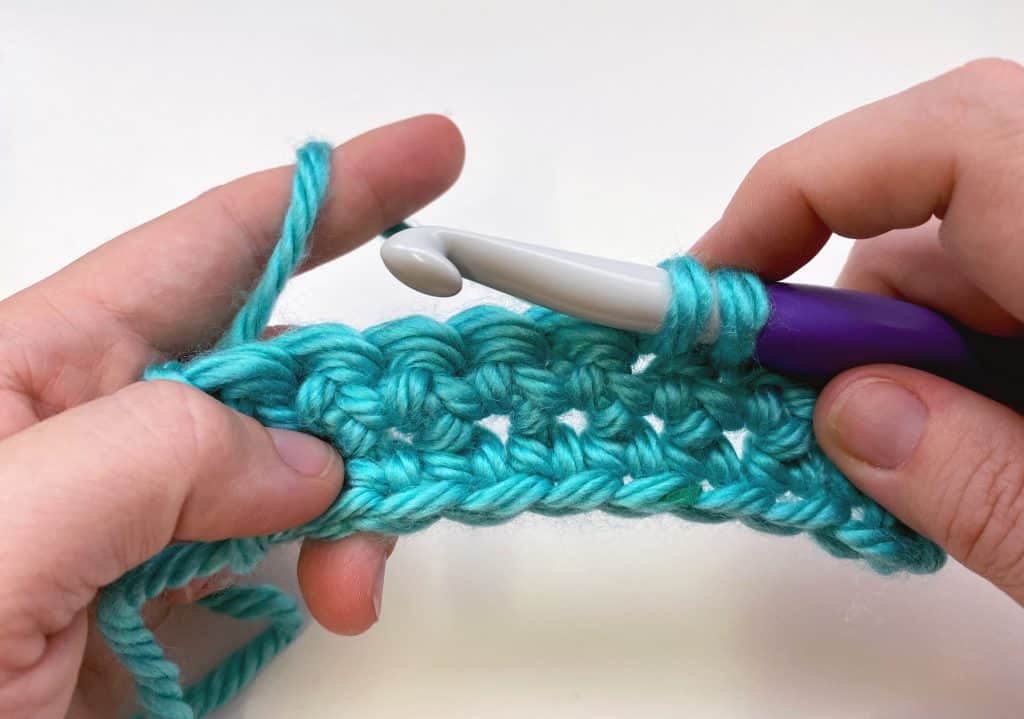
Single crochet is the most common crochet stitch and is usually the first one a beginner learns.
This stitch is super common in all types of crocheted items, from dolls and stuffed animals all the way to the most intricate sweaters, you are bound to find single crochet in all types of projects.
Today we are going to cover all aspects of single crochet, from common questions asked about the stitch to the different ways you will use single crochet stitches, common mistakes and more. There is even a video tutorial to help you out, so get comfy, grab your yarn and hook and let’s get going!
Common Questions about Single Crochet Stitches
Single crochet is the most basic stitch in crocheting. This stitch produces a dense fabric that has a gauge that is usually roughly square (same number of stitches and rows per inch). It is typically the first stitch for beginners, although it is still used by even the most advanced crocheters, especially in amigurumi patterns such as stuffed toys.
In the UK, the term “single crochet” is not used, so you know if you see this term it is in US terms. In the UK, a sc stitch is called a double crochet, which can be confusing if you aren’t sure which terms you are dealing with.
If it is just the difference between US and UK terms, they are the same. However, if you are working in US terms, a single crochet is a much shorter stitch, and a double crochet is worked starting with a yarn over and has more steps, which results in taller stitches.
This one is super easy! The abbreviation for single crochet is simply sc.
This stitch can actually have two charts. It either looks like a plus sign or an “x”. You can see all of the crochet chart symbols from the Craft Yarn Council here.
The Anatomy of a Sc
Height
The single crochet is the shortest stitch, unless you count a slip stitch, which technically has no height.
Turning Chain
A turning chain for single crochet is simply ch-1. When creating the base chain, you will never work in the first chain stitch from the hook unless the pattern tells you to (which is very rare).
Before we begin… let’s get Social!
I would love for you to come follow me on
Instagram (get sneak peeks of what’s coming up!)
My Facebook Page (come join the fun!)
Follow me on Pinterest (I pin tons of free patterns to my boards!)
Join my Facebook group (lots of awesome crochet talk there)
Also, you can find me on Ravelry or join more than 12K subscribers on YouTube.
Single Crochet Tutorial
How to sc into a Chain
Begin with a slip knot on your hook and chain as many stitches as you need plus one for the turning chain.
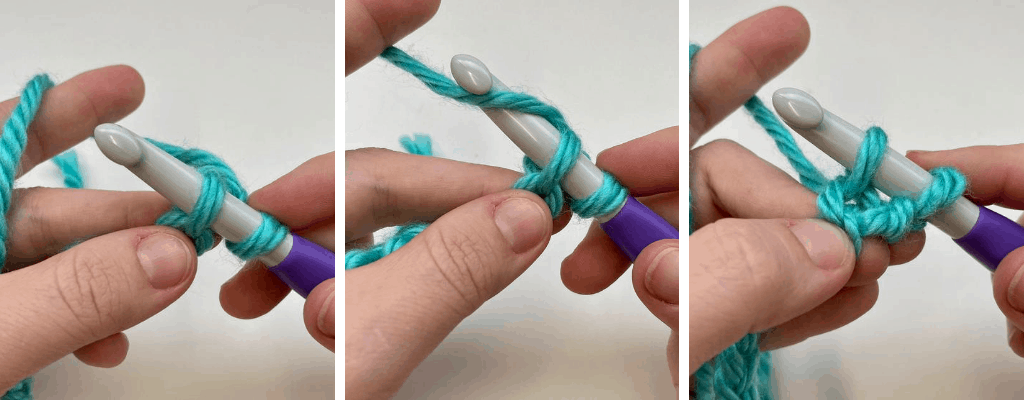
Step One: Insert the hook into the second chain from the hook, wrap the yarn over the hook and pull up a loop. Two loops on hook.
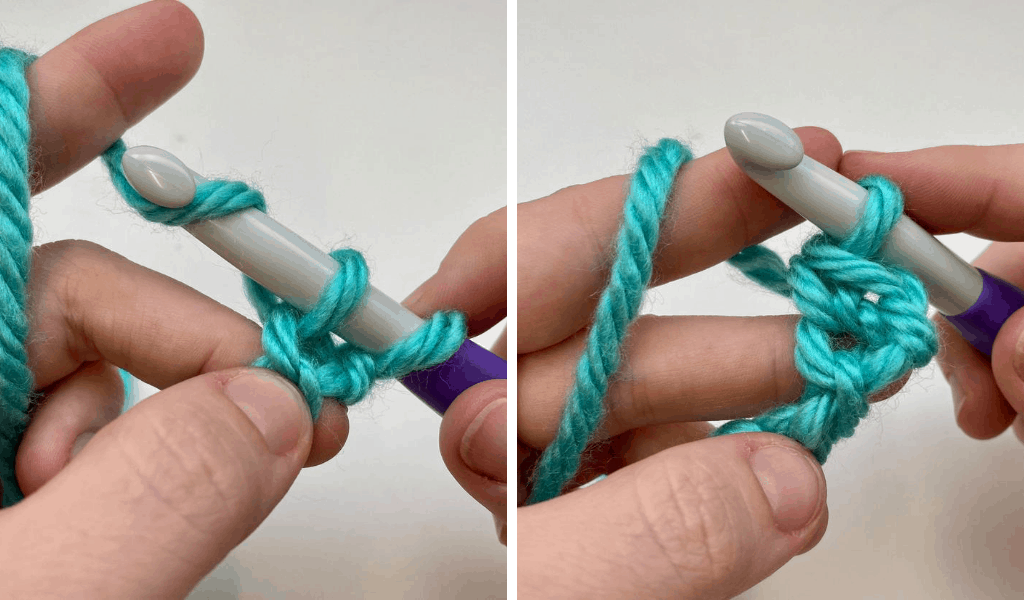
Step Two: Wrap the yarn over the hook again and pull it through both loops on hook.
You’ve made your first stitch. Continue repeating steps one and two into each chain.
How to sc into an Established Row
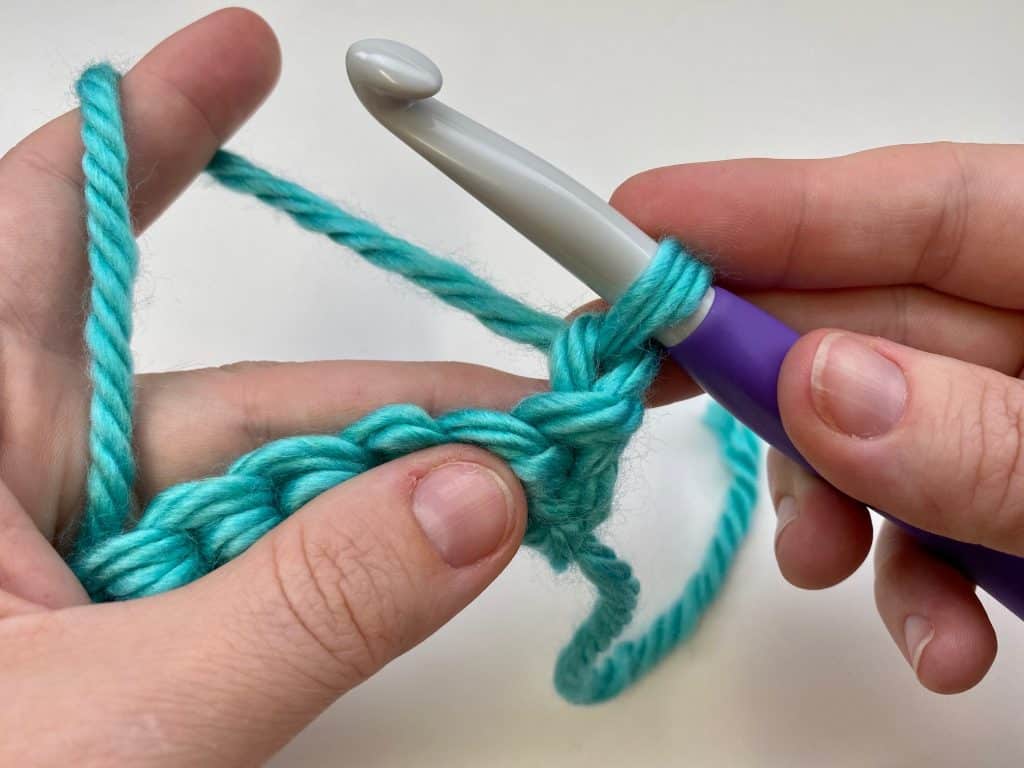
Step One: Chain 1 to make a turning chain (this gets your hook up to the level of the single crochet stitch).
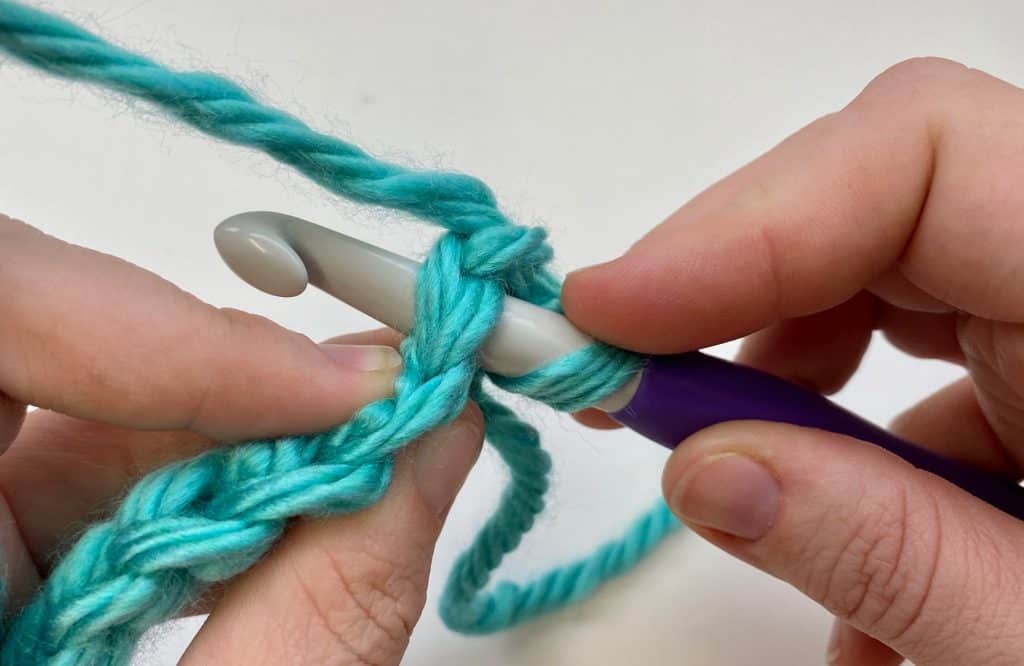
Step Two: Insert the hook under both loops at the top of the last stitch in the previous row. (The stitch below the ch-1).
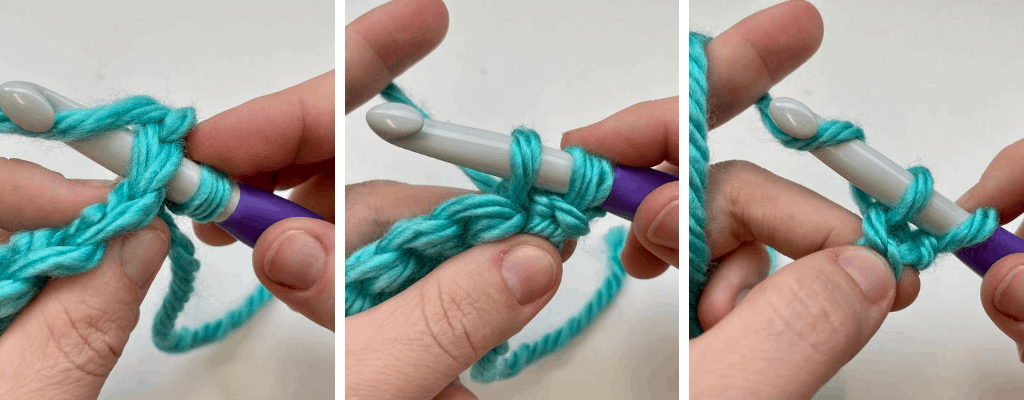
Step Three: Yarn over and pull up a loop, yarn over and pull through two loops.
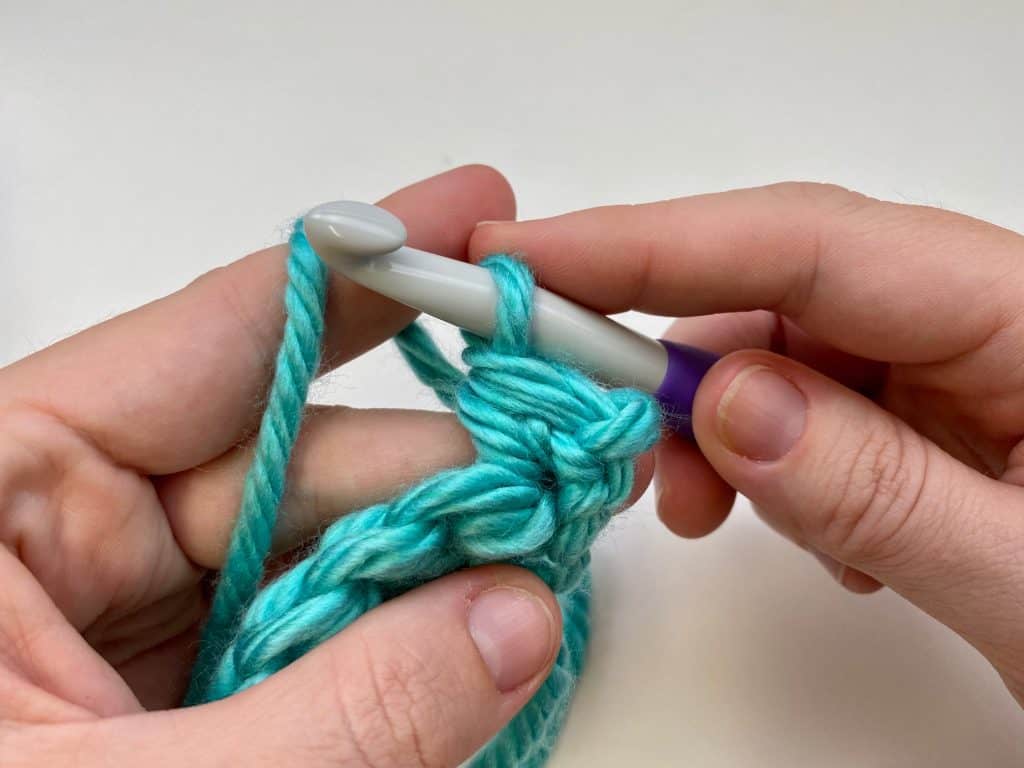
This is the first stitch. Repeat steps two and three into each stitch from the previous row.
Single Crochet Video Tutorial
Buy the ad-free PDF here!Single Crochet in the Round
When you work single crochet in the round, you work the stitch the same as you do in a row, but there are a couple of options when working in the round:
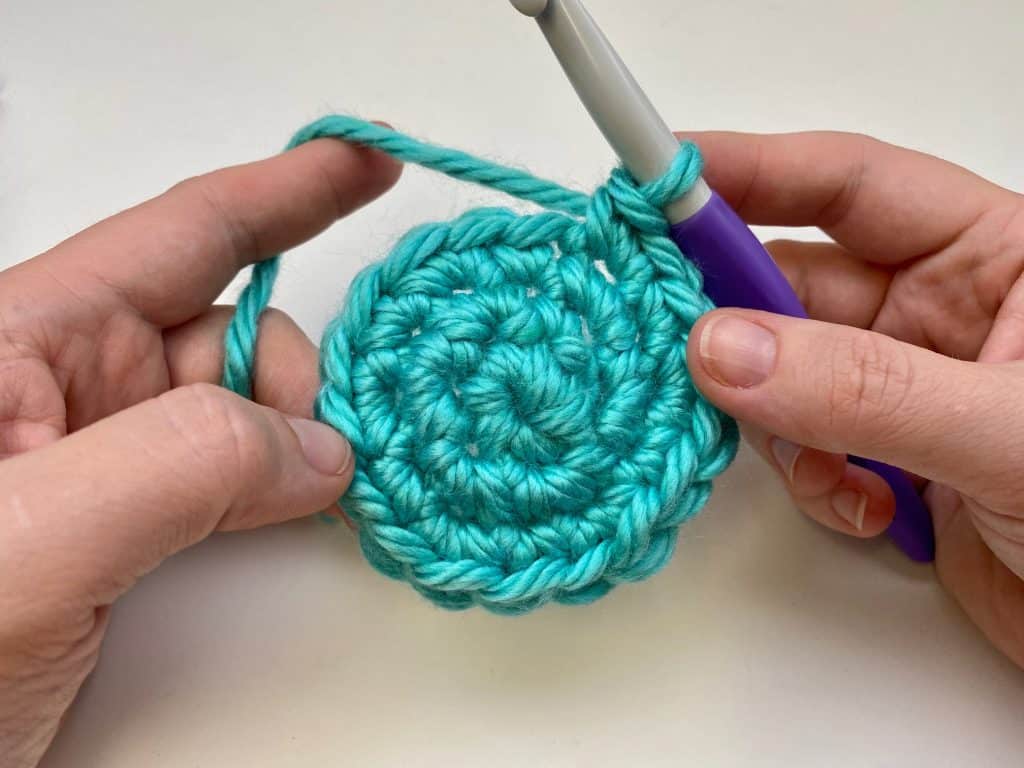
Option 1: Working in continuous rounds
For this option, you would keep working sc without joining or turning, just keep working sc around in a spiral. A stitch marker is very helpful for this.
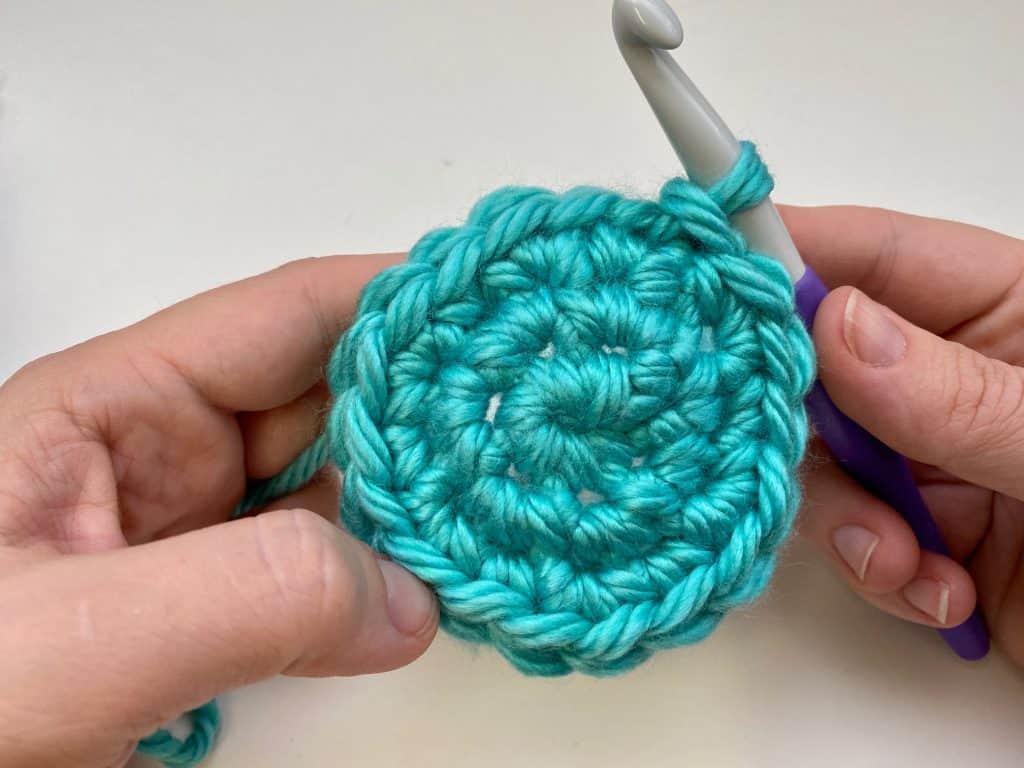
Option 2: Joining with a slip st
For this option, you join the last sc to the first with a slip st. This often creates a noticeable seam. A stitch marker is also helpful for this, although not as necessary than the continuous rounds. Depending upon the look you want you may turn or not at the end of a round. There are times when I turn to keep the look of back and forth crochet consistent with pieces I’ve worked flat.
Single Crochet Increase
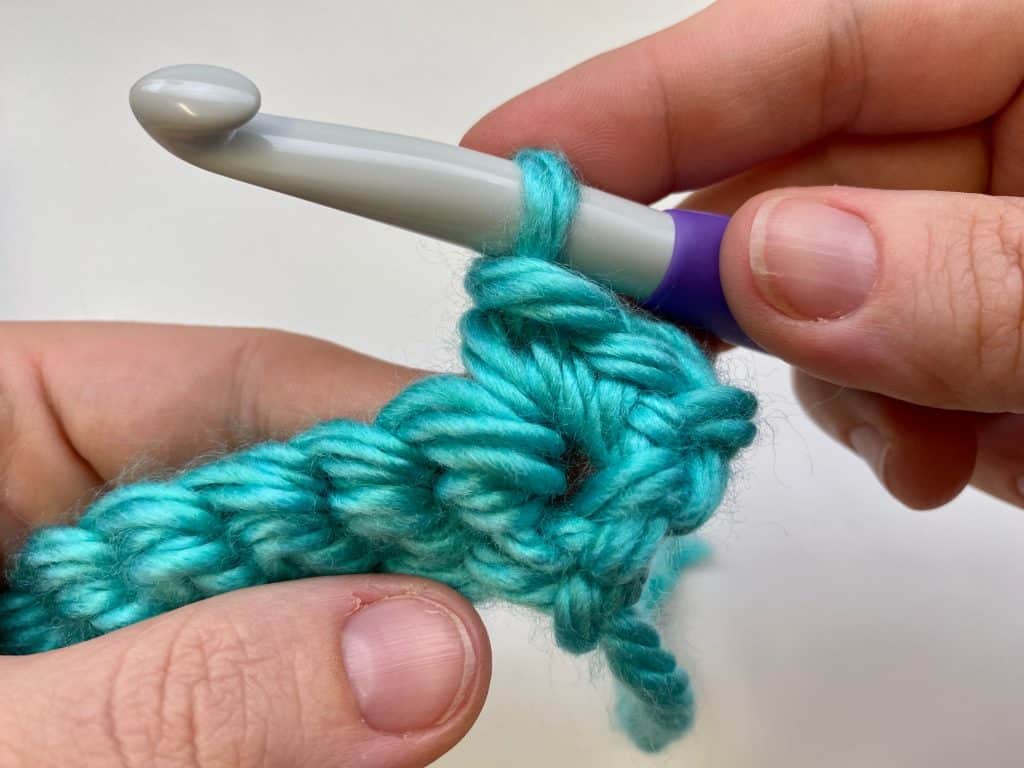
When you need to increase in sc, you work more than one stitch into the same chain, space, or stitch. For example, many times you will work 2 sc into the same st.
Decreasing with Single Crochet
When decreasing in sc, you work a single crochet stitch over more than one chain, space, or stitch. A common decrease is sc2tog (single crochet 2 together). Sometimes you might see sc3tog (single crochet 3 together) or more, depending upon the pattern.
To decrease (sc2tog)

Step One: Insert the hook under both loops at the top of the last stitch in the previous row.
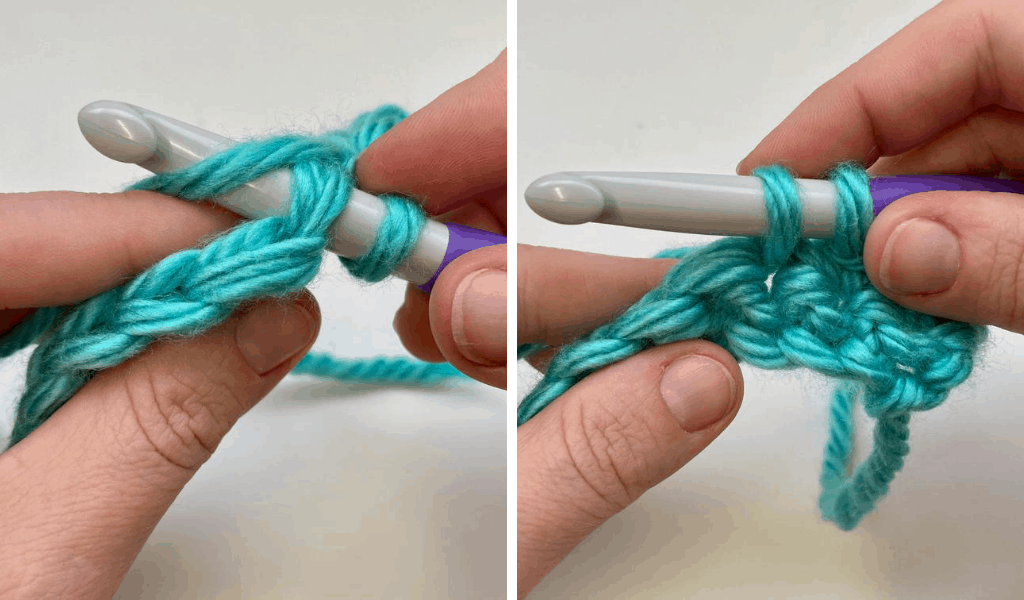
Step Two: Yarn over and pull up a loop (2 loops on hook)
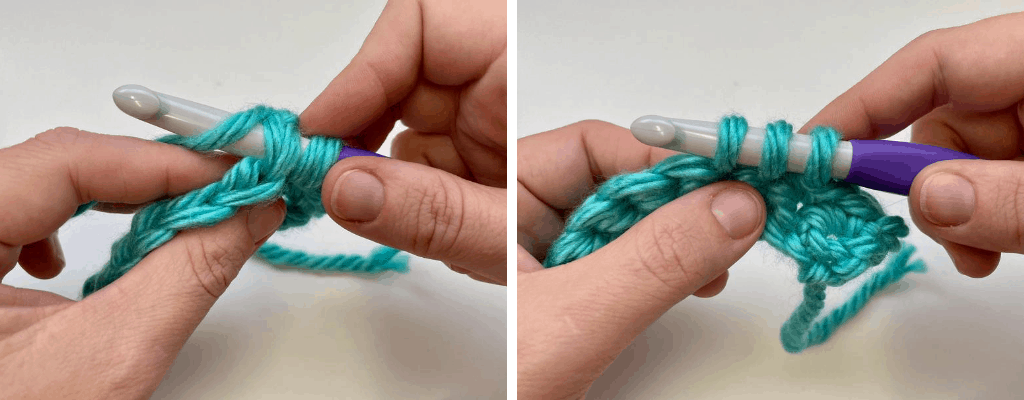
Step Three: Insert the hook under both loops of the next stitch in the previous row, yarn over, draw up a loop (3 loops on hook),
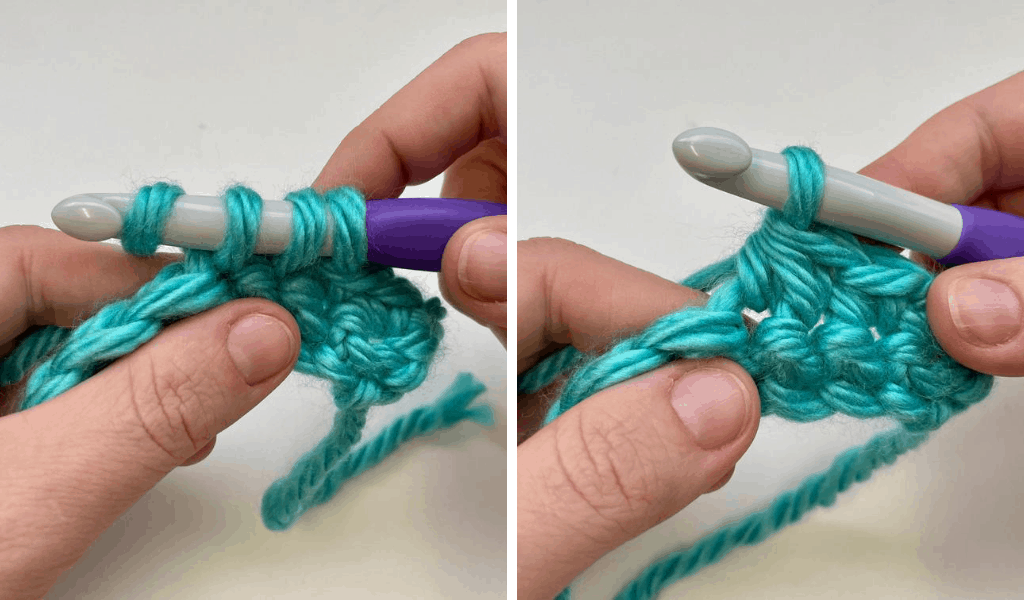
Step Four: Yarn over and pull through all loops.
How to Work Invisible Decrease
This is a great technique when working amigurumi or another project where a regular single crochet decrease is a bit noticeable.
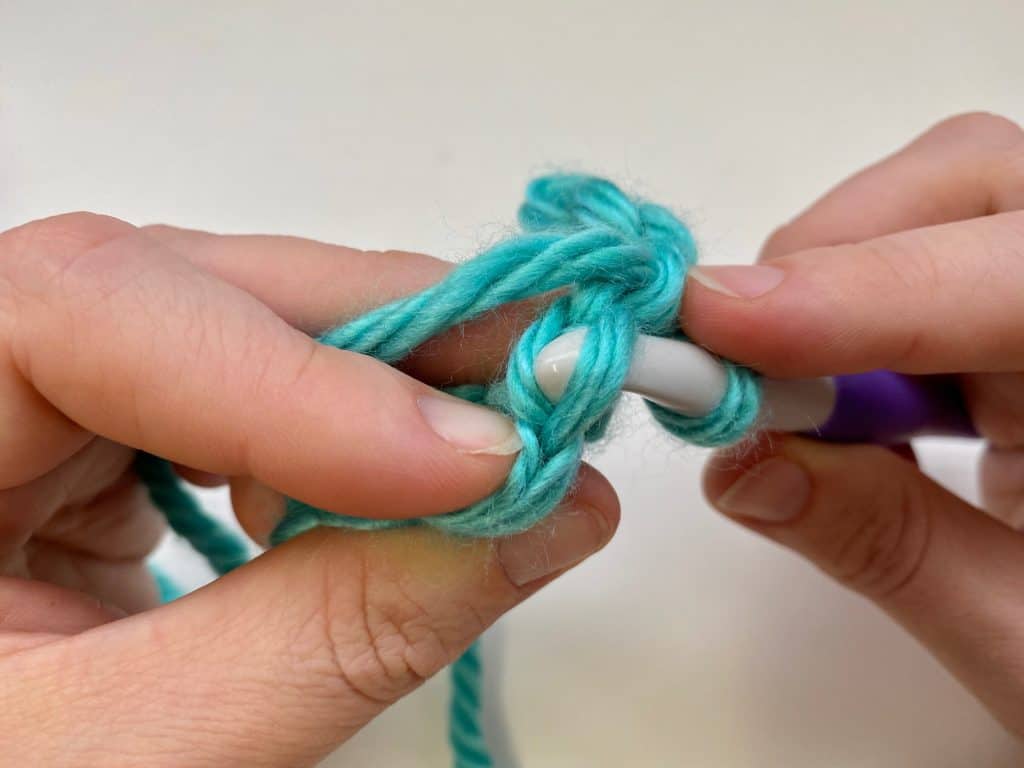
Step One: Insert hook under front loop only of the next stitch.
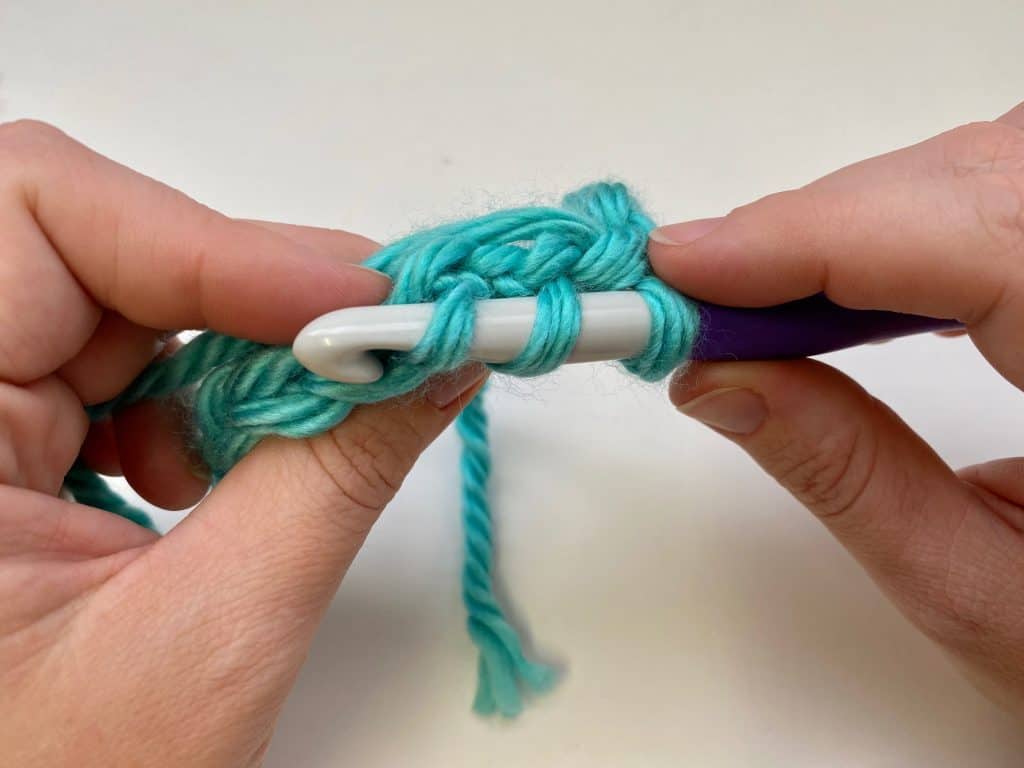
Step Two: Insert hook in front loop only of next stitch.
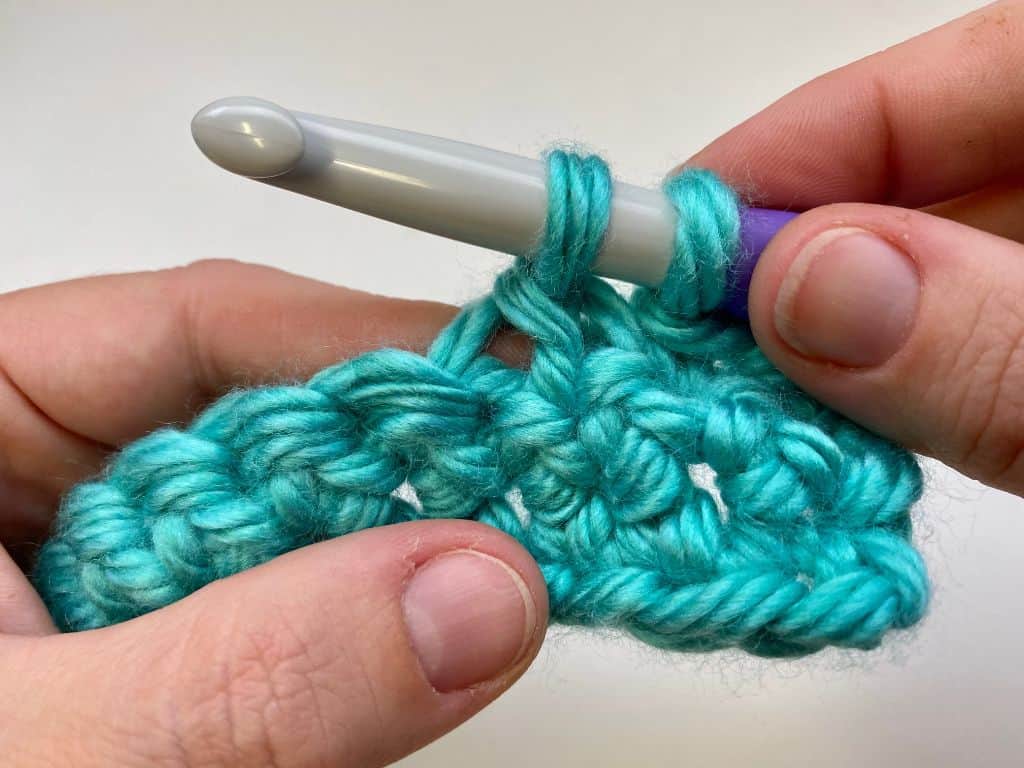
Step Three: Yarn over and draw through two loops.
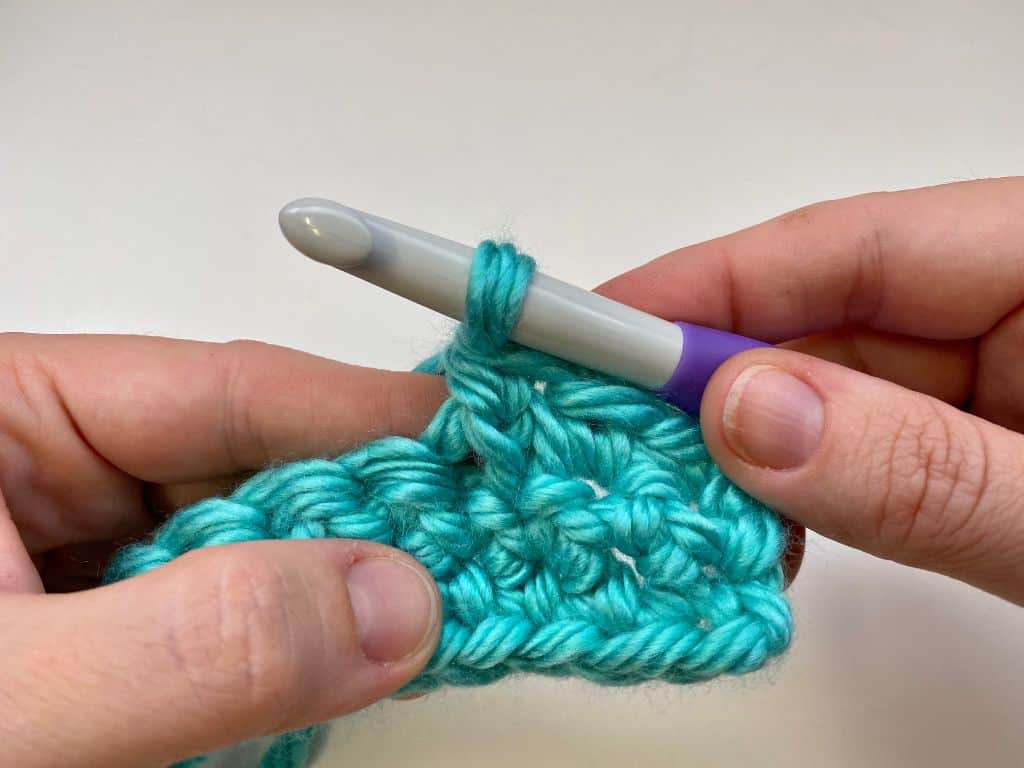
Step Four: Yarn over and draw through last two loops.
How to count sc stitches and rows
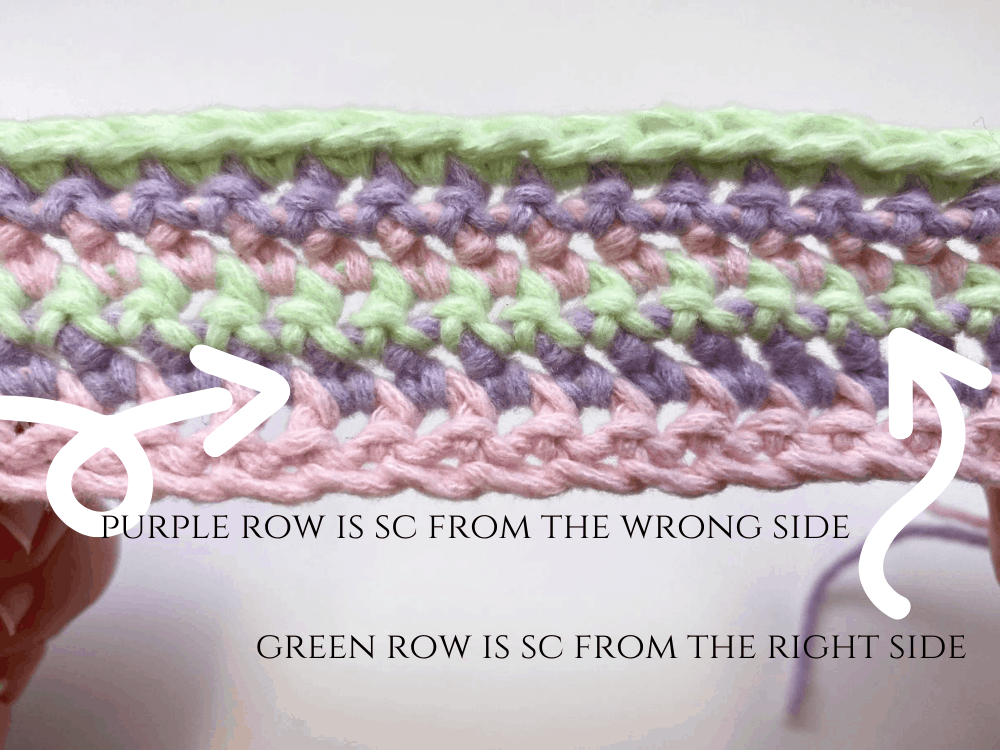
The image above is rows of sc worked with a different color for each row. This is great practice, and if you’re new to crochet I would definitely recommend trying it yourself.
The reason you should do this with each stitch is to familiarize yourself with what the individual stitches and rows look like. I’ve pointed out above which side the rows were worked on (so the “right side” is what it looks like as you are working across, and the “wrong side” is the row you worked when you turned and came back across).
You can also really see the “V” shapes the stitches make when you practice these swatches with different colors for each row. So if you are practicing your sc, use three colors!
I used three colors because that way you don’t have to cut the yarn to change colors – you can carry it up the sides.
Common Mistakes
You have too many stitches
When you are first starting out, sometimes you don’t know where to put your hook and it is easy to accidentally work into an area where you aren’t supposed to and you end up with more stitches than you started with. It’s important to always count your stitches when you are starting out (and I honestly still will count mine every few rows to make sure I’m even). It’s very common to add a stitch at the beginning of a row if you aren’t careful.
You have too few stitches
This can happen easily if you forget to work the final stitch in a row. It can be difficult to see the final stitch until you have more experience, so counting is also important to make sure you don’t accidentally forget a stitch.
Your stitches are too tight or too loose
This is a common problem that is usually easily rectified. Some people find that they always crochet tighter or looser using the recommended yarn and hook a pattern calls for. This can be fixed in a variety of ways and sometimes will work itself out with practice. First, try switching to a larger or smaller crochet hook (depending upon if you are working too tightly or too loosely). If your stitches are too loose, choose a smaller crochet hook. If you are crocheting too tightly, choose a larger crochet hook. Just go up or down one size and try again. Adjust another size if necessary. You can also adjust how you hold your hook and yarn. There are many ways to do this and really no right or wrong way as long as it works for you.
Single Crochet Patterns
Free Pattern Collection. Each crochet pattern here uses only sc and chains. Try one of these beginner crochet projects!
Learn how to reverse single crochet (also called Crab Stitch) and work the extended single crochet stitch.
How to Single Crochet for Beginners
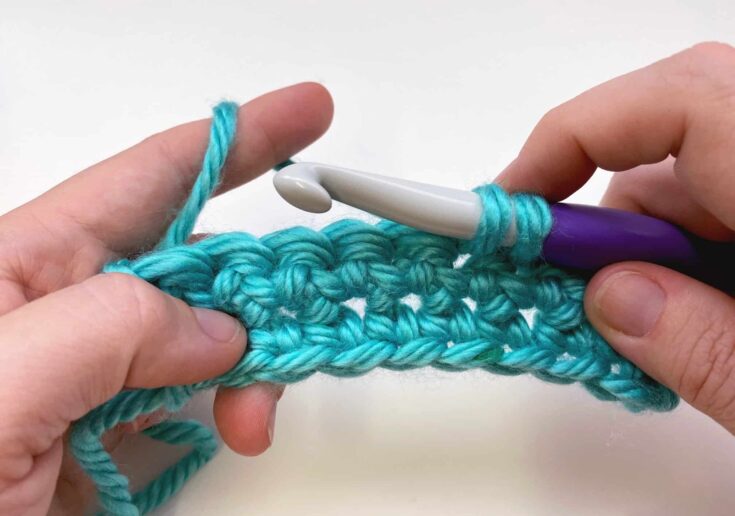
Learn how to single crochet with this practice swatch!
Materials
- Yarn of choice
Tools
- Crochet hook appropriate for yarn. If you are unsure of the hook size you need for your yarn, be sure to check the label on your yarn, it will have a hook size recommendation.
Instructions
- Chain 26.
- Insert hook into 2nd chain from hook and work one single crochet (insert hook into chain, yarn over and pull up a loop, yarn over and pull through two loops on hook).
- Single crochet in each chain across - there should be 25 sts (because you didn't crochet into the first chain, it was the turning chain). Turn your work.
- Now you will be working across the established stitches. Chain 1 as your turning chain (this brings the yarn up to the height of the row), single crochet in each stitch across, being sure to work into both loops of each stitch. Turn your work.
- Repeat row 4 until desired height.
