
Looking for a knit hat pattern with some texture? Check out this free hat pattern using slipped stitches!
Buy the ad-free PDF of this pattern in my shop here!
Design Story and Inspiration for the Slip Stitch Hat
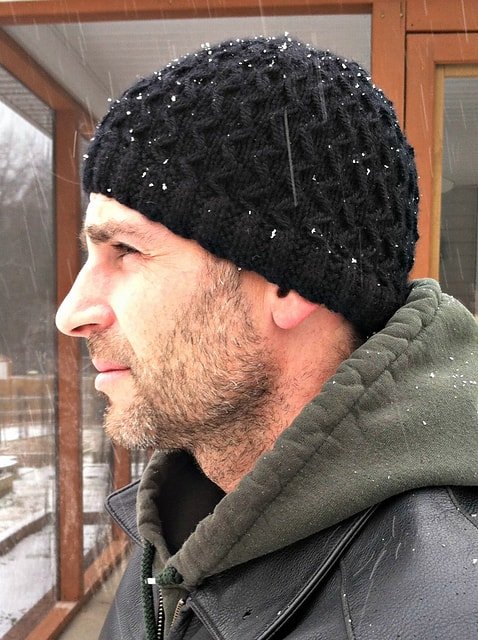
I’ve been trying for years to make something that my husband will actually wear. I finally did it!
My husband had a beanie from the Army that he accidentally washed. It shrank and looked terrible and he was pretty bummed about it.
He likes to wear the color black quite a bit, especially when it came to beanies, so even though I don’t normally use black yarn it was a no brainer for this design.
I am working on expanding my knitting skills and have been enjoying slip stitch techniques, so I put the two together and came up with this project. If you are new to slip stitches, don’t be afraid to tackle them!
Plenty of times when it said to let them hang off the needle I was terrified I would lose stitches, but I didn’t. I haven’t had a lot of practice correcting my errors, although I am getting better at it if I lose a stitch and it unravels a few rows. I used to just give up and scrap the whole project, but not anymore! I love expanding my knitting skills and will most definitely keep working on them.
I almost called this The Hubby Hat. 😉
Yarn Options for this Knit Hat Pattern
I chose Galway Worsted for this hat because it’s a worsted weight yarn (my favorite yarn weight) and it’s super warm for a knit hat pattern.
Since this hat is knit in worsted weight yarn, it is very easy to substitute any similar yarn. Check to ensure you are getting gauge, and also look for a yarn that has a similar yardage to weight ratio.
To do this, just check the ball band. The original yarn has 210 yards in 3.5oz, so look for something with nearly the same yardage in a 3.5oz skein.
Before we begin… let’s get Social!
I would love for you to come follow me on
Instagram (get sneak peeks of what’s coming up!)
My Facebook Page (come join the fun!)
Follow me on Pinterest (I pin tons of free patterns to my boards!)
Join my Facebook group (lots of awesome crochet talk there, knitters welcome, too!)
Also, you can find me on Ravelry or join my subscribers on YouTube.
Pattern Details for the Slip Stitch Hat Knitting Pattern
This hat is knit in the round on dpn’s. You could also use circulars by working the magic loop method with one circular needle or two circulars. Whatever works for you!
How to Customize this Knit Hat Pattern
This hat can be made larger or smaller by adding or subtracting stitches in multiples of four. For example, if you would like to make it smaller, you could take away one four-stitch repeat from each needle (total of 104 sts).
You could also do this to make it larger by adding a four-stitch repeat to each needle (total 136 sts).
The decreases might be a bit tricky, but if you remember to add or take away the right number of repeats, it will work out. Many people have made theirs this way.
Check out all the finished projects on Ravelry here!
More Free Knitting Patterns You’ll Love
Go ahead, check them out. I’ll save your tab right here. 🙂
Get the Ad-Free PDF Here!
This beanie knitting pattern can be viewed in its entirety here on the site. However, many readers have requested ad-free PDF’s of my patterns so I provide inexpensive options for these.
If you like to knit on the go or just prefer paper, you can print this PDF and take it with you anywhere.
If you would like to buy the ad-free PDF, you can purchase on Etsy here.

Slip Stitch Hat
What You’ll Need
Yarn: Plymouth Yarns Galway Worsted (weight #4), wool, 1 skein Black
Needles: 4 dpn in sizes 3 (3.25mm) and 6 (4.00mm)
Notions: Tapestry needle/yarn needle, scissors, stitch marker (if using circular needles), faux fur pom pom (if desired)
Gauge: 24 sts and 32 rows = 4 inches
Skill Level: Intermediate
Finished Size: Approximately 19″ circumference (stretches to fit 20-21″ head), 8 1/2″ tall
Stitch Descriptions and Abbreviations:
Knit Stitch (k)
Purl Stitch (p)
Slip slip knit (ssk)
Knit 2 together (k2tog)
Special Stitches:
Sl Left: Drop sl st from LH needle to front of work, k2, pick up dropped st and knit it, k1
Sl Right: Sl next 2 sts, drop sl st from LH needle to front, place 2 sl st back on LH needle, pick up dropped st and knit it, k3
Note:
Slip all stitches purl wise.
FREE KNITTING PATTERN
Using smaller needles, cast on 120 sts evenly on four dpn’s or circular method of your choice; join, being careful not to twist.
Ribbing
Round 1: *K2, p2; repeat from * to end.
Round 2: Knit.
Repeat rounds 1 and 2 until piece measures 1″, ending with round 1.
Switch to larger needles.
Body of Hat
Round 1: Knit.
Rounds 2-3: *Sl 1, k3; rep from * to end.
Round 4: *Sl left; rep from * to end.
Round 5: Knit.
Rounds 6-7: *K2, sl 1, k1; rep from * to end.
Round 8: *Sl right; rep from * to end.
Repeat rounds 1-8 four more times (40 rows).
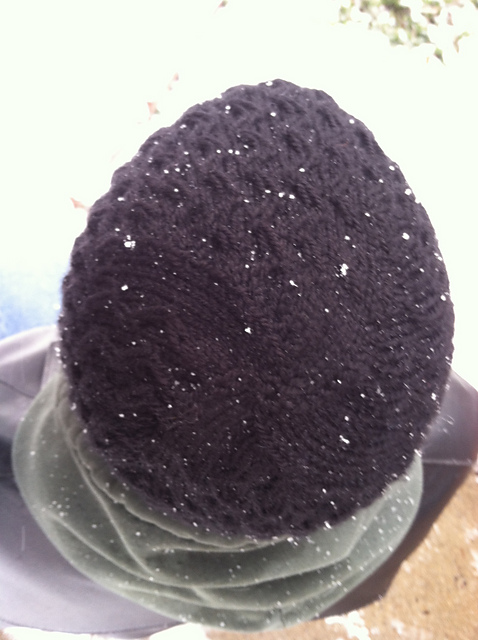
Shape crown
Round 1: *Ssk, k2tog, k26; rep from * to end – 112 sts.
Round 2: *K2, (sl 1, k3) six times, sl 1, k1, (sl 1, k3) seven times, rep from * to end.
Round 3: *Ssk, k2tog, k2, (sl 1, k3) five times, sl 1, k1, Ssk, k2tog, (sl 1, k3) six times; rep from * to end – 104 sts.
Round 4: K4, (Sl left) five times, k4, (Sl left) six times, k4, (Sl left) five times, k4, (Sl left) six times.
Round 5: *Ssk, k2tog, k22; rep from * to end – 96 sts.
Round 6: *K4, (sl 1, k3) five times, k2, (sl 1, k3) five times, k2; rep from * to end.
Round 7: *ssk, k2tog, (sl 1, k3) five times, ssk, k2tog, k2, (sl 1, k3) four times, sl 1, k1; rep from * to end – 88 sts.
Round 8: *(Sl right) five times, k4, (Sl right) four times, k4; rep from * to end.
Round 9: *Ssk, k2tog, k18; rep from * to end – 80 sts.
Round 10: *K2, (sl 1, k3) four times, k6, (sl 1, k3) four times; rep from * to end.
Round 11: *Ssk, k2tog, k2 (sl 1, k3) three times, k2, ssk, k2tog, (sl 1, k3) four times; rep from * to end – 72 sts.
Round 12: *K4, (Sl left) three times, k4, (Sl left) four times; rep from * to end.
Round 13: *Ssk, k2tog, k14; rep from * to end – 64 sts.
Round 14: *K4, (sl 1, k3) three times, k2, (sl 1, k3) three times, k2; rep from * to end.
Round 15: *Ssk, k2tog, (sl 1, k3) three times, ssk, k2tog, k2 (sl 1 k3) two times, k2; rep from * to end – 56 sts.
Round 16: *(Sl right) three times, k4, (Sl right) two times, k4; rep from * to end.
Round 17: *Ssk, k2tog, k10; rep from * to end – 48 sts.
Round 18: Knit.
Round 19: *Ssk, k2tog, k8; rep from * to end – 40 sts.
Round 20: *Ssk, k2tog, k6; rep from * to end – 32 sts.
Round 21: *Ssk, k2tog, k4; rep from * to end – 24 sts.
Round 22: *Ssk, k2tog, k2; rep from * to end – 16 sts.
Round 23: *Ssk, k2tog; rep from * to end – 8 sts.
Cut yarn, leaving a long tail. Draw yarn through remaining sts and pull tight. Weave in ends.
Hope you enjoy!
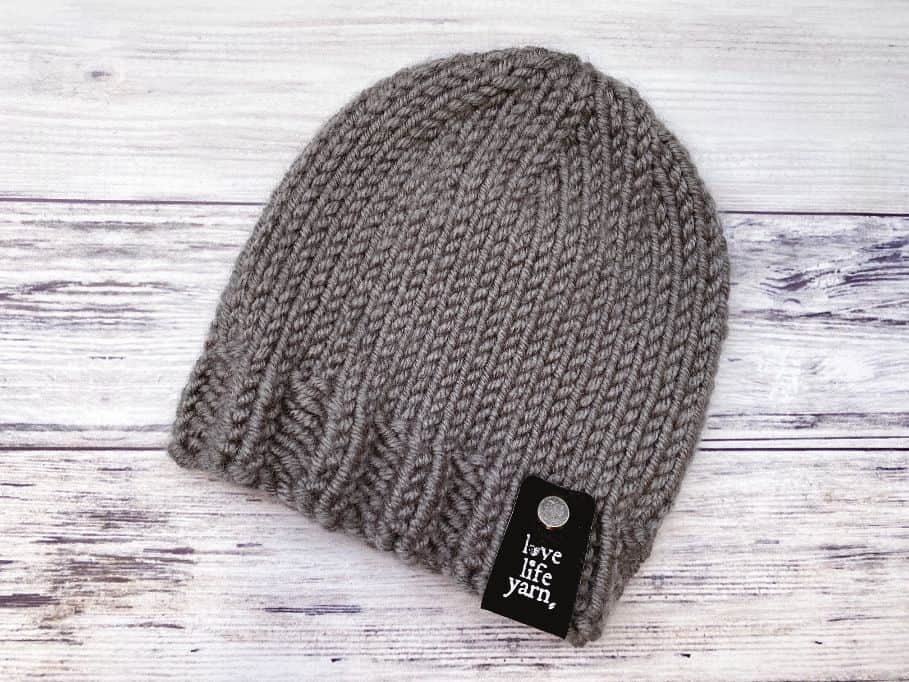
Need an easier hat pattern?
Try the Easiest Ever Knit Hat
Think this slip stitch hat is a little too complicated? Don’t worry, we’ve got you covered with this easy knit hat pattern! This free knitting pattern has NO decreases and is knit flat! Uses bulky yarn for a quick project, with a body of stockinette stitch and a seed stitch brim.
Today we learned how to create a knitted hat using slipped stitches for texture.
I hope you’ve enjoyed this free knitting pattern!
Happy Knitting!
Amanda
Question if I can reduce the number of stiches cast on and still have this work. I have some bulky yarn and #3 needles, but when cast on 120 stiches the hat is way too big. I might not be able to use this yarn but was hesitant to reduce the number of stiches given that it might mess up the decreases and the alignment of the pattern. I can’t see going much smaller than a #3 needle, or if that would even help much. Any thoughts? Can I even use this yarn?
Hi Paul,
This pattern is a four stitch repeat so you could try to refigure the numbers taking one repeat away from each needle (so you would cast on 104). The decreases will be the tricky part, but they shouldn’t be too bad. I decreased where the needles meet so if you just take away one four-stitch repeat out of the middle of each needle, it should work. If that gets too complicated I would switch yarns. Let me know if you have any other questions!
Amanda
I love this pattern.my decreases are much simpler and will work with any multiple if 8 stitches.
I mark stitches in quarters with a contrasting thread draped across. At the end of every odd numbered row I do your double decrease ( ask, k2 tog )
This takes off 8 sets every other row, while maintaining the pattern almost uninterrupted. 3 1/2 to 4 inches, stopping with 16 stitches.
I use # 9 needles and 80 or 88 sets.
Thanks Nancy! I will check this method out. When designing this hat I used a raglan shaping technique I had seen before so that I would interrupt the pattern as little as possible but I didn’t think of adding in more decreases in a given round. I always love to hear tips and tricks to make my patterns better! 🙂
PS – my phone autocorrects me like that all the time! haha – especially with knitting or crochet abbreviations
Nancy, can you write out your pattern?
“Big sister” auto corrected wrongly. Ask should be ask and 8 stitches are removed, not sets. Sorry I didn’t proofread !
It did it again ! Slip slip knit, not ” ask” .
Hello, I’m knitting this hat and my yarn and gauge are different from the pattern. I’ve made the adjustments for the # of stitches to cast on, but I’m wondering if you can tell me in inches how long I should work the main pattern before starting the decreases. I know that you have the gauge as 32 rows = 4 in but I assumed that was in stockinette stitch, not the pattern stitch, which is a little condensed I think. Anyway, your help would be appreciated.
Hi Debi,
I went back through my notes and found that I did work 32 rows (4″) of pattern stitches after the ribbing before I started decreasing. So you should start decreasing when the hat measures 5″ from the beginning. Hope that helps! 🙂
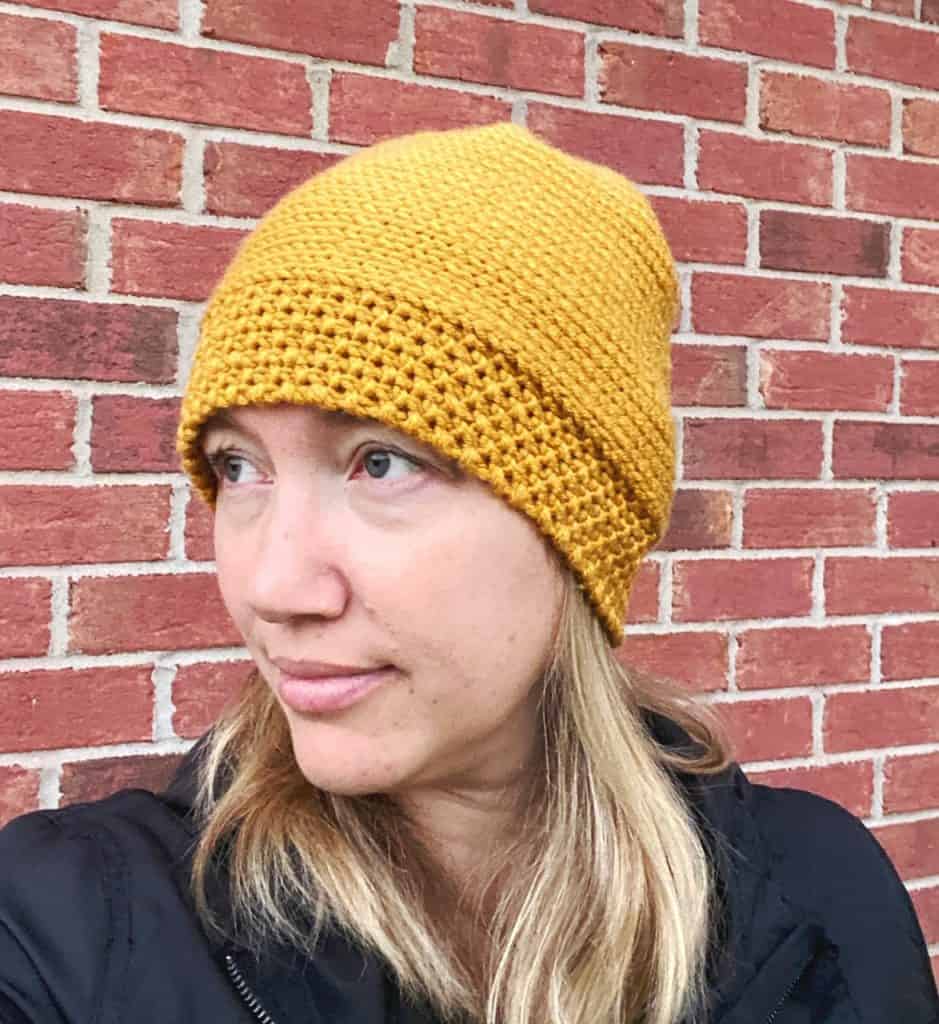
Is round 2 of the ribbing really “knit”? Not entirely sure as the hat in the picture is black but it looks like regular 2k 2p ribbing to me.
Thanks for clarifying.
Hi Lali! It is knit. I think the color of this hat makes it harder to tell but between the raised ribs is more of a reverse stockinette. My husband only wanted black or I would have used another color! If you prefer, I’m sure a regular k2, p2 ribbing would work. You can see it clearer by clicking on the projects tab of this link. These hats were worked up using this pattern but other yarns. Hope that clears it up! 🙂
Thanks Amanda! That’s very cool. I will follow the pattern exactly. I plan to start on this hat tonight and appreciate your clarification.
You are so welcome! I’d love to see pictures when you are done!
Hi Amanda,
I’m confused with Sl right. Are you moving two stitches purlwise from the left needle onto a cable needle and hold it in front, then put the stitches back on the left needle, and knit 5 stitches?
Hi! No, you are moving the two stitches to the right needle and then letting the slipped stitch hang in front of the work while you move those 2 sts back to the left needle. There is no cable needle needed for this pattern 🙂
Can’t make heads or tails of Sl left. Am I supposed to use a cable needle or something to make sure I don’t lose my stitch? Or am I mistaking what it means to drop a slip stitch?
Oops! I just figured out what I’m doing wrong. I’ve been testing the pattern on straight needles, forgetting that the wrong side / right side shift will mess up the pattern. Doh!
I could not figure out the zip zag pattern at all!! The slip stitches are very confusing and the pattern doesn’t differentiate between the types of slips during the pattern. For example; slip, slip 2; slip one; moves two stitches over slip stich and knit 3. The pattern needs to tell you whether you slip “knit wise” or “purl wise”. I love the look of the pattern, but cannot figure it out. Help!
Hi Lois! I slipped all of my stitches purl wise. Is it the “slip right” part that is confusing? Where it says “Sl next 2 sts, drop sl st from LH needle to front, place 2 sl st back on LH needle, pick up dropped st and knit it, k3” you are slipping the first 2 sts temporarily to get the slipped stitch from the rows before it in place, then putting those 2 slipped sts back on the needle and knitting. Does that make sense? Not sure if I’m explaining it clearly. You should know which stitch to drop because it is the same st you slipped on the rows before. Let me know if this helps or if this isn’t the area you’re having trouble with and we can figure it out. 🙂
Thank you so much for your reply. It makes perfect sense now, since you stated your slip stiches were “purl wise”.
That would have been helpful to add to your pattern instructions, as slip stitches are normally knit wise unless stated otherwise. It will definitely try that again with another hat.
Thanks!!!
Sorry for the confusion Lois! I had read that you always slip a stitch purl wise unless instructed otherwise, so I’m not sure what the right answer is on that, but I will add it to the instructions to clarify. 🙂
Hi! I love this pattern, and, unusual for me, decided to do the gauge. Given that the instructions didn’t indicate whether to use the 3 or the 6, I tried both. 6 was too much, and now the 3 is as well. What’s your advice? Thank you very much! Karen
Hi Karen! I got the gauge listed with the larger needle. The smaller one is for the ribbing. To get gauge sometimes you have to try several needle sizes so keep trying until you get one that works or is at least very close and use a smaller needle size for the rib.
Hi I love this pattern. Thank you so much! I have a doubt. I understand we have to slip all stitches purlwise, does that apply to the SSK as well because usually it’s slipped knitwise. Could you please clarify? Thanks 😊
Hi Lucy! When I work SSK, I Slip the first st knitwise and the second st purlwise and i find it gives a much nicer result. 🙂
Thank you so so much for clarifying! I just started knitting this hat and I am new to slip knitting and find it difficult to figure out the zigzag pattern ☹️ I just don’t want to give up because it’s so pretty 😃 Can you please tell me if the yarn is held in the front or back while slipping purlwise in rounds 2-3 and 6-7 (main part) please please help
Hi Lucy,
Keep the yarn to the back – I know the zig zag can be tricky, but keep at it! One of the reasons I worked this slip stitch pattern for this hat was to improve my skills because I hadn’t had any experience with slip stitches and wanted to challenge myself. Once you get the hang of it you will find it goes pretty smoothly. 🙂
Thank you so much for the prompt response 😃 I just finished the hat and it’s gorgeous 😍 my husband loves it. Thanks a ton and keep rocking with your amazing designs.
Yay!! I’m SO glad it worked out! I’m trying to find more things I can make that husbands won’t mind wearing 😉 Mine is so picky that is the only thing so far I have made him that he will wear.
Hi! I was just wondering for when you are shaping the crown, if in round two you only repeat the part in the parentheses? Thanks!
Hi Lia!
You repeat the part in parentheses the number of times indicated (such as (sl 1, k3) six times) work the rest of the instructions for the row, then repeat from the * once, which in this case is from the beginning. 🙂
Okay thank you! Also, for shaping the crown on round 4, I’m not familiar with sl left and can’t find it on the web. Could you clarify for me? Thanks!
Hi Lia,
The instructions for Sl left and Sl right are under the materials needed but before the main pattern. This pattern was tested out by several helpful knitters who suggested using those custom abbreviations because the pattern was so long with them written out every time. 🙂
I am loving this pattern now that I have figured it out! The part that I’m getting stuck on is the first part of shaping the crown. When I complete round 1 I have 116 stitches left instead if 112. If I keep working following the pattern it gets all wonky. Can you help me with this please?
Hi Melissa! Glad to hear you are liking the slip stitch pattern – it has been one of my favorite knits! When you shape the crown you should decrease 8 sts each time (ssk and k2tog so 2 sts decreased each time) and you decrease four times. Hope this helps! Let me know if you have any other questions. 🙂
Sl Purl wise? Or knit wise?
Thanks
I slip purl wise 🙂
Have you thought of making a how to video so it would make the pattern clearer . It would be much appreciated .Thank You
HI Margaret! I’ve definitely thought about a tutorial video for this pattern, but I haven’t branched out to knitting tutorials just yet. This will be the first pattern I do a tutorial for when I start adding knits to my channel 🙂
Ihave done this pattern two times and both times hat is huge. I used 3mm and 6 mm dpn
Hi Gayle,
Everyone knits at a different gauge and maybe mine is tight. Did you try a gauge swatch before beginning? That always helps. 🙂
Do you use 4 dpns with a fifth dpn to work so 5 dpns all together and 30 stitches on each don?
You know, I never realized I put 4 dpn’s in the materials and then said to cast on stitches on 4 needles! This project was edited and tested thoroughly and no one has ever pointed that out! Yes, I used 5 total and cast on 30 sts on each. I hate using 3 dpn’s as a triangle and working with a fourth so I avoid it unless I have to. 🙂 Now I use the magic loop method and avoid dpn’s if at all possible.
I started over this morning and it is going better now that I know how many dpns to use for sure. I have to use needle caps or stitches start sliding off.
Wrong email address I. First post
4 dpns 40 stitches on each of 3 or 5 dpns 30 stitches on each of 4?