
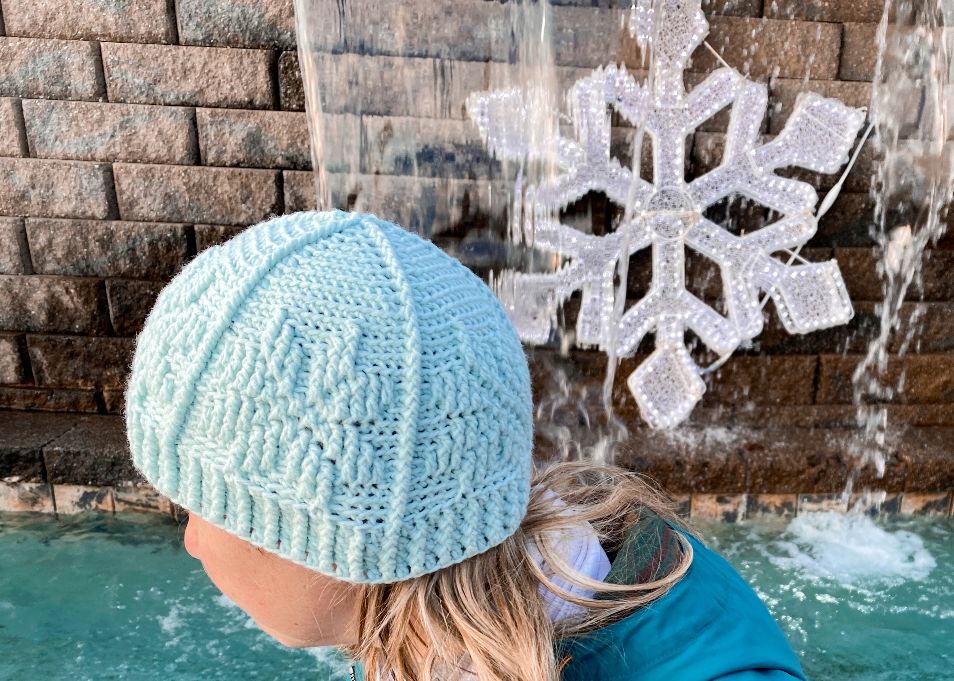
Use texture to create a mosaic design with the Textured Crochet Snowflake Beanie!

Buy the ad-free PDF of this pattern in my shop here!
Design Story and Inspiration for This Crochet Beanie
I designed this textured beanie for the Holiday Maker’s Challenge, an annual event where we work together to finish our handmade Christmas gifts and there are 8 FREE downloadable PDF’s!
This pattern is a bit more challenging than I normally add to the challenge, but I wanted something to stretch the skills of advanced beginners and give intermediate crocheters something that would keep them interested (because, yes, sometimes the easy patterns can get boring when you’ve been doing it a while!).
So I designed this beanie using the mosaic crochet technique, which has you working front post double crochet over a background of single crochet in the back loop only.
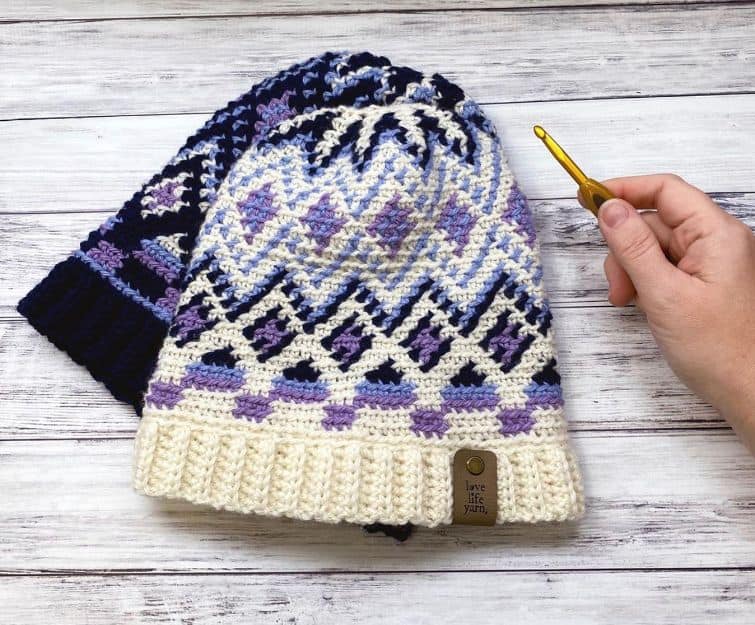
I really love how it turned out! I made mine in one single color, but you would make the snowflake in a different color and it would really pop!
Yarn Options for This Textured Crochet Hat
I used We Crochet Heatherly Worsted for this project and I really love it! I actually bought the Heatherly Value Pack, which includes one of each color and I’m loving all of them. (Right now they are having a sale!)
You can use any worsted weight yarn you have in your stash that gets gauge. I’m all about using up stash yarn, so grab out those worsted yarns and get swatching!
Before We Begin.. Let’s Get Social!
I would love for you to come follow me on
Instagram (get sneak peeks of what’s coming up!)
My Facebook Page (come join the fun!)
Follow me on Pinterest (I pin tons of free patterns to my boards!)
Join my Facebook group (lots of awesome crochet talk there)
Also, you can find me on Ravelry or join my subscribers on YouTube.
Textured Crochet Snowflake Beanie
What You’ll Need
Yarn: We Crochet Heatherly Worsted in Seaglass
Hook: US Size I (5.50mm)
Notions: Yarn needle, scissors
Gauge: 16 sts and 14 rows = 4” (10cm) in sc back loop only
Finished Size: 20” circumference, stretches to fit adult head
Abbreviations
Stitch (st)
Slip Stitch (sl st)
Back Loop Only (blo)
Front Loop Only (flo)
Single Crochet (sc)
Double Crochet (dc)
Front Post Double Crochet (fpdc)
Dec – work single crochet 2 together (sc2tog) into back loop only of next 2 stitches
Notes
Ch 3 at beginning of round counts as dc.
Pattern is worked in the round, first joined with a slip stitch for the ribbing and then working in continuous rounds for the rest of the hat.

PATTERN
Ch 80, join with sl st to first ch, being careful not to twist.
Ribbing
Round: Ch 3, dc in each ch around, join with sl st to top of ch-3 – 80 sts.
Row 2: Ch 3, *fpdc, dc; repeat from * around to last st, fpdc in last st, join with sl st to top of ch-3.
Rows 3-4: Repeat row 2.
Body Set Up
Row 1: Ch 1, sc blo in same st as join, fpdc in next fpdc, *sc blo 15, fpdc in next fpdc; repeat from * to last 14 sts, sc blo 14. Sc blo in next st (what was your first st) and begin working in continuous rounds, with a fpdc as the first st of the round.
Row 2: Fpdc in next fpdc, *sc blo 15, fpdc in next fpdc, repeat from * to end, omitting the last fpdc.

Buy the ad-free PDF of this pattern in my shop here!
Special Note for working Snowflake: This stitch pattern is a multiple of 16. I’ve included a chart. The snowflake is worked as Mosaic crochet with dc sts that are worked over a background of sc blo.
First note, all sc are sc blo, the blo is not noted for ease of reading but work all of them as blo.
Second note, when working the fpdc or dc the placement will depend on what is below in the next stitch place. If there are 2 sc rows below a dc you work the dc into the available flo of sc 2 rows below, if there is only 1 sc row below the dc you work into the available flo of the sc 1 row below and if there is a dc below the dc you work a fpdc. Always skip the sc that is behind the dc, consider it as used.
The instructions will tell you when to make a dc, follow the instructions as written here for the proper placement or working it as a fpdc over a dc in the previous row. Don’t worry, you’ll get it.
Snowflake
Row 1 is written out with more instructions to help you get started.
Row 1: (Fpdc, sc blo 4, dc flo 2 rows below, sc blo 5, dc flo 2 rows below, sc blo 4) 5 times.
Row 2: (Fpdc, sc 4, fpdc, dc flo 2 rows below, sc 3, dc flo 2 rows below, fpdc, sc 4) 5 times.
Row 3: (Fpdc, sc 4, fpdc 2, dc , sc, dc, fpdc 2, sc 4) 5 times.
Row 4: (Fpdc, sc, dc 3, sc, fpdc 2, sc, fpdc 2, sc, dc 3, sc) 5 times.
Row 5: (Fpdc, sc 2, fpdc 2, dc flo 1 row below, sc, fpdc, sc, fpdc, sc, dc flo 1 row below, fpdc 2, sc 2) 5 times.
Row 6: (Fpdc, sc 3, fpdc 2, dc, sc, dc, sc, dc, fpdc 2, sc 3) 5 times.
Row 7: (Fpdc, sc 6, dc flo 1 row below, sc, dc flo 1 row below, sc 6) 5 times.
Row 8: (Fpdc, sc 3, dc flo 1 row below 3, sc, dc flo 1 row below 1, sc, dc flo 1 row below 3, sc 3) 5 times.
Row 9: (Fpdc, sc 2, dc flo 2 rows below 1, fpdc 2, sc, dc flo 1 row below 1, sc, dc flo 1 row below 1, sc, fpdc 2, dc flo 2 rows below 1, sc 2) 5 times.
Row 10: (Fpdc, sc, dc flo 2 rows below 1, fpdc 2, sc, dc flo 1 row below 1, fpdc, sc, fpdc, dc flo 1 row below 1, sc, fpdc 2, dc flo 2 rows below 1, sc) 5 times.
Row 11: (Fpdc, sc 4, dc flo 1 row below 1, fpdc 2, sc, fpdc 2, dc flo 1 row below 1, sc 4) 5 times.
Row 12: (Fpdc, sc 4, fpdc 2, sc 3, fpdc 2, sc 4) 5 times.
Row 13: (Fpdc, sc 4, fpdc 1, sc 5, fpdc 1, sc 4) 5 times.
Rows 14-15: Fpdc in next fpdc, *sc blo 15, fpdc in next fpdc, repeat from * to end, omitting the last fpdc.
Crown Shaping
Round 1: *Fpdc, dec, sc blo 11, dec; repeat from * to end – 70 sts.
Row 2: *Fpdc, dec, sc blo 9, dec; repeat from * to end – 60 sts.
Row 3: *Fpdc, dec, sc blo 7, dec; repeat from * to end – 50 sts.
Row 4: *Fpdc, dec, sc blo 5, dec; repeat from * to end – 40 sts.
Row 5: *Fpdc, dec, sc blo 3, dec; repeat from * to end – 30 sts.
Row 6: *Fpdc, dec, sc blo 1, dec; repeat from * to end – 20 sts.
Row 7: *Fpdc, dec, sc blo 1; repeat from * to end – 15 sts.
Row 8: *Fpdc, dec; repeat from * to end – 10 sts.
Finishing
Cut yarn, leaving a long tail. Use tail end to gather remaining 10 sts and pull tightly to close.
Weave in ends. Block if desired.
Chart
More Free Crochet Hat Patterns


Final Thoughts on Our Textured Crochet Snowflake Beanie
I hope you’ve enjoyed this free pattern! I had a blast designing this one and I got compliments wearing it on our family vacation, which is always a great feeling!
Happy Crocheting!
Amanda
Just completed Snowflake Hat. I enjoyed the pattern very much. I reduced stitch count for child size hat.
Thank you so much.
Yay! I’m so glad you enjoyed the pattern. 😀
Hello Amanda,
I have a question about some abbreviations that are in rounds 3, 4 and 5, it is about sc bo and sc bl, I can’t find the meaning of this, I am mainly concerned about bo and bl, I do know what sc means but can’t figure out what bo and bl means. Can you give me the full meaning of bo and bl?
I am from the Netherlands thats wy I can’t translate bo en bl.
Thanks for the effort.
Somehow that was left over from where I had typed blo for every single sc. The note above took care of that so that all sc are worked back loop only (blo) so I’ve fixed it. 🙂
Hi I’m currently working on the snowflake part and have got to row 14 which says to repeat row 2. Which is fine but then for row 15 you are supposed to repeat row 2 which I can’t figure out. Won’t that make the snowflake to tall also for the dc flo 2 rows down….there is no front loop at that point…? Am I doing something wrong?
Hi Krista! I see what happened here… the row 2 it is referring to is from before the snowflake part of the pattern and you are just working fpdc in the fpdc sts and sc blo above the snowflake. I’ll change the instructions to reflect that. 🙂 I didn’t take into account that there are more than one “row 2” directions.