
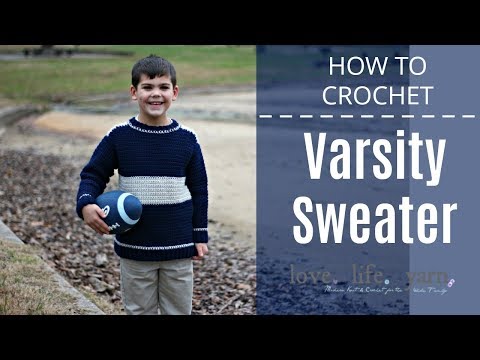
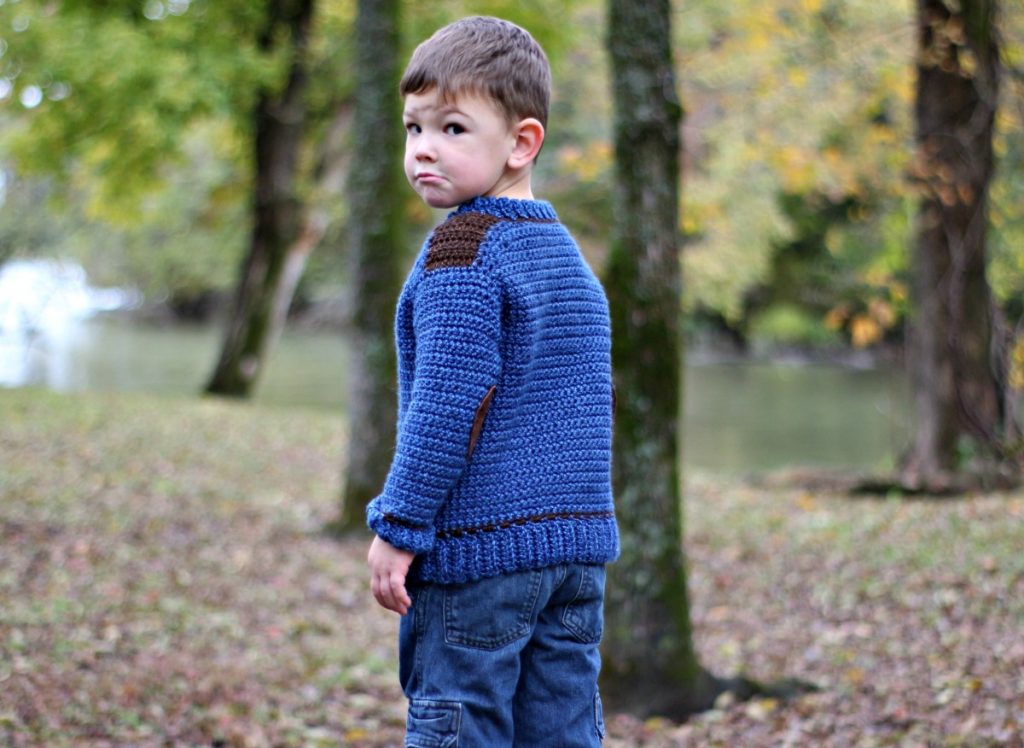
Crochet a boys crochet sweater in no time with this easy, minimal seaming design in sizes 4-12.

I have to admit, I am in love with this method of making sweaters. For years I have been making the front, back and sleeves separate and seaming them together at the end. With this top-down method, you work the back to the armholes, then connect the front and work to the armholes and then work in the round to the bottom of the body. Then the sleeves are crocheted on and the collar is worked last. The only seaming is at the ribbing. It’s amazing and it works up so fast!!
This sweater is great for those with advanced beginner crochet skills. There is a video for you to follow along each step of the way, and the techniques you need to know are chain, slip stitch, and single crochet. That’s it!
UPDATE: Lots of crocheters have just slip stitched the ribbing seams, so this can absolutely be a NO SEAM sweater!!
I created a V-neck version of this sweater for my third son and he absolutely loves it. I hadn’t ever made a sweater for my second son so I knew I had to crochet one for him – pronto. This sweater, made with Lion Brand Wool-Ease is just what he was hoping for and he loves it so much. He was also so proud to get to model for me. I am just thrilled with how this turned out and my testers loved it as much as I do! I hope you enjoy this free crochet pattern as much as I enjoyed creating it!
Yarn Options for This Simple Sweater Pattern
I used Lion Brand Wool-Ease for this pattern, which is a worsted weight yarn that is comfortable, easy to work with and shows a stitch pattern very well. It’s an acrylic/wool blend that worked wonderfully for this sweater pattern for kids. (I listed for boys because I have four of them and make sweaters more geared for the boys in my household!).
Feel free to use any worsted weight yarn that gets gauge. You can use two colors like I chose to do, use a single solid color for a stylish pullover or even use stripes or color blocking to create a colorful crochet sweater – it’s totally up to you!

Buy the ad-free PDF of this pattern in my shop here!
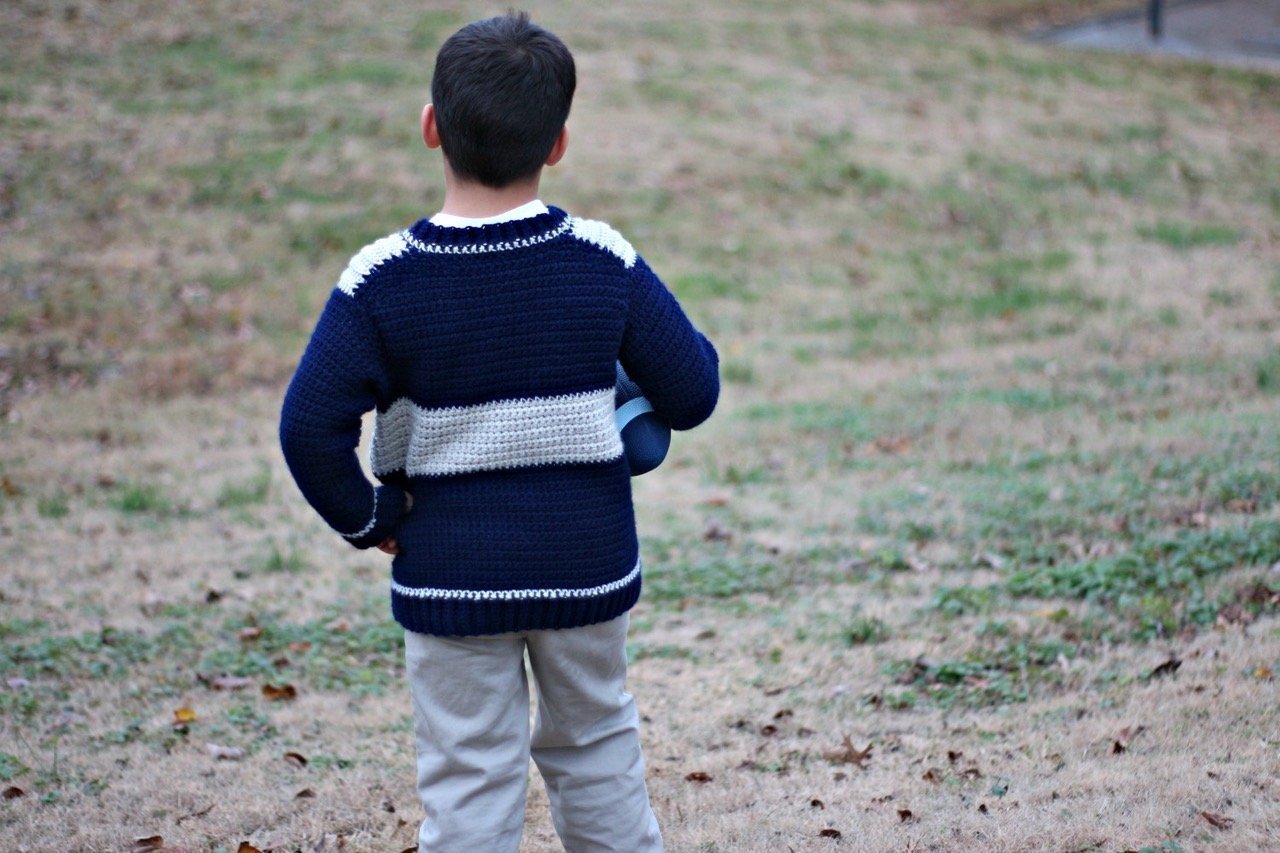
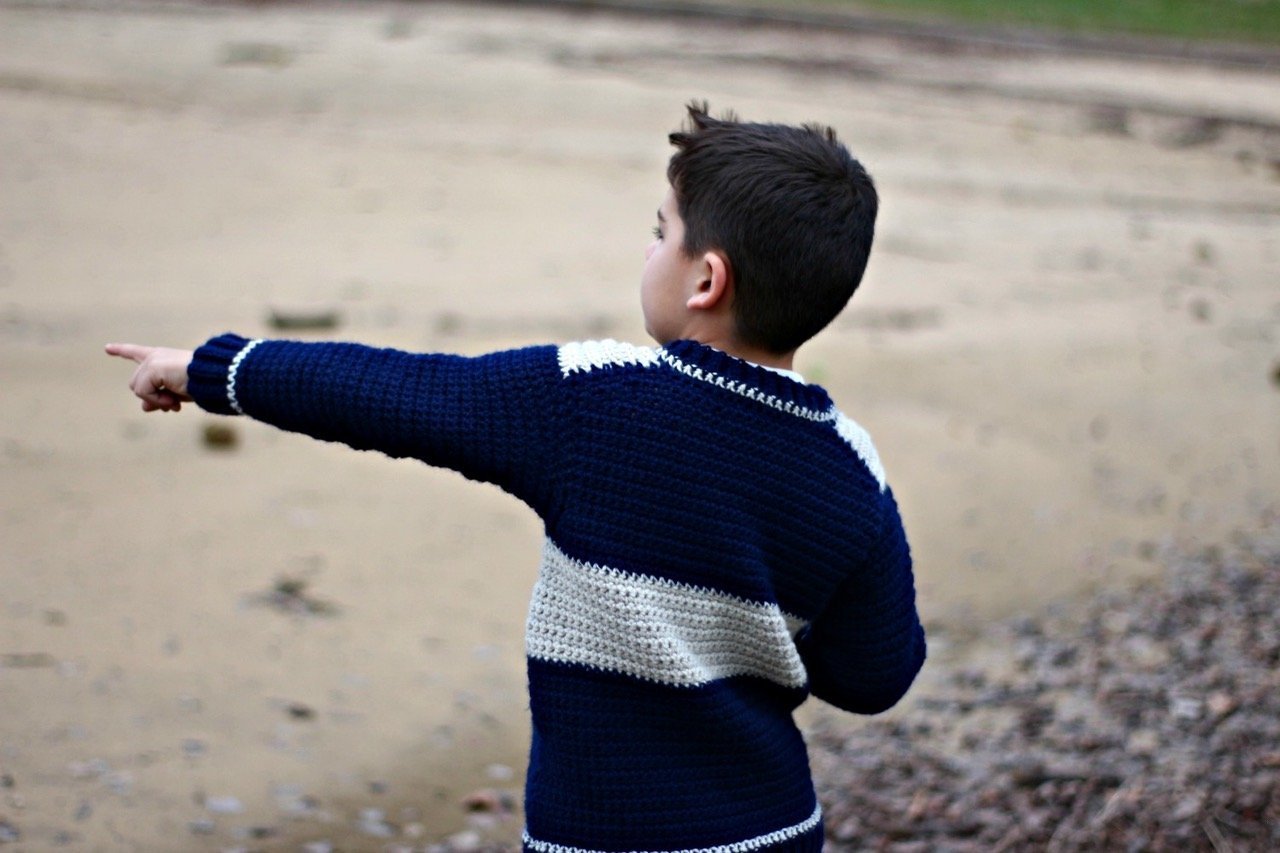
Varsity Boy’s Sweater Crochet Pattern
What You’ll Need
Yarn: Lion Brand Wool-Ease (80% Acrylic, 20% Wool; 197 yards [180 meters]/85 grams): #111 Navy, 2 (3, 3, 4, 4) skeins (MC), #098 Natural Heather 1 skein (CC) – (Worsted Weight Yarn, Category #4)
Crochet Hook: US size L/11 (8.0 mm); US size I/9 (5.5mm)
Notions: Yarn needle
Skill Level: Easy
Child Sizes: Finished Chest Size 26 (28, 30, 32, 34)” to fit kid’s size 4 (6, 8, 10, 12). 2” positive ease recommended. Shown in size 10.
(Looking for a similar baby crochet pattern? Check out the baby ribbed shoulder sweater!)
Gauge: 12 sts and 16 rows = 4” [10 cm] in sc with larger hook
Note: stitch gauge is more important than row gauge
Pattern Notes for This Classic Crochet Pullover
This cozy crochet sweater is crocheted from the top down, starting with the CC saddles (the cream colored part on top of the shoulders). The back is worked across the saddles to the armholes, then the front is worked to the armholes and the pieces are joined. Sleeves are crocheted around armhole edges, leaving only the ribbing to be seamed.
Shoulder shaping is achieved using short rows. When working back across the row, sc in the next st as usual. After a few more rows it should lie relatively flat.
Use a stitch marker if needed to mark first stitch of the row.
Ch 2 at beginning of a row counts as hdc.
Basic Stitches and Abbreviations
Chain Stitch (ch)
Slip Stitch (sl st)
Single Crochet Stitch (sc)
Special Stitches:
Blo: Work into the back loop only of the indicated stitch.
Crochet Kids Pullover Video Tutorial
For the left-handed tutorial, click here
Varsity Boy’s Sweater Crochet Pattern
Saddle (make 2)
With smaller hook and CC, ch 7 (9, 9, 11, 11).
Row 1 (RS): Hdc in 3rd chain from hook and in each ch across, turn – 6 (8, 8, 10, 10) sc.
Row 2: Ch 2, hdc blo in each hdc across, working last st into ch-2, turn.
Rep Row 2 until Saddle measures 2 ½ (2 ¾, 2 ¾, 3, 3 ½)” from beginning, ending with WS row. Do not turn at end of last row. Fasten off at end of first saddle. At end of second saddle, change to larger hook and MC.
Buy the ad-free PDF of this pattern and crochet on the go!
Back
Turn second saddle and continue across long side as follows:
Row 1: Ch 1, sc 8 (8, 9, 9, 10) evenly across second saddle, ch 14 (16, 18, 18, 18) for back neck, sc 8 (8, 9, 9, 10) sts evenly across long side of first saddle, turn – 30 (32, 36, 36, 38) total sts.
Row 2: Ch 1, work even in sc.
Row 3 (Begin shoulder shaping): Ch 1, sc 25 (27, 31, 31, 32), turn, leaving remaining sts unworked.
Row 4: Ch 1, sc 20 (22, 26, 26, 26), turn, leaving remaining sts unworked.
Row 5: Ch 1, sc 23 (25, 29, 29, 30), turn, leaving remaining sts unworked.
Row 6: Ch 1, sc 26 (28, 32, 32, 34), turn, leaving remaining sts unworked.
Row 7: Ch 1, sc 28 (32, 34, 34, 36), turn, leaving remaining sts unworked.
Row 8: Ch 1, sc to end, turn.
Work even in sc until piece measures 4 ¼ (5 ¼, 5 ¾, 6, 6)” from center of saddle – NOT center back.
Shape Armholes
Row 1: Ch 1, 2 sc in first st, sc to last st, 2 sc in last st – 32 (34, 38, 38, 40) sts.
Sizes 10 & 12 ONLY
Work one row even.
Repeat row 1 – 32 (34, 38, 40, 42) sts.
All Sizes
Row 2: Ch 3, sc in 2nd ch from hook and next ch, sc to end – 34 (36, 40, 42, 44) sts.
Row 3: Repeat row 2 – 36 (38, 42, 44, 46) sts.
Fasten off.

Left Front
Row 1: With RS facing, larger hook and MC, sc 8 (8, 9, 9, 10) sts across left saddle edge opposite back, beginning at neck edge, turn – 8 (8, 9, 9, 10) sts.
Row 2: Ch 1, sc evenly across, ch 5, turn.
Row 3: Sc in 2nd ch from hook and next 3 ch, sc 3 (3, 4, 4, 4), turn, leaving remaining sts unworked.
Row 4: Ch 1, sc 7 (7, 8, 8, 8), turn.
Fasten off. Work right front.
Right Front
Row 1: With RS facing, larger hook and MC, sc 8 (8, 9, 9, 10) sts across right saddle edge opposite back, beginning at armhole edge, turn – 8 (8, 9, 9, 10) sts.
Row 2: Ch 1, sc evenly across, turn.
Row 3: Ch 1, sc evenly across, ch 5, turn.
Row 4: Sc in 2nd ch from hook and next 3 ch, sc 3 (3, 4, 4, 4), turn, leaving remaining sts unworked.
Front Joining Row:
Row 5: Ch 1, sc 7 (7, 8, 8, 8), ch 6 (8, 10, 10, 10) for front neck, sc 10 (10, 11, 11, 12), turn, leaving remaining sts unworked.
Row 6: Ch 1, sc 26 (28, 32, 32, 34) sts, turn, leaving remaining sts unworked.
Row 7: Ch 1, sc 28 (30, 34, 34, 36) sts, turn.
Row 8: Ch 1, sc 30 (32, 36, 36, 38) sts; turn.
Work even in sc until same length as back before armhole shaping.
Work armhole shaping same as back. Do NOT fasten off front.
Lower Body:
Change to CC.
Round 1: Ch 1, work 36 (38, 42, 44, 46) sts across front, ch 4 (4, 4, 4, 6), work 36 (38, 42, 44, 46) sts across back, ch 4 (4, 4, 4, 6), join to first sc with slip st, turn – 80 (84, 92, 96, 104) sts.
Round 2: Ch 1, work even in sc, join to first sc with slip st, turn.
Work next 12 rounds in CC, then change to MC.
Repeat round 2 until lower body measures 6 ¼ (7 ¼, 8 ¾, 9 ¾, 11 ¼)” from joining round. Work one row sc in CC. Change to smaller hook and MC.
Ribbing:
Ch 9 (9, 9, 11, 11).
Row 1: Hdc in 3rd ch from hook and next 5 (5, 5, 7, 7), hdc2tog next ch and next sc of body, slip st in next st of body, turn.
Row 2: Ch 1, hdc blo in each st, turn.
Row 3: Ch 2, hdc blo to last st, hdc2tog blo of next hdc and body, slip st in next st of body, turn.
Repeat rows 2-3, working row 3 into every other sc of body (the sts that you do not slip st into). If ribbing seems to flare out, you have made your rows too close together.
Fasten off.
Sleeve
With RS facing, larger hook and MC, join yarn at center underarm stitch.
Round 1: Ch 1, sc 2 (2, 2, 2, 3) sts along underarm, 9 (11, 13, 13, 12) sts to saddle edge, 6 (8, 8, 10, 10) sts of saddle, 9 (11, 13, 13, 12) sts down to base of armhole, 2 (2, 2, 2, 3) sts along underarm, join with slip st to first sc, turn – 28 (34, 38, 40, 40) total sts.
Round 2: Ch 1, work even in sc, join with slip st to first sc, turn.
Rounds 3-5: Repeat round 2.
Size 4 ONLY
Rows 6-12: Repeat round 2.
Round 13 (Dec round): Ch 1, sc2tog, sc to last 2 sts, sc2tog – 26 sts.
Rounds 14-21: Repeat rounds 6-13 – 24 sts.
All Sizes
Rounds 6-10: Repeat round 2.
Round 11: Ch 1, sc2tog, sc to last 2 sts, sc2tog – 22 (32, 36, 38, 38) sts.
Repeat rounds 6-11 2 (4, 5, 6, 5) times -18 (24, 26, 26, 28) sts.
Sizes – (6, 8, 10, 12) ONLY
Rounds 1-3: Repeat round 2.
Round 4: Ch 1, sc2tog, sc to last 2 sts, sc2tog – – (22, 24, 24, 26) sts.
All Sizes
Work even if needed until sleeve measures 9 ½ (10 ¼, 11 ½, 12 ½, 13)” from first round of sleeve. Work 1 row sc in CC. Change to MC and smaller hook.
Sleeve Ribbing:
Work same as body ribbing.
Fasten off.

Collar
With RS facing and larger hook, join MC with sl st at right back, directly behind saddle.
Round 1: Ch 1, sc evenly around neck edge, join with slip st.
Round 2: Change to CC, sc in each sc, join with slip st.
Change to smaller hook and MC.
Row 1: Ch 5, hdc in 3rd ch from hook and next ch, hdc2tog last ch and first sc of body, slip st in next sc of body, turn.
Row 2: Ch 1, hdc blo in each st, turn.
Row 3: Ch 2, hdc blo first 3 sts, hdc2tog blo ch-2 and next sc of body, slip st in next sc of body, turn.
Repeat rows 2-3 around neck edge until you are back at beginning. Again, if it flares out then there are too many rows.
Fasten off.
Finishing
Sew ribbing seams at sleeves, collar and hem.
Weave in ends.
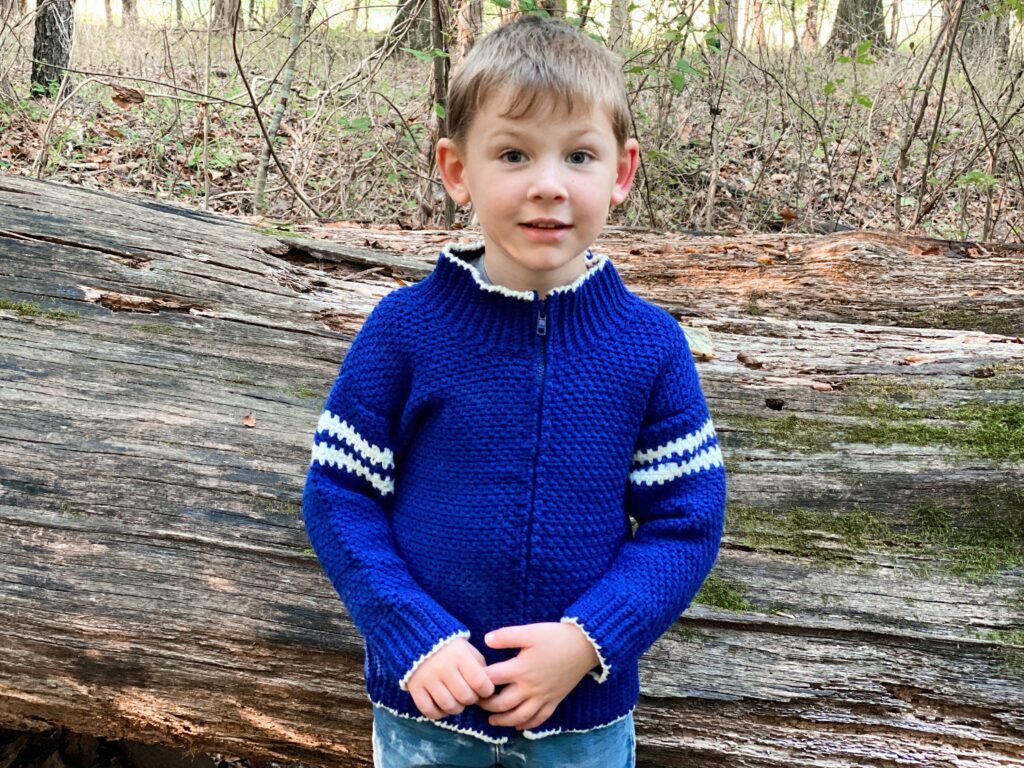
You’ll Love These Other Crochet Projects for Kids
Check out these other cute crochet wearables modeled by some of my other kiddos!

Final Thoughts on Our Boys Crochet Sweater Pattern
That’s it! I hope you have enjoyed this cute crochet sweater pattern. It’s hard to find good patterns for crochet kids sweaters, so I’m working on designing them! With four boys to design for, I have plenty of models and I’m always searching for the perfect pattern for each of them.
I also really hope you’ll give this sweater method a try. Don’t be intimidated – you can do it! Follow along with the video tutorial if you need help.
Happy Crocheting!
Amanda

This sweater is beautiful! I love the dark blue with white. Too bad my youngest grandson is 11. No little ones anymore.
I understand! I’m working on a men’s version 🙂
Do you have a baby size version?
Hi Debbie! I actually do! The construction method is the same for the Baby Ribbed Shoulder Sweater. 😀
My grandson wears a size 16. Could this be enlarged to fit him? If so, how would I do that?
I do love this and it is the first one I think he might wear.
Thank you.
Ledonna
Hi Ledonna!
You can try using a heavier weight yarn for this pattern, just be sure that you don’t go too low with the armhole measurement. A size 16 usually has an armhole depth of 7.5″, so be sure when you are working down from the armhole you don’t go longer than that before starting the armhole shaping and working in the round. 🙂
You answered my question and gave me more things to remember in changing size. Thank you so very much in helping with my issue.
So confused. On the left front row 4 is supposed to have 7 sc but there aren’t 7 sts to crochet into. On row three I crochet three and turn. Where do I sc the other four sets?
Hi Ginger, have you checked out the tutorial video? I walk through all the steps of crocheting this sweater there.
On row 8 of back it says 28 sc but when you add 2 sc for armhole it says 32 st. Am I supposed to end up with all 30 st ? I have watched the tutorial and it looks like all st are used until you start armhole. I’m doing size 4
Row 1 of armhole shaping should be 30 sts for row 1. Then you repeat row 1 and end up with 32. Looks like a typing error and I’ll fix it.
All Sizes
Rounds 6-10: Repeat round 2.
Round 11: Ch 1, sc2tog, sc to last 2 sts, sc2tog – 22 (32, 36, 38, 38) sts.
Repeat rounds 6-11 2 (4, 5, 6, 5) times -18 (24, 26, 26, 28) sts.
Sizes – (6, 8, 10, 12) ONLY
Rounds 1-3: Repeat round 2.
Round 4: Ch 1, sc2tog, sc to last 2 sts, sc2tog – – (22, 24, 24, 26) sts.
Hi- These instructions seem contradictory for a size 12. Especially for Round 4. Am i misunderstanding something? What are the correct instructions for the sleeve decrease for size 12.
Thanks so much!!
These are the correct instructions for the sleeve. You work the rows under “all sizes” and then the extra rows 1-4 to give it more length and also to decrease one more time.
Hello again! I have read the comments and in 2020 someone asked for a larger size. I see one of your sons must be close in age to mine as one of your newer patterns goes to a 12. I would love to make this little jacket, and I’m thinking a 12 or 14 would be the best as the cabled one I made in size 10 was a “just right” fit, and I’d like to make it a bit bigger.
You mention going up to maybe a thicker yarn. Is that still what you would recommend or is there some “easy” way a relative newbie could figure out how to make this a little bigger?
Sorry if this is a silly question!!!